TPT Wirebonder www.tpt.de Page 10 of 53 September 2016
9. Tool Installation
Remove the wire and carefully move the Clamp to the left side.
It is recommended to use your right hand to push while buffering the
movement using your left hand.
If there is already a Capillary or Wedge Tool in the transducer, make
sure to secure it when you loosen the screw. Place the new tool in the
transducer.
Tighten the screw using the Torque Wrench 35 cNm after you made sure
that the tool is flush with the top of the transducer. To ensure high quality
bonding it is mandatory that the tool is in a perfect position. If the tool is
not fixed correctly, Ultrasonic vibrations may not be forwarded properly
from the transducer into the tool, causing heavy bonding mistakes. Also
make sure to only use original components of TPT.
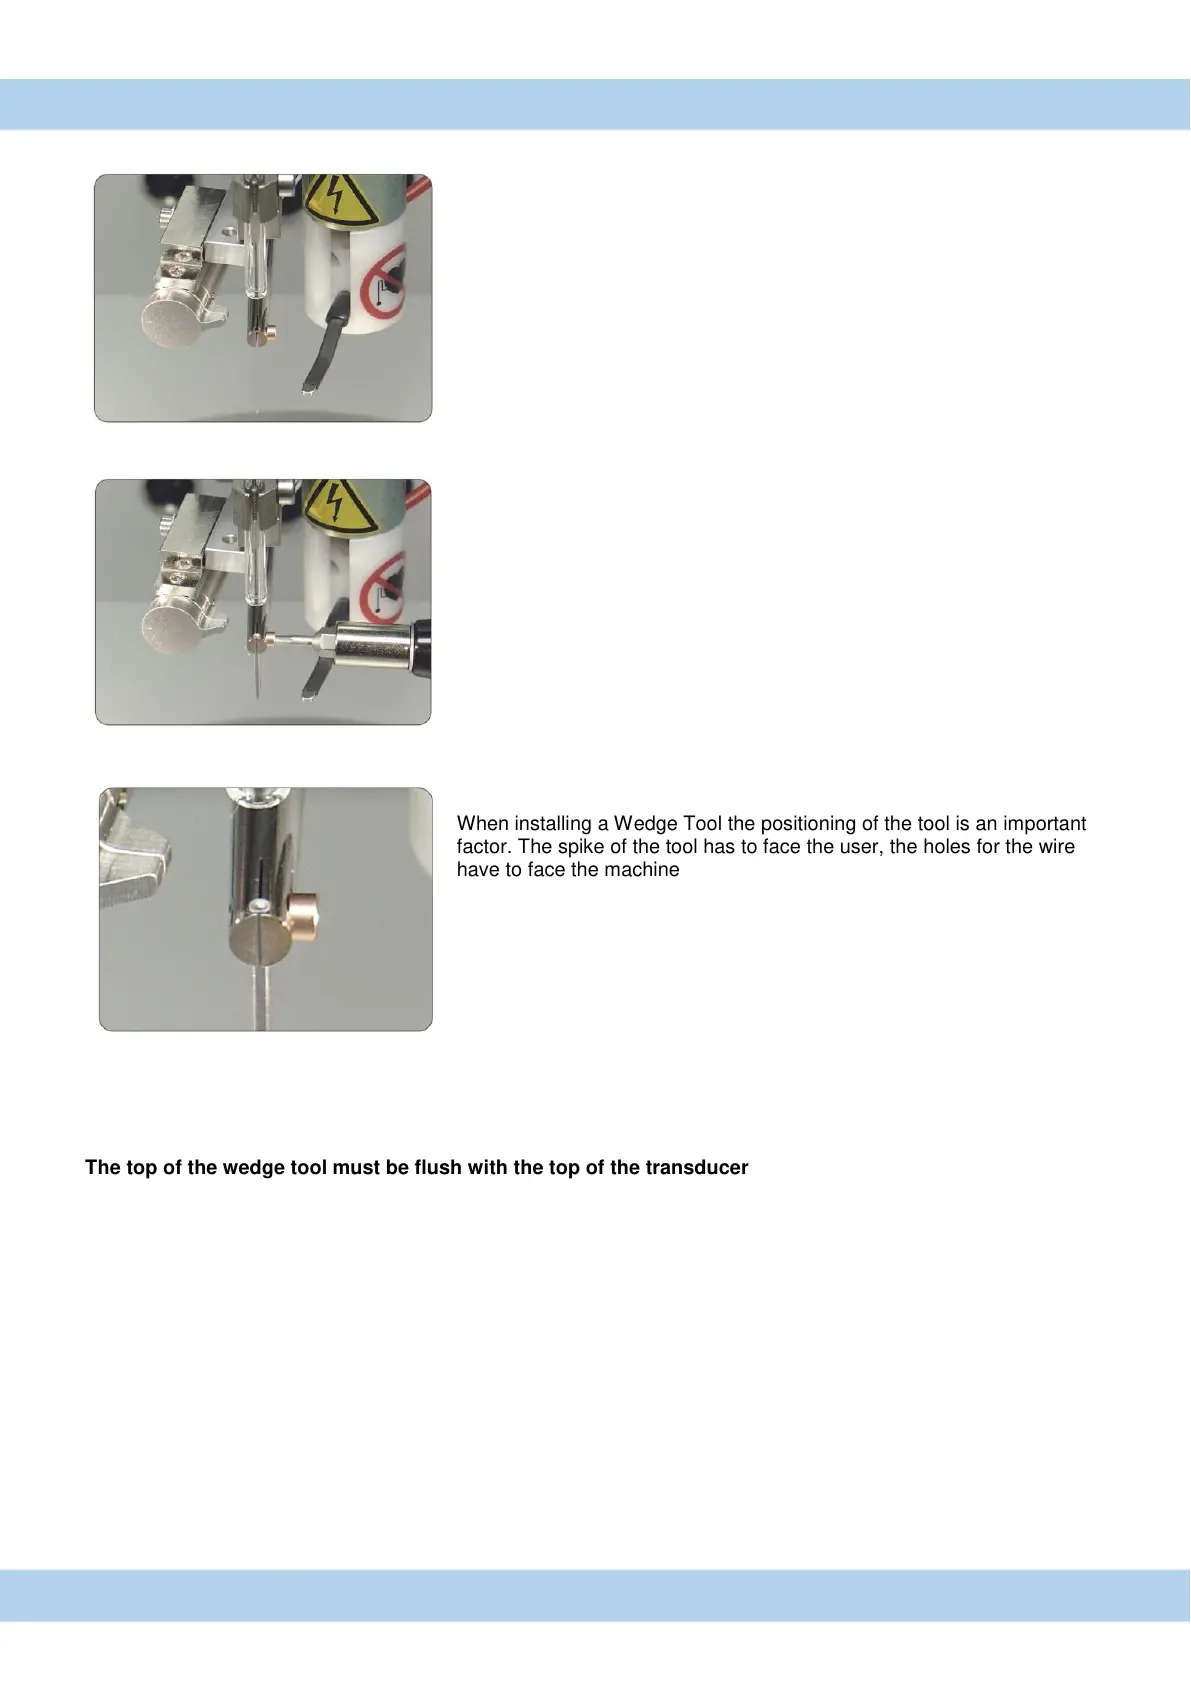
When installing a Wedge Tool the positioning of the tool is an important
factor. The spike of the tool has to face the user, the holes for the wire
have to face the machine. It is recommended to use the microscope for
an accurate adjustment. Carefully move the clamp back to its original
position
The bonding tool is fitted into the 1/16 inch diameter hole in the ultrasonic transducer.
The top of the wedge tool must be flush with the top of the transducer.
Secure by tightening the special set screw with Torque Wrench 35 cNm.
Wedge bonding Tool: 1/16" dia. x 0.750 long bonding wedge with a '45 wire or ribbon feed angle is ecommended.
Ball Bond Tool : Capillary 1/16" dia. x 0.450 long is recommended
Refer to your tool supplier catalogue for the tool suitable for the specific application.