TPT Wirebonder www.tpt.de Page 26 of 53 September 2016
24. Find Bonding Parameters
At the next page you will find start parameters for different wire sizes and bonding methods.
In general ultrasonic power has the most influence at the bond.
Always start modifying US-Power first then Force parameter.
Important is that your sample is well fixed by mechanical clamping or vacuum holder.
Generally the recommended bonding parameters can vary due to the following reasons:
- Bonding Tool (manufacturer, bonding foot length, wear and tear)
- Epoxy (for the DIE)
- Bonding surface (material, roughness, surface layers)
- Age of surface material (oxidation, cleanliness)
- Age of aluminum wire
- also Transducer all have slight variations in frequency and resistance
24.1. Tail Parameters
Tail parameters are in “Advan. Settings” menu.
140-220 for Wedge bonding
400 -500 for Ball bonding
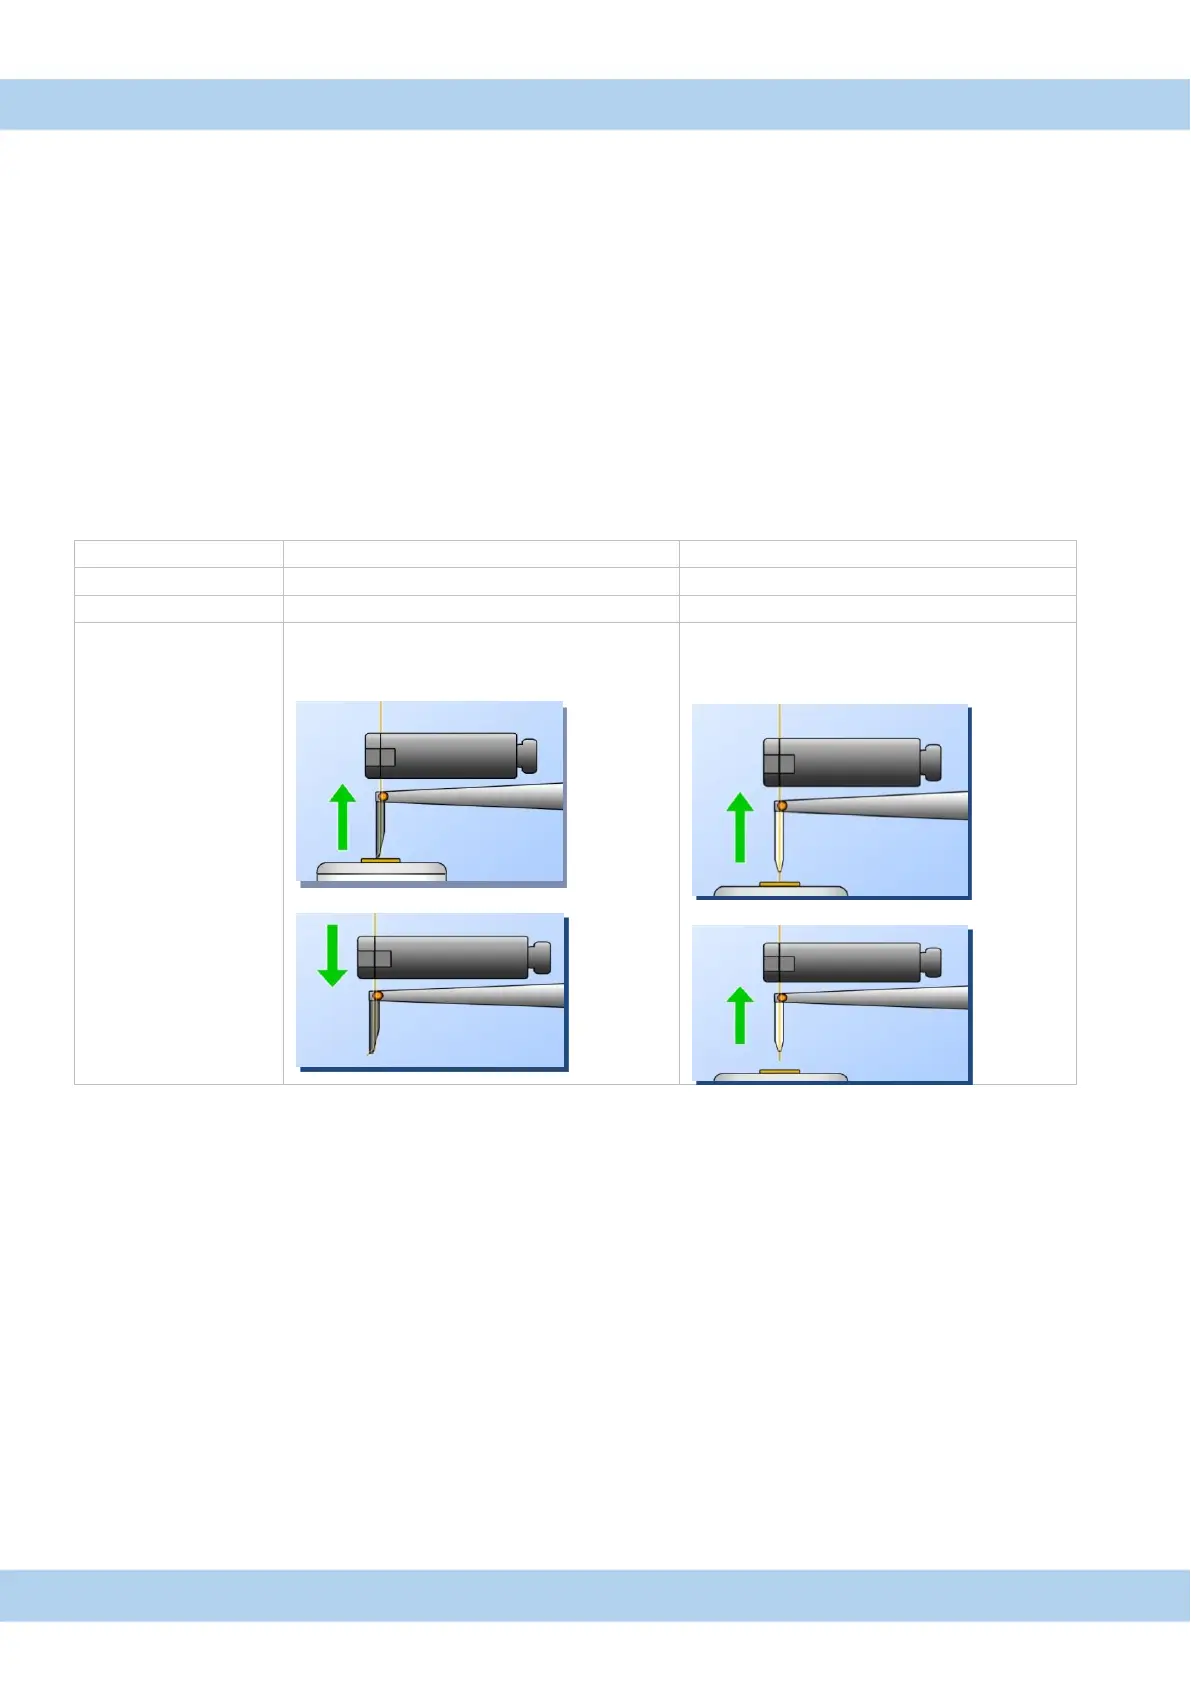
After second bond clamp is close.
Bondhead move up and cut wire
Clamp is move down to feed wire
After second bond clamp is open.
Bondhead move up.
(Distance of the defined tail length).
Clamp is close and cut wire.
Wedge bonding:
“Table Tear” mode for wedge bonding is useful to prevent:
Lift off of second bond. Wire feed problems, in case wire is stuck into wedge tool.
It can happen that aluminum wire is stick to the tool tip after bonding.
To cut wire in a backward movement make sure the wire is straight.
Ball bonding:
For ball bonding also the „clamp feed“ mode can be used,
but the „table tear“ mode delivers more repeatable results.
A case where “clamp feed” mode may be useful is, when the wire tear off after the second bond.
Ribbon bonding
If possible use “Table Tear” mode to cut the ribbon, this prevent lift off of second bond and tear the wire to the tool.
“Table Tear” for wedge bonding is only available in HB16 Bonder