TPT Wirebonder www.tpt.de Page 13 of 53 September 2016
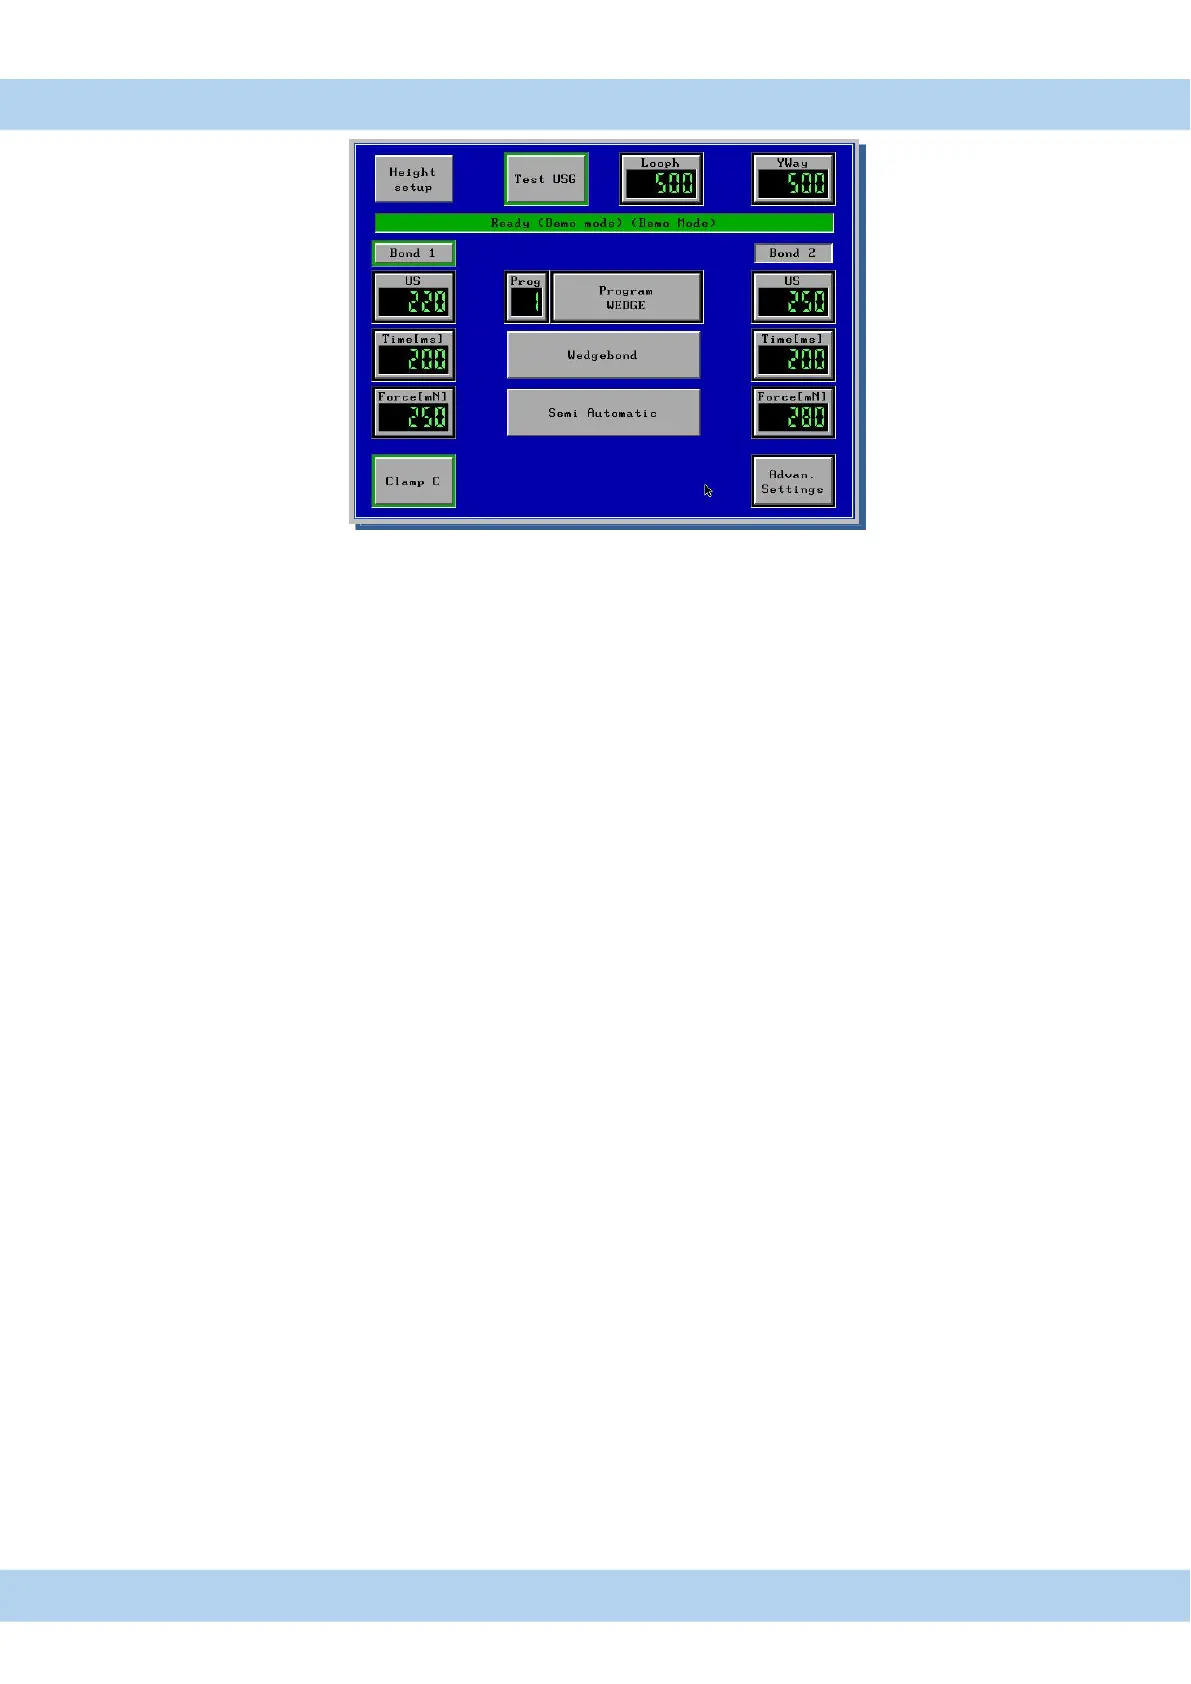
12. Menu Bond Touch Panel Display
Bond Menu Start menu after Bonder switch on,to program all necessary parameters
Ready display green = Bonder OK
Test USG button for test of US-Energy
Height Setup button for Auto height Set Up ( see page 31) Reset with Feed Button
Loop H Loop Height
Y-way Auto button for Y-way adjustment ( see page 25 ) Only HB12/14/16 Bonder
Bond 1 green = Bonder ready for 1
st
. Bond and switch for reset to 1
st
Bond
U/S button for 1st. Bond US energy
Time button for 1st. Bond time
Force button for 1st. Bond force
Bond 2 green = Bonder ready for 2nd.Bond
U/S button for 2nd. Bond US energy
Time button for 2nd Bond time
Force button for 2nd Bond force
Prog Button for Load new Programs
Program Name Display and change Program Name
Wedgebond program changed from Wedge-/-Ball/-Bump/ Pick & Place (Option)
Bond Mode Full Automatic, Semi Automatic, Step, Manual (see next Page)
Clamp switch for Wire clamp open/closed
Advanced Setting parameter for Setup, Tail, Loop and other Setting
All changed program values are automatic saved in displayed program number