General Information
68
• Down - scroll the menu from the top
to the bottom
•
Left - scroll the menu to the left
• Right - scroll the menu to the right
• Center - press to confirm selection.
Horn Button
When the horn button is pushed, with
the ignition switch turned to the ON
position, the horn will sound.
Heated Grips Switch (if equipped)
The heated grips will only heat when
the engine is running.
When the heated grips are switched on,
the heated grips symbol will appear in
the display and the selected heat level
will be shown.
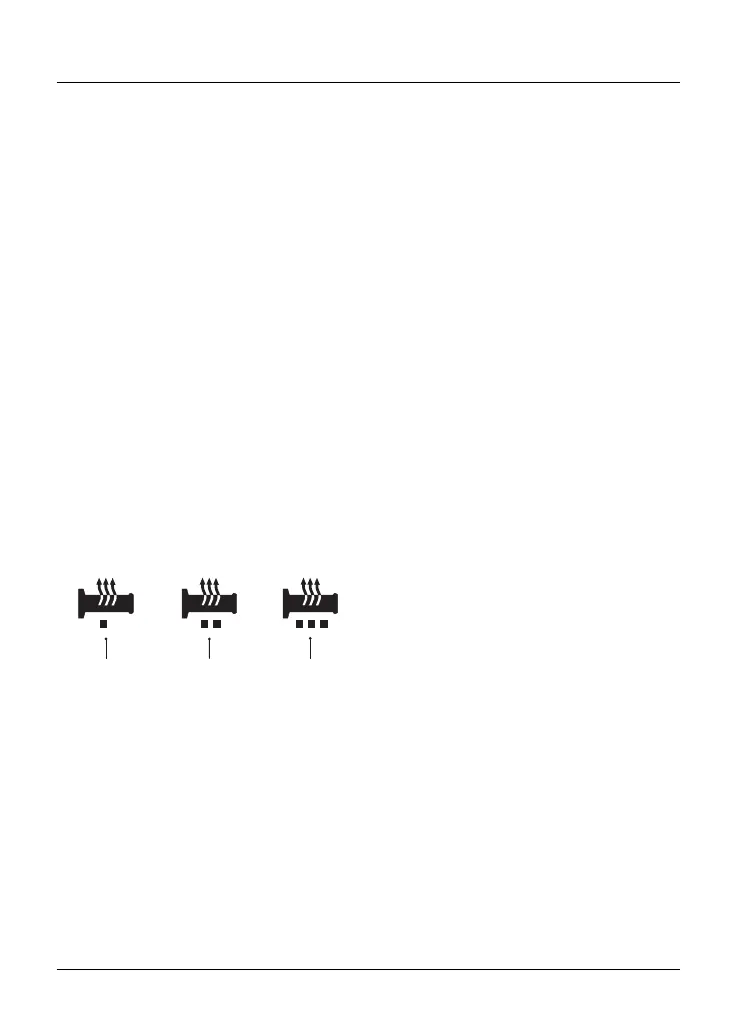
There are three levels of heat: low,
medium and high. This is indicated by
the different colors of the symbols
shown in the display.
1
1. Low heat symbol (yellow)
2. Medium heat symbol (orange)
3. High heat symbol (red)
For maximum benefit in cold conditions,
from the OFF position press the switch
once for the high heat setting initially
and then reduce the heat level by
pressing the switch again for a low heat
setting when the grips have warmed up.
To turn off the heated grips, press and
release the switch until the heated
grips symbol is no longer shown in the
display.
Low Power Voltage Cut Off
If a low voltage is detected, the heated
grips switch will power off. The heated
grips will not function again until the
voltage rises to a safe level.
The switch will not power back on
automatically even if the voltage rises to
the safe level. The user must manually
press the switch again to activate the
heated grips.
High Beam Button
The high beam button has a different
function depending on whether Daytime
Running Lights (DRL) are installed or
not. When the high beam is turned
on, the high beam indicator light will
illuminate in the display.
Models with Daytime Running Lights
(DRL)
If the DRL switch is in the Daytime
Running Lights (DRL) position, then
press and hold the high beam button
to turn the high beam on. It will remain
on as long as the button is held in and
will turn off as soon as the button is
released.
If the DRL switch is in the dip beam
position, press the high beam button to
switch the high beam on. Each press of
the button will swap between dip and
high beam.
Note
A lighting on/off switch is not installed
on this model. The brake/tail light
and license plate light all function
automatically when the ignition is
turned to the ON position.
The headlight will function when the
ignition is turned on and the engine is
running.