C30HVRT Compressor Unit Instruction Manual
Connecting procedures
1. Remove all dust plugs and caps from the compressor, couplings and flexible hoses of
the cryocooler. Check the connections and ensure that there is no dust or dirt on
helium coupling gasket and around it. If there is any dust, remove it. Ensure that
helium coupling gasket goes in the male coupling and there is no gasket for female
coupling.
2. Return flexible hose is labeled “RETURN” with red letters. Connect the return flexible
hose to “RETURN GAS” connector on the rear panel of the compressor. Then connect
the other end of the return flexible hose to the connector labeled “RETURN” with red
letters on the cryocooler side.
(Actual connecting method)
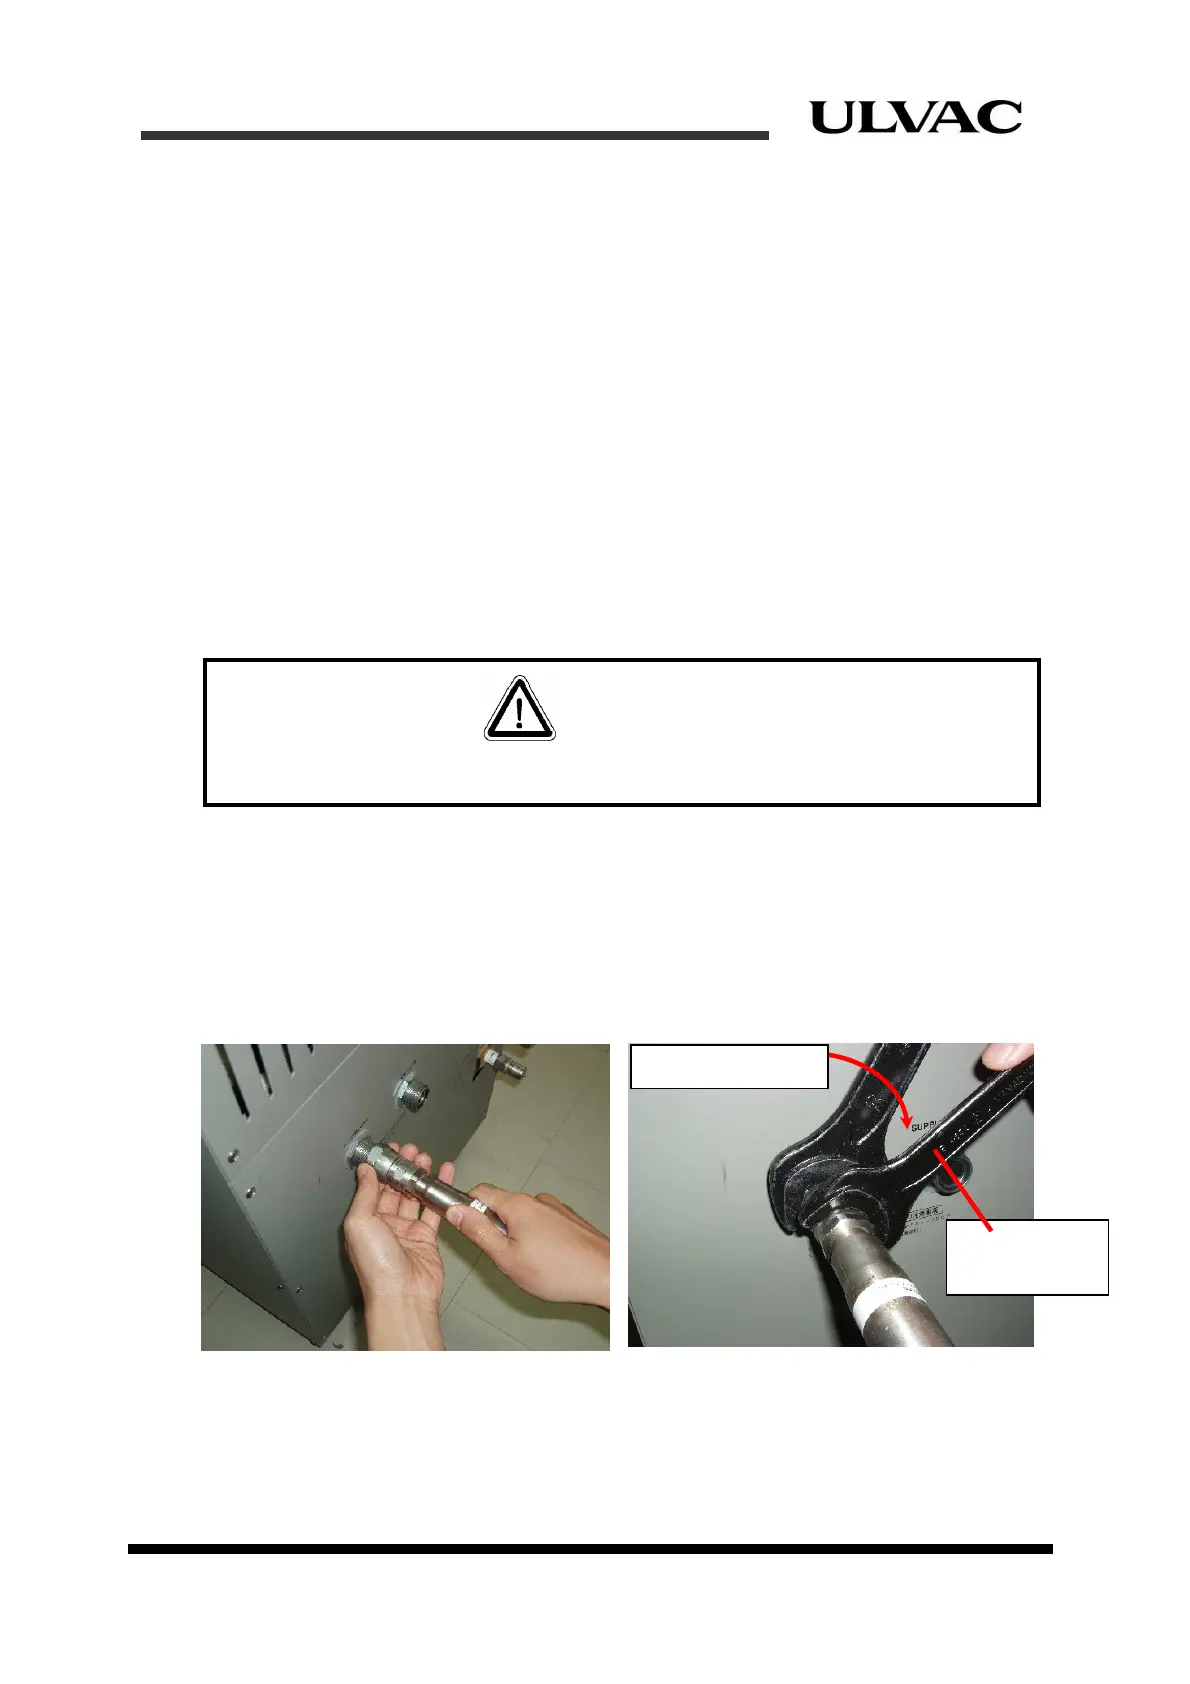
As shown in Figure 4-2, hold the braid support straight so that the connection parts
fit properly and tighten by hands as tight as possible. Then tighten the coupling
with two spanners as shown in Figure 4-3. See Figure 4-4 for usage of two
spanners.
The torque value is 20N・m for both couplings. Complete the procedure as quick
as possible to minimize helium gas leakage.
3. Supply flexible hose is labeled “SUPPLY” with green letters. Connect the supply
flexible hose to “SUPPLY GAS” connector on the rear panel of the compressor. Then
connect the other end of the supply flexible hose to the connector labeled “SUPPLY”
with green letters on the cryocooler side. Connecting method is the same as the return
flexible hose.
4. Verify the helium filling pressure referring to “Section5.1 Verification of helium static
pressure”.
Tighten in clockwise.
26mm spanner.
Fix the nut with
Tightening the couplings too much may result in damaging the equipment.
CAUTION
Figure 4-2 Tighten with hands first Figure 4-3 Tighten with two spanners
ULVAC CRYOGENICS INCORPORATED 4-3