Section 7 Maintenance
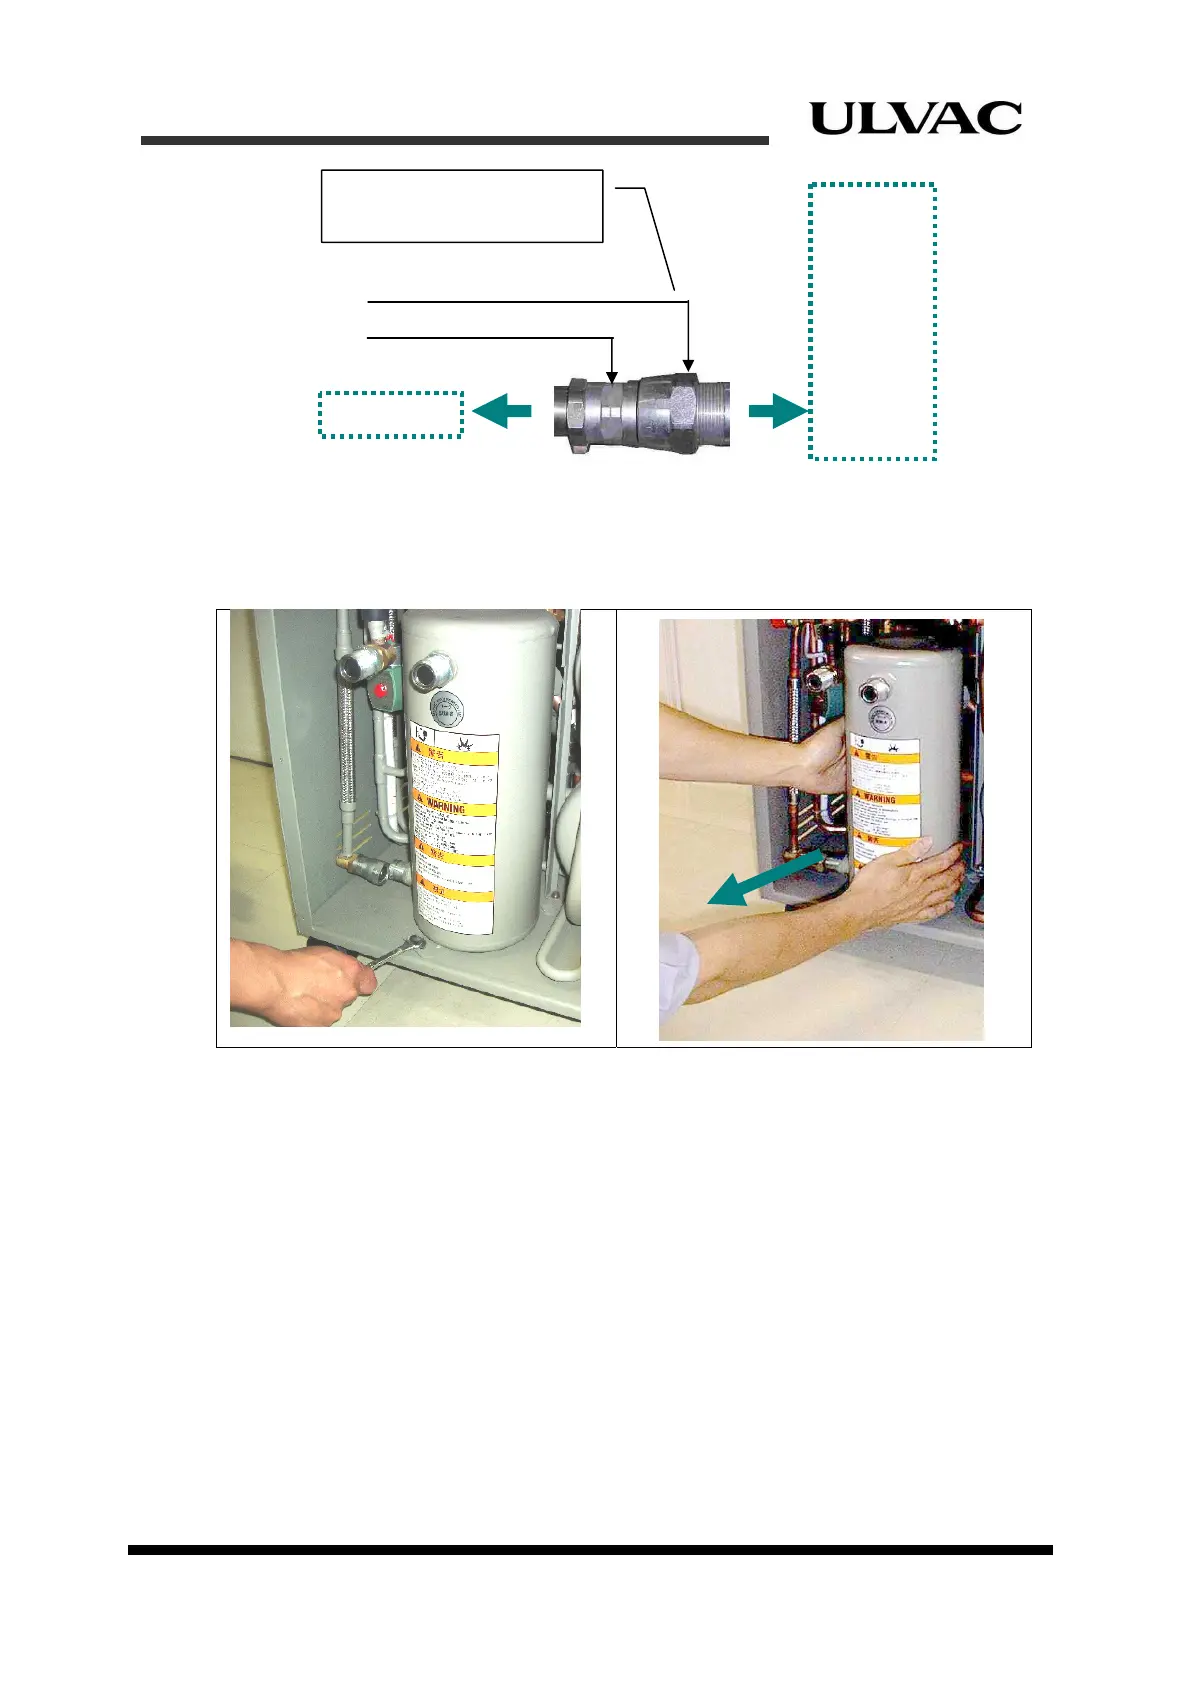
Figure 7-5 Connecting and Disconnecting Self-Sealing Coupling with Two Spanners
TURN with 30mm spanner
HOLD with 26mm spanner
(Self-sealing coupling)
Clockwise: Tightening
Counter Clockwise: Loosening
Adsorber
Flexible hose
Figure 7-7 Slide out Adsorber Bottle
Figure 7-6 Remove the Bolt
9. Install the replacement adsorber. Remove the two dust caps from the replacement
adsorber. Put the adsorber into the compressor so as to place it at the mounting tab on
the base of the compressor. Secure the adsorber with the mounting bolt temporally.
10. Connect self-sealing coupling to the adsorber with the two spanners. Tighten the
coupling referring to Figure 7-5. Recommended tightening torque is 20N・m. Connect
the coupling quickly to minimize helium leakage.
11. Put the rear panel back on the compressor to align the helium connector of the
adsorber with the hole of the rear panel and then remove the rear panel again. Fix the
adsorber mounting bolt firmly this time.
12. Replace the rear panel and secure it by tightening the seven screws.
7-4
ULVAC CRYOGENICS INCORPORATED