Section
4-25LX 31/41 Work Platform
Maintenance
4.12
INSTALLATION
NOTE: Before installing the cylinder, check the pins
and bearings for excessive wear. Replace if neces-
sary.
1. Using a suitable lifting device, lower the cylinder
into the elevating assembly from the front. DO
NOT sling the cylinder by the rod end pivot, this
will cause the cylinder to extend when hoisted.
2. Align the pivots and install the pivot pins, lower one
first, then the upper one.
3. Install the retaining bolts into the pivot pins.
4. Install the down valve and cable assembly. Adjust
the cable to stop on the collar of the cable jacket,
before the down valve reaches the full extent of it's
pull. The down valve may leak if the cable is
allowed to pull the spool of the valve beyond it's
limit.
5. Install the hoses.
6. Lift and lower the machine for several cycles to work
out the air. Check for leaks, repair as necessary.
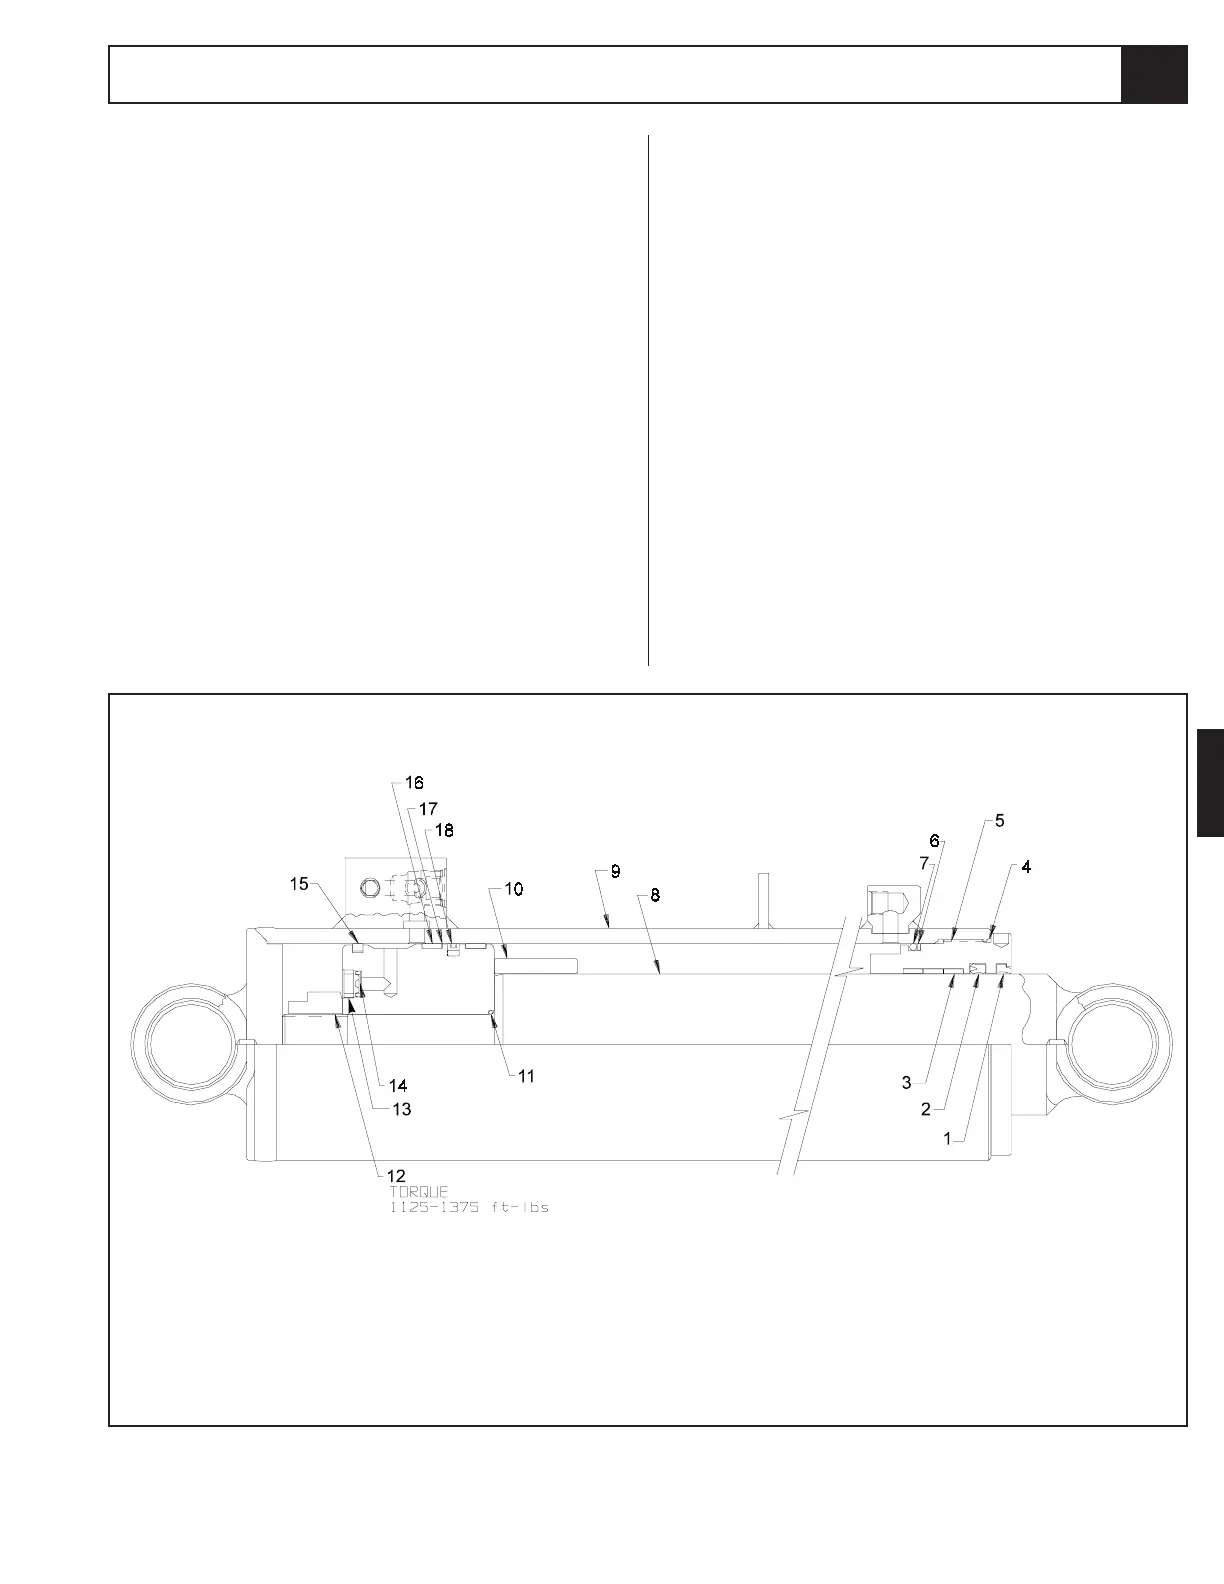
Figure 4-24 Lift Cylinder Cross Section
1. Rod wiper
2. Rod seal
3. Wear ring 3 req'd
4. O-ring
5. Head
6. Backup ring
7. O-ring
8. Rod weldment
9. Tube weldment
10. Spacer
11. O-ring
12. Locknut
13. Bushing
14. Orifice
15. Cast iron ring
16. Wear ring 2 req'd
17. Piston
18. Piston seal
 Loading...