Default Setting (System Menu)
9-71
9
Auto Correction
Follow the steps below to automatically correct color drift.
1 Press the System Menu key.
2 Press [ ], [Adjustment/Maintenance], [ ] and then [Next] of Color Registration.
3 Press [Next] in Auto > [Start]. A chart is printed.
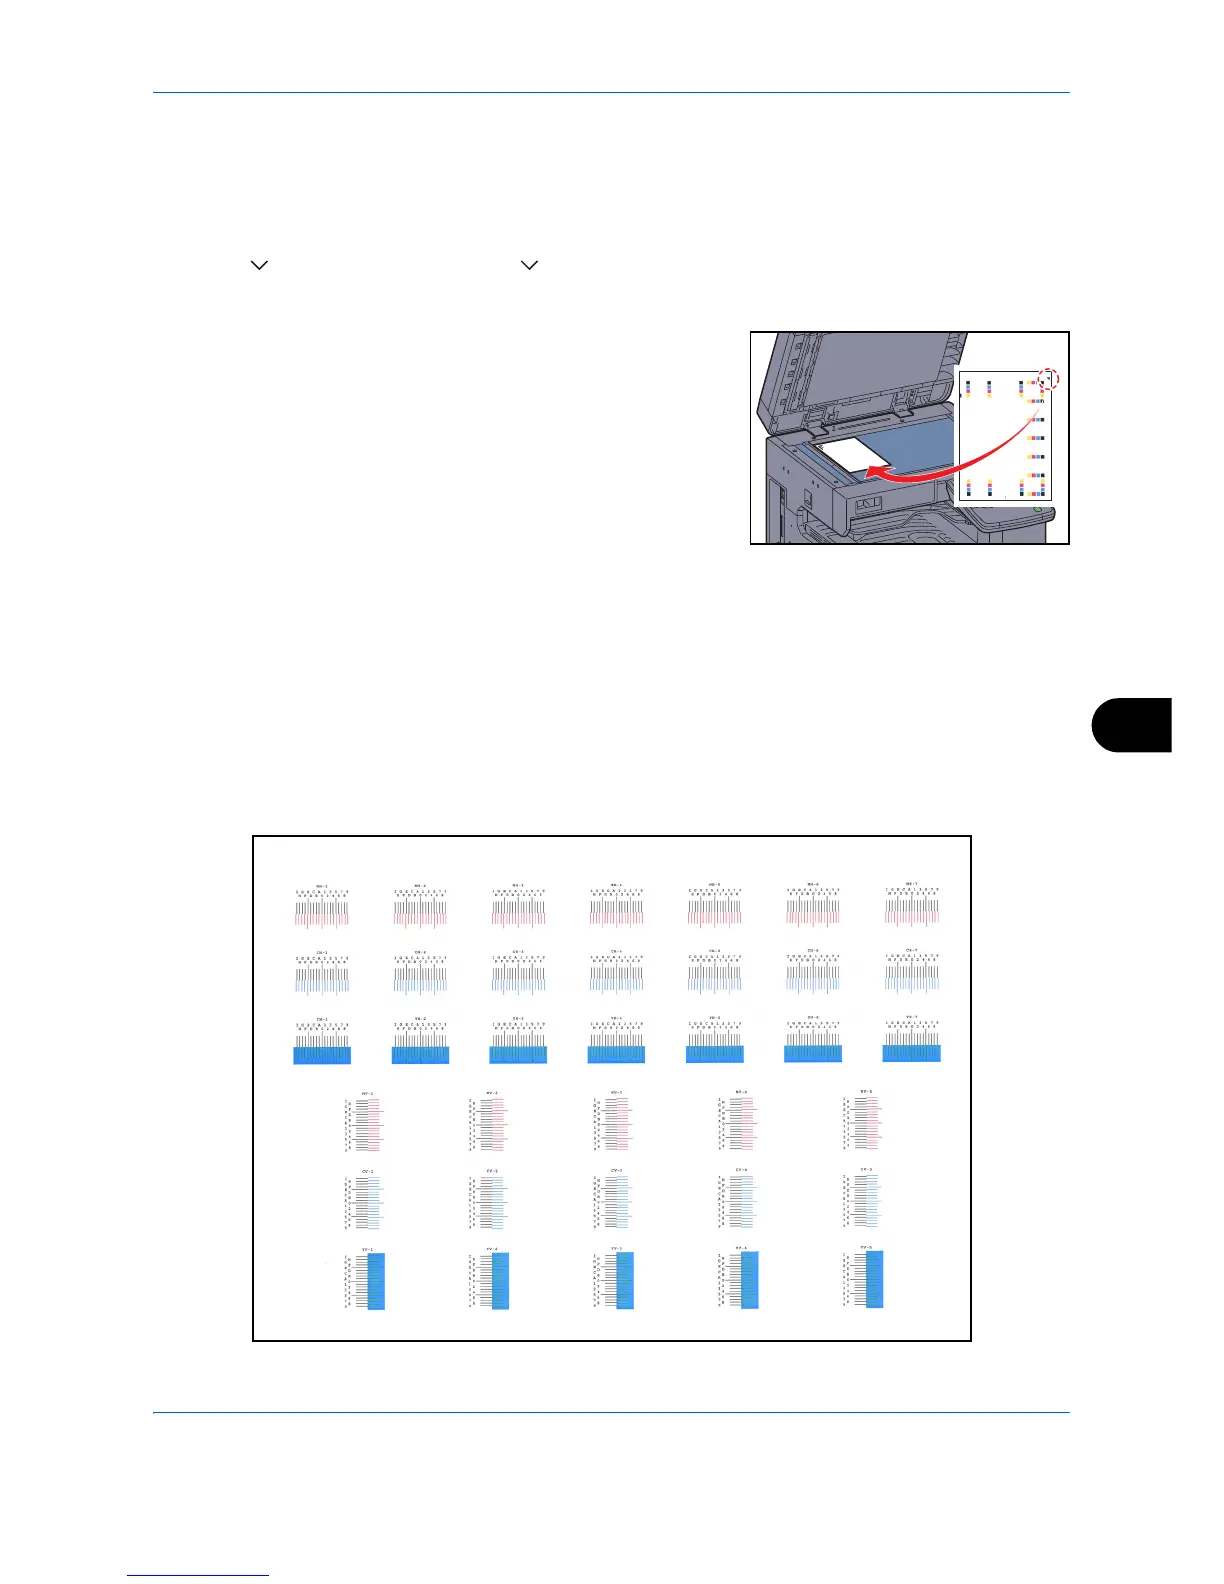
4 As shown in the illustration, place the printed side down on the
platen with the edge with the arrows toward the back.
5 Press [Start] to scan the chart.
6 When scanning is finished, color printing position correction starts.
7 When color printing position correction ends, press [OK].
Manual Correction
To perform more detailed correction, follow the steps below.
1 Display the Color Registration screen as explained in steps 1 and 2 of Auto Correction.
2 Press [Next] in Manual.
3 Press [Print] of Chart. A chart is printed.
On the chart, for each of M (magenta), C (cyan) and Y (yellow), charts for H-1 to 7 and V-1 to 5 are printed.
Chart Example