Calibrating the Generator
Setup, Tests, and Adjustments
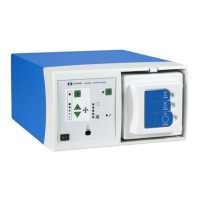
Force FX-8C Service Manual 5-27
E. To proceed to the next calibration step, press the Bipolar up arrow (∆)
button.
At the end of each calibration step, press the Bipolar up arrow (∆)
button to advance to the next step. If you need to return to a previous
calibration step, press the Bipolar down arrow (∇) button.
The Bipolar up arrow (∆) button cycles through the calibration steps.
For example, when you reach step 10 and press the Bipolar up arrow
(∆) button, the generator returns to step 1.
Next, check the month, day, and year values as described in Step 2 – Adjust
the Calendar.
Step 2 – Adjust the Calendar
The month, day of the month, and year values are stored in the real-time
clock on the Control board.
A. Verify that the Bipolar display shows calibration step number 2.
B. To select the month, press the Coag up (∆) or down (∇) arrow buttons
until the correct value (1–12) appears in the Coag display.
C. To display the day value, press the Fulgurate button.
To select the day, press the Coag up (∆) or down (∇) arrow buttons
until the correct value (1–31) appears in the Coag display.
D. To display the year value, press the Spray button. Initially, the Coag
display may show a value outside the normal range of 0 to 99. Ignore
the displayed value.
To select the year, press the Coag up (∆) or down (∇) arrow buttons
until the correct value (0–99) appears in the Coag display.
Examples:
• For 1997, set the year value to 97.
• For 2001, set the value to 1.
E. To save the month, day, and year values and go to the next calibration
step, press the Bipolar up arrow (∆) button.
Next, check the hour and minute values as described in Step 3 – Adjust the
Clock.