Low Voltage Power Supply Replacement
7-24 Force FX-8C Service Manual
Step 2 – Install the Low Voltage Power Supply
A. Place the new low voltage power supply on the Power Supply/
RF board and install the four screws that secure it to the board.
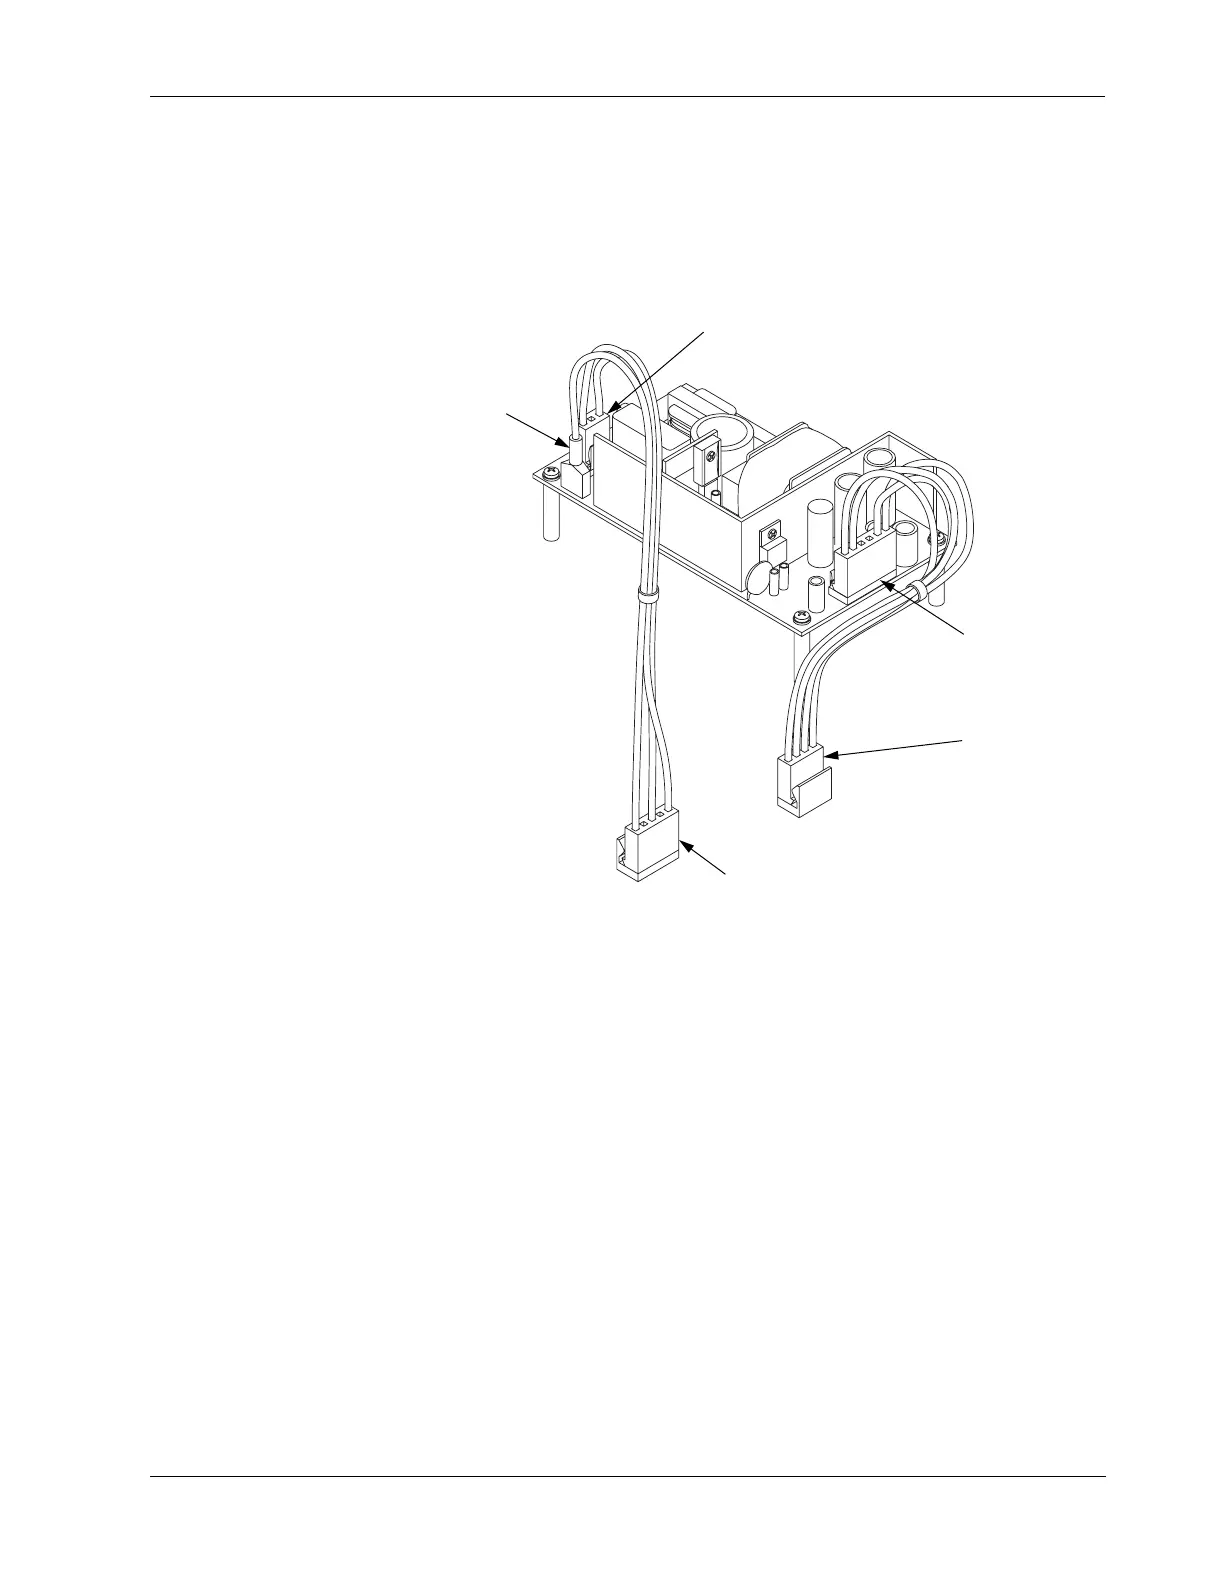
B. Facing the front of the unit, connect the cables from the Power
Supply/RF board to the new low voltage power supply.
Figure 7-6.
Low voltage power supply
(1)
Connect the 3-pin cable to J1 at the rear of the low voltage power
supply. Verify that this cable is connected to J7 on the Power
Supply/RF board.
(2) Connect the red spade lug with the green and yellow ground wire
to the ground lug on the left rear corner of the low voltage power
supply.
(3) Connect the 6-pin cable to J2 at the front of the low voltage power
supply. Verify that this cable is connected to J11 on the Power
Supply/RF board.
C. Position the support bracket over the heat sinks and install the three
screws that secure the bracket to the left rear heat sink (plastic screw)
and to the left front and right heat sinks (two metal screws).
D. Position the cover above the chassis and slide it down. Install the five
screws that secure the cover to the chassis.
Red
Spade
Lug
3-Pin Cable Connected to J1
6-Pin Cable
Connected to J2
To J11 on the
Power Supply/
RF Board
To J7 on the Power Supply/RF Board