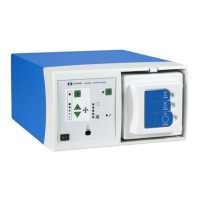
Display Board
4-14 Force FX-8C Service Manual
Each display driver (U6, U10, and U14) can drive up to eight banks of
eight LEDs by multiplexing the time that each bank is turned on. The
banks can be wired together to increase the time that a group of LEDs is
on, effectively increasing the brightness of that group.
U10 drives the discrete LEDs and the CEM LED. These include green
indicators for the bipolar modes (Precise, Standard, and Macro), the cut
modes (Low, Pure, and Blend), and the coag modes (Desiccate, Fulgurate,
and Spray). The anode of the mode selection LEDs are tied to driver U10.
By using pairs of the driver digit lines, the duty ratio for these LEDs is
effectively 1/4.
U6 drives the seven-segment displays that indicate power settings. U4
and U5 indicate the bipolar power setting, U7–U9 indicate the cut power
setting, and U11–U13 indicate the coag power setting. The anodes of these
displays are each tied to only one digit line of the driver. The effective
duty cycle is 1/8 for each seven-segment display.
Some filtering components are associated with U6, U10, and U14. Bypass
capacitors C3, C4, C7, C8, C9, and C10 are connected between + 5V and
DGND. C3, C4, and C10 have a relatively small capacitance value of
0.1 µF to filter higher frequency noise. C7, C8, and C9 have a relatively
large capacitance value of 47 µF to supply the large spikes of current for
the LEDs generated by the multiplexing action of the drivers, which
typically occurs at 250 Hz.
Resistor array R18 reduces the input impedance of the display driver
inputs as seen by the main microcontroller on the Control board. This
rounds off the edges of these digital signals, reducing high frequency
emissions. The lowered impedance also reduces the susceptibility of the
circuit to noise from other circuits.
CEM Switch Circuit
When you plug a CUSA handpiece with a CEM nosecone into the
Monopolar 1/CEM Instrument receptacle, the small nonconductive pin in
the plug pushes a spring-loaded plastic lever arm mounted inside the
front panel. This lever arm activates a small switch that plugs into the
Display board. The switch signal tells the microcontroller to limit the
power.
Mode Selection and Power Control Switches
The mode selection and power control switches are arranged in a matrix.
The main microcontroller selects a bank of switches to read by asserting a
bank select signal (BANK0, BANK1, or BANK2) through port A of
programmable peripheral U3 on the Control board. These signals are
buffered by Q1, Q2, and Q3 respectively and become the switch drive
signals COM0, COM1, and COM2.