75 © VeEX Inc. All Rights Reserved. Platform Functions
scoped.
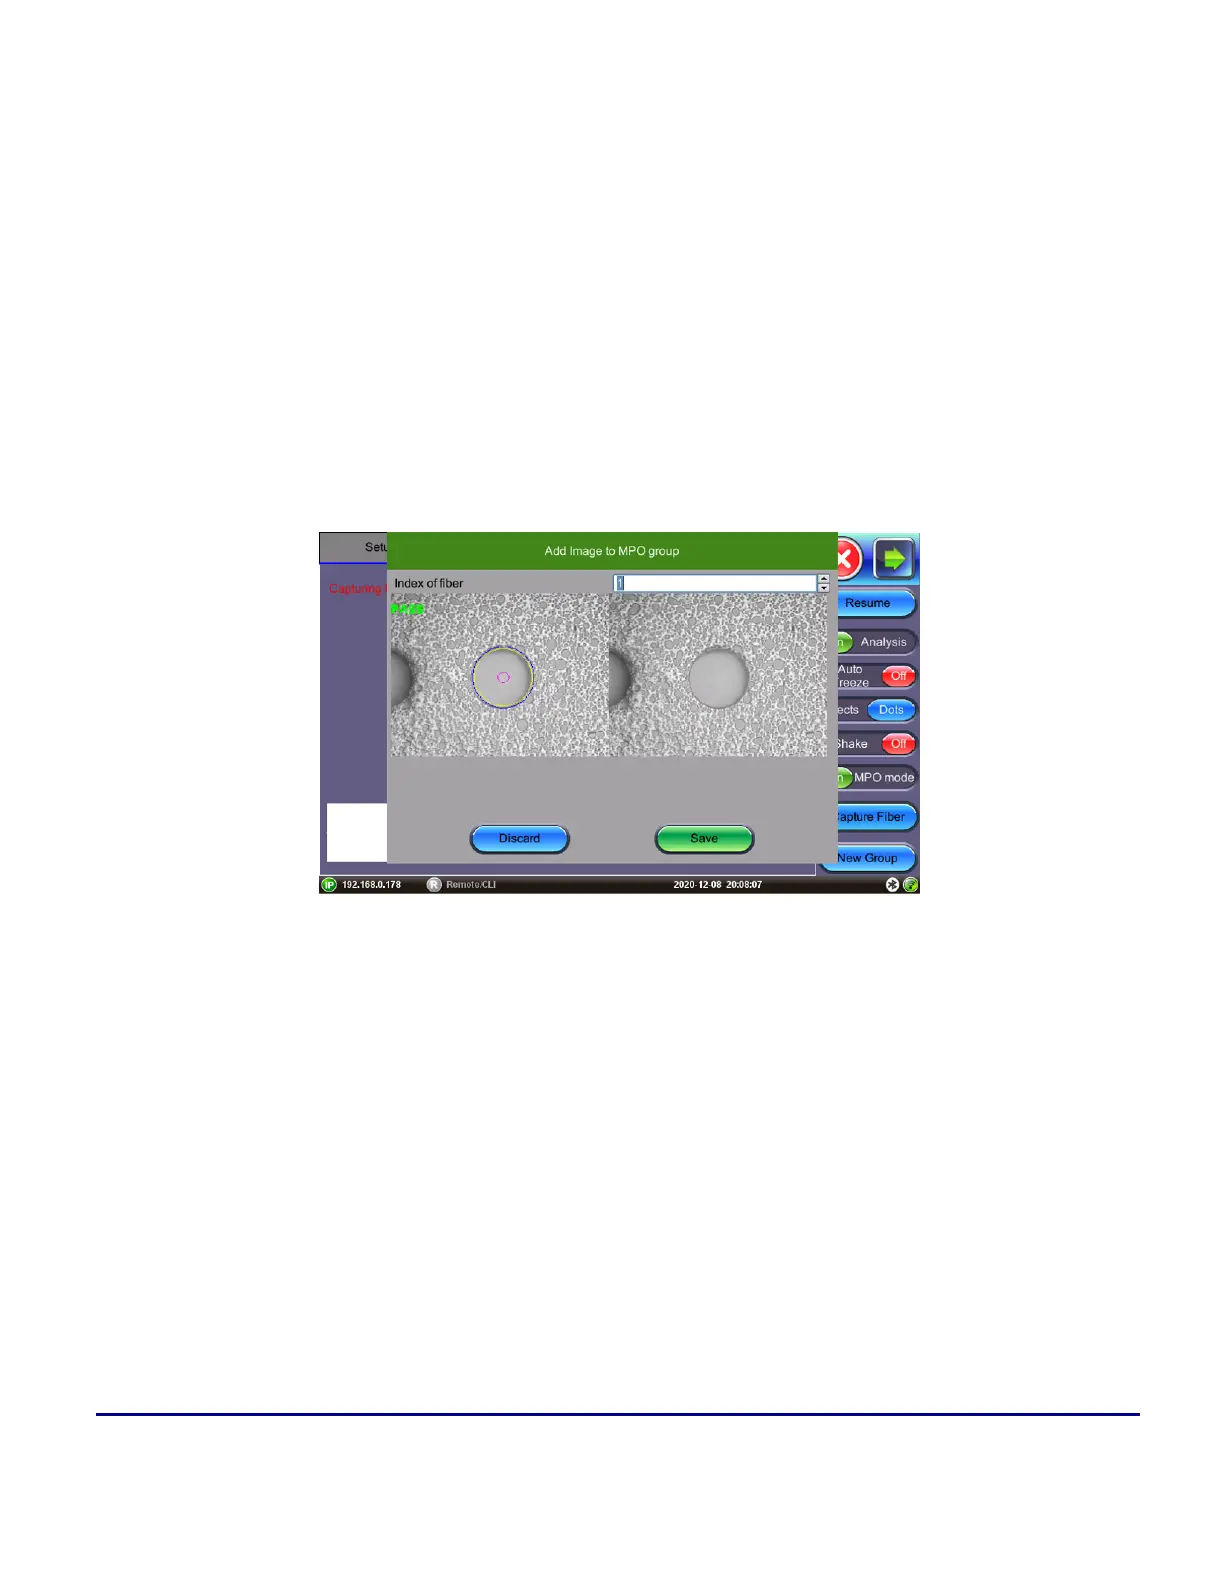
Press OK in the pop-up window to confirm the MPO fiber number, then adjust the scope controls
(horizontal (x-axis) control only) to navigate to the next fiber.
2. Fiber Scope button (fast)
Press the Capture button (located on the bottom of the DI-1000MPO fiberscope) successively to cap-
ture, confirm the MPO fiber number, and add the fiber screenshot to the list. As the x-direction (hori-
zontal control) is rotated to the next consecutive MPO fiber the logging actions are done on the
fiberscope itself. Scoping an MPO-12 fiber can be done under a minute (no mistakes) with practice.
Press New Group to create a new set of MPO images.
MPO Group - Add Image
The example below shows a completed MPO-12 cable inspection.
The key-up and key-down adapter that comes with the DI-1000MPO standard package is a straight-through
connection so the MPO fiber # at the start matches the MPO fiber # at the end (not flipped). When using the
adapter, fibers will be in the opposite orientation of the camera. In the below example, fiber #1 is on the right.
 Loading...