39
Verathon Service Partner Manual: Repair & Replacement
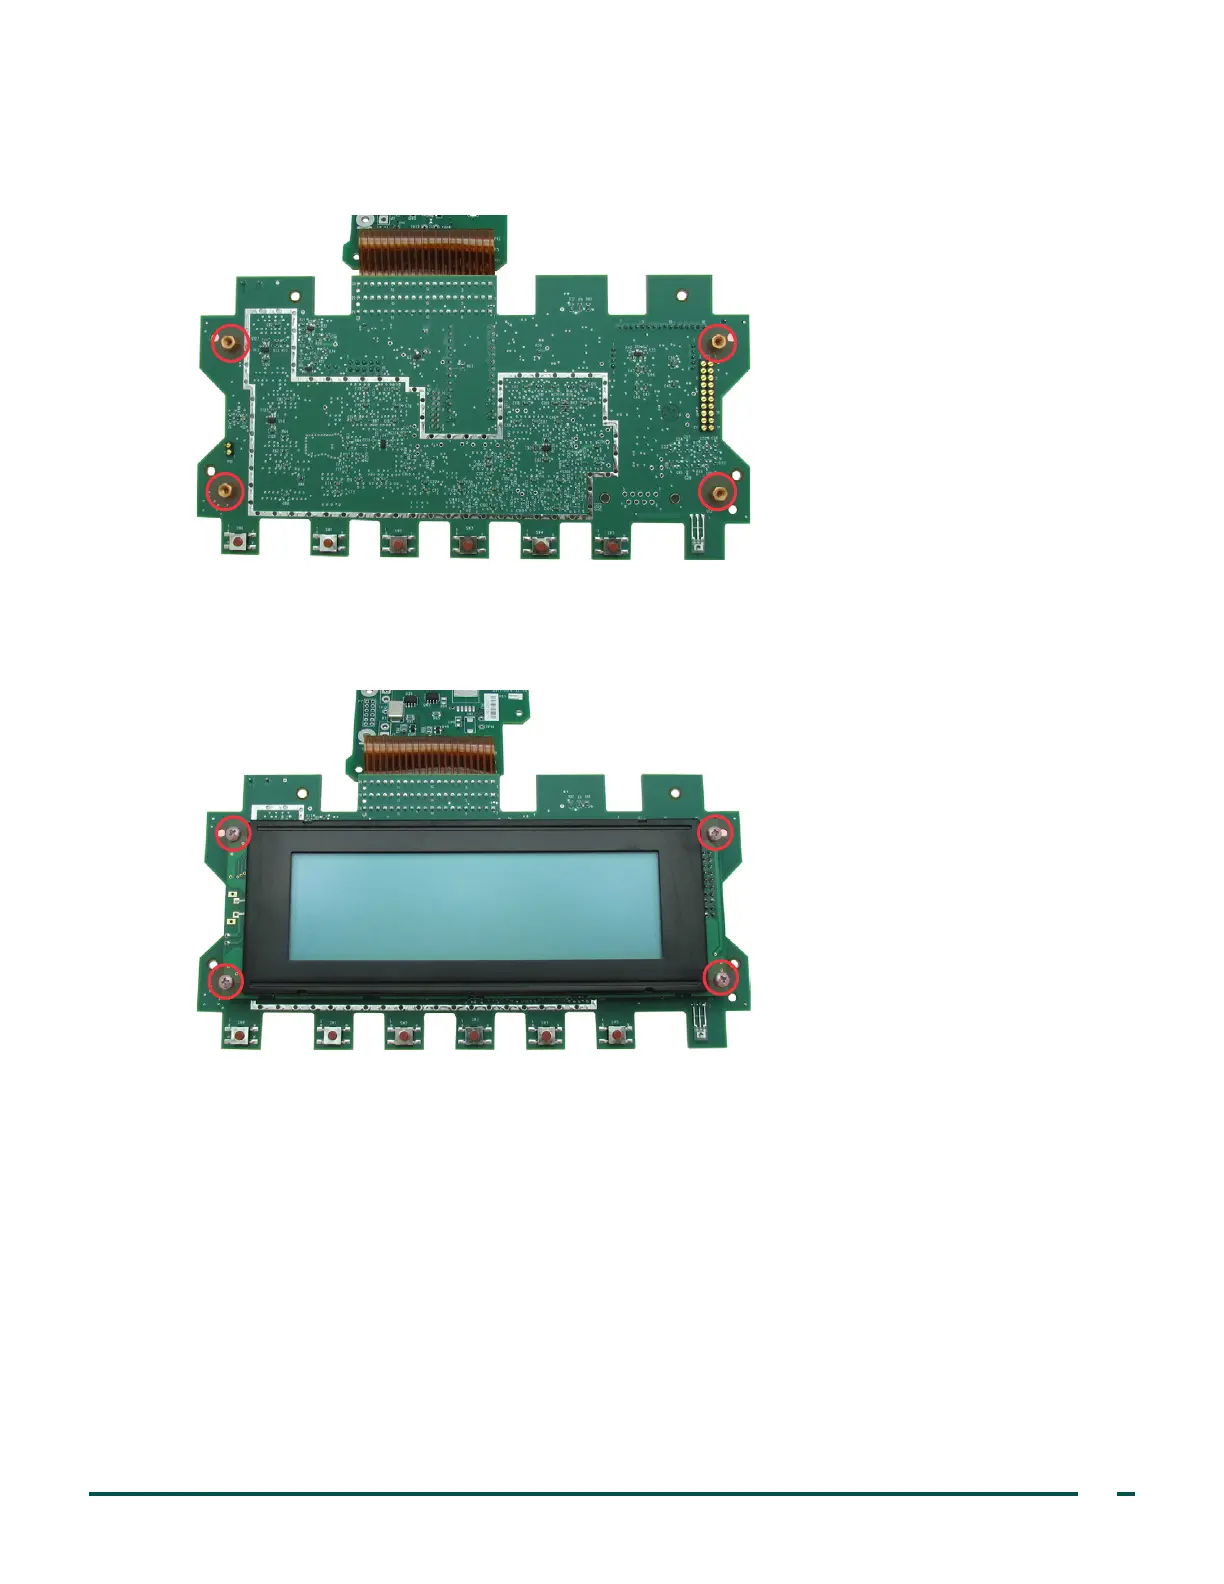
ATTACH THE NEW LCd
4. On the corners of the PCB, ensure that all four LCD standoffs are present. If any are missing, replace the
standoff by inserting the male end into the PCB, and then secure it with a nut.
5. Carefully align the new LCD with the P10 and P12 pins on the PCB, and then gently press the PCB and
LCD together.
6. Using a Phillips bit and (4) LCD standoff screws (0261‑0008), secure the LCD on the PCB.
7. Remove the protective film from the LCD. Ensure that you keep the LCD clean as you complete service
and reassemble the console.
8. Complete any additional repairs to the console, and then reassemble the console according the
procedure Reassemble the Console on page54.
 Loading...