21
Verathon Service Partner Manual: Diagnostics & Troubleshooting
REPAIR GUIDE
This section provides an outline of service issues and their respective corrective procedures. Ensure that you
have isolated the service issue to the console or probe according to the instructions in the procedure Isolate
the Service Issue. Locate the service issue in the following table, and then complete the indicated corrective
procedure(s) in the order that they are listed in the Order column. As you complete the corrective procedures
in the indicated order, you are troubleshooting and eliminating possible sources of the failure. Once the
failure has been resolved, additional corrective procedures may not be required.
Complete the following procedures in order to resolve a console service issue:
• Exit Configuration Mode (page17)
• Disassemble the Console (page32)
• Complete the corrective procedure(s) as indicated in Table 1
• Reassemble the Console (page54)
Complete the following procedures in order to replace the tailcone:
• Exit Configuration Mode (page17)
• Replace the Probe Tailcone (page70)
• Program the Tailcone (page72)
• Update the Probe ID (page73)
Please note that probe and console failures are not limited to those detailed in the table below. If you
encounter an issue that is not documented in this manual or if you complete all of the corrective procedures
and the service issue is not resolved, contact Verathon Customer Care.
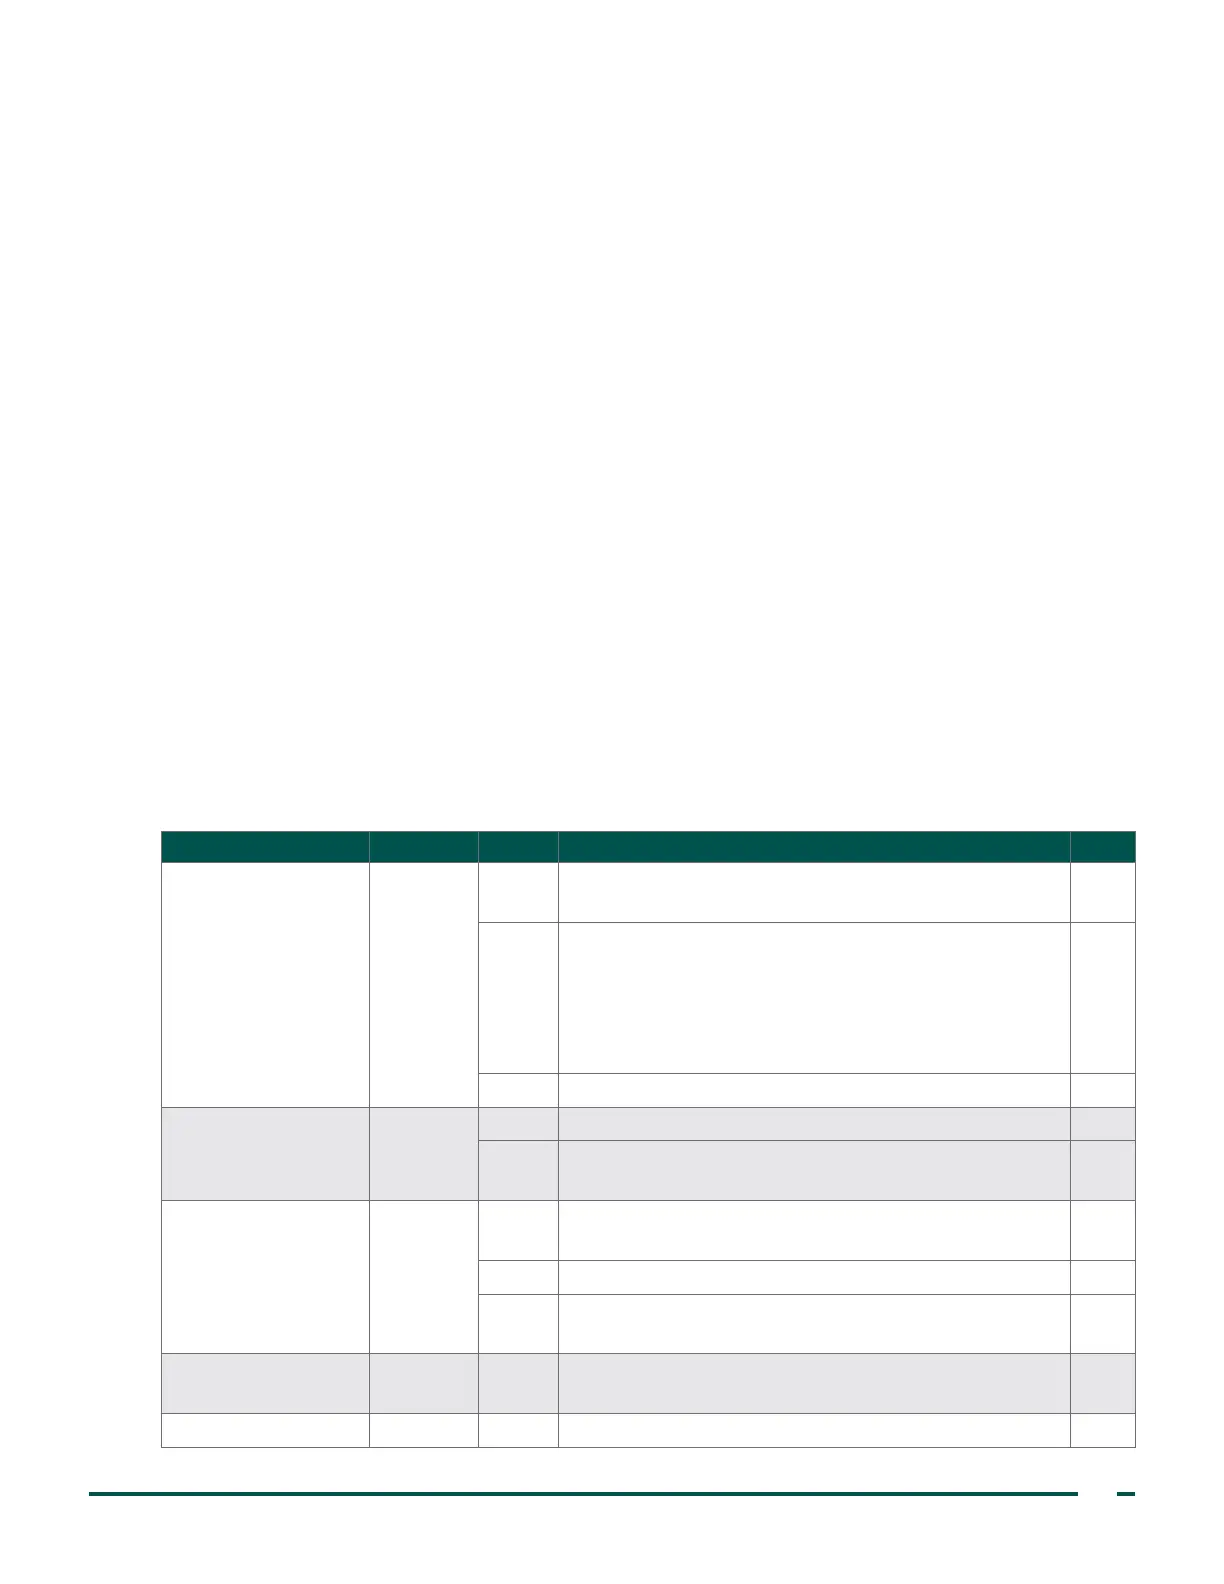
Table 1. Issues and Corrective Procedures
ISSUE LOCATION ORDER CORRECTIVE PROCEDURE PAGE
System does not
turnon
Console
1
If battery contact is missing or broken, Replace the Battery
Contacts
46
2
Ensure the following screws are tightened:
• Battery contact screws are tight in Replace the Battery
Contacts
• PCB screws into battery standoffs are tight in
Reassemble the Console
46
54
3 Replace the PCB assembly in Reassemble the Console 54
Paper door stuck Console
1 Ensure paper door and paper door track are clean —
2
File the door track in Step3 of Replace the Hide or
Printer Door
53
Battery button stuck Console
1
Clean the push rod and rocker arm, and ensure there is
no debris
—
2 Loosen the screw in Replace the Battery Eject Button 48
3
Replace the plastic components in Replace the Battery
Eject Button
48
Console button(s)
non‑responsive
— Replace the PCB assembly in Reassemble the Console 54
Failure on self‑test
*
— Replace the PCB assembly in Reassemble the Console 54
 Loading...