8. Insert and tighten the four screws.
9. Tighten the M6 nut installed in step 2 securely.
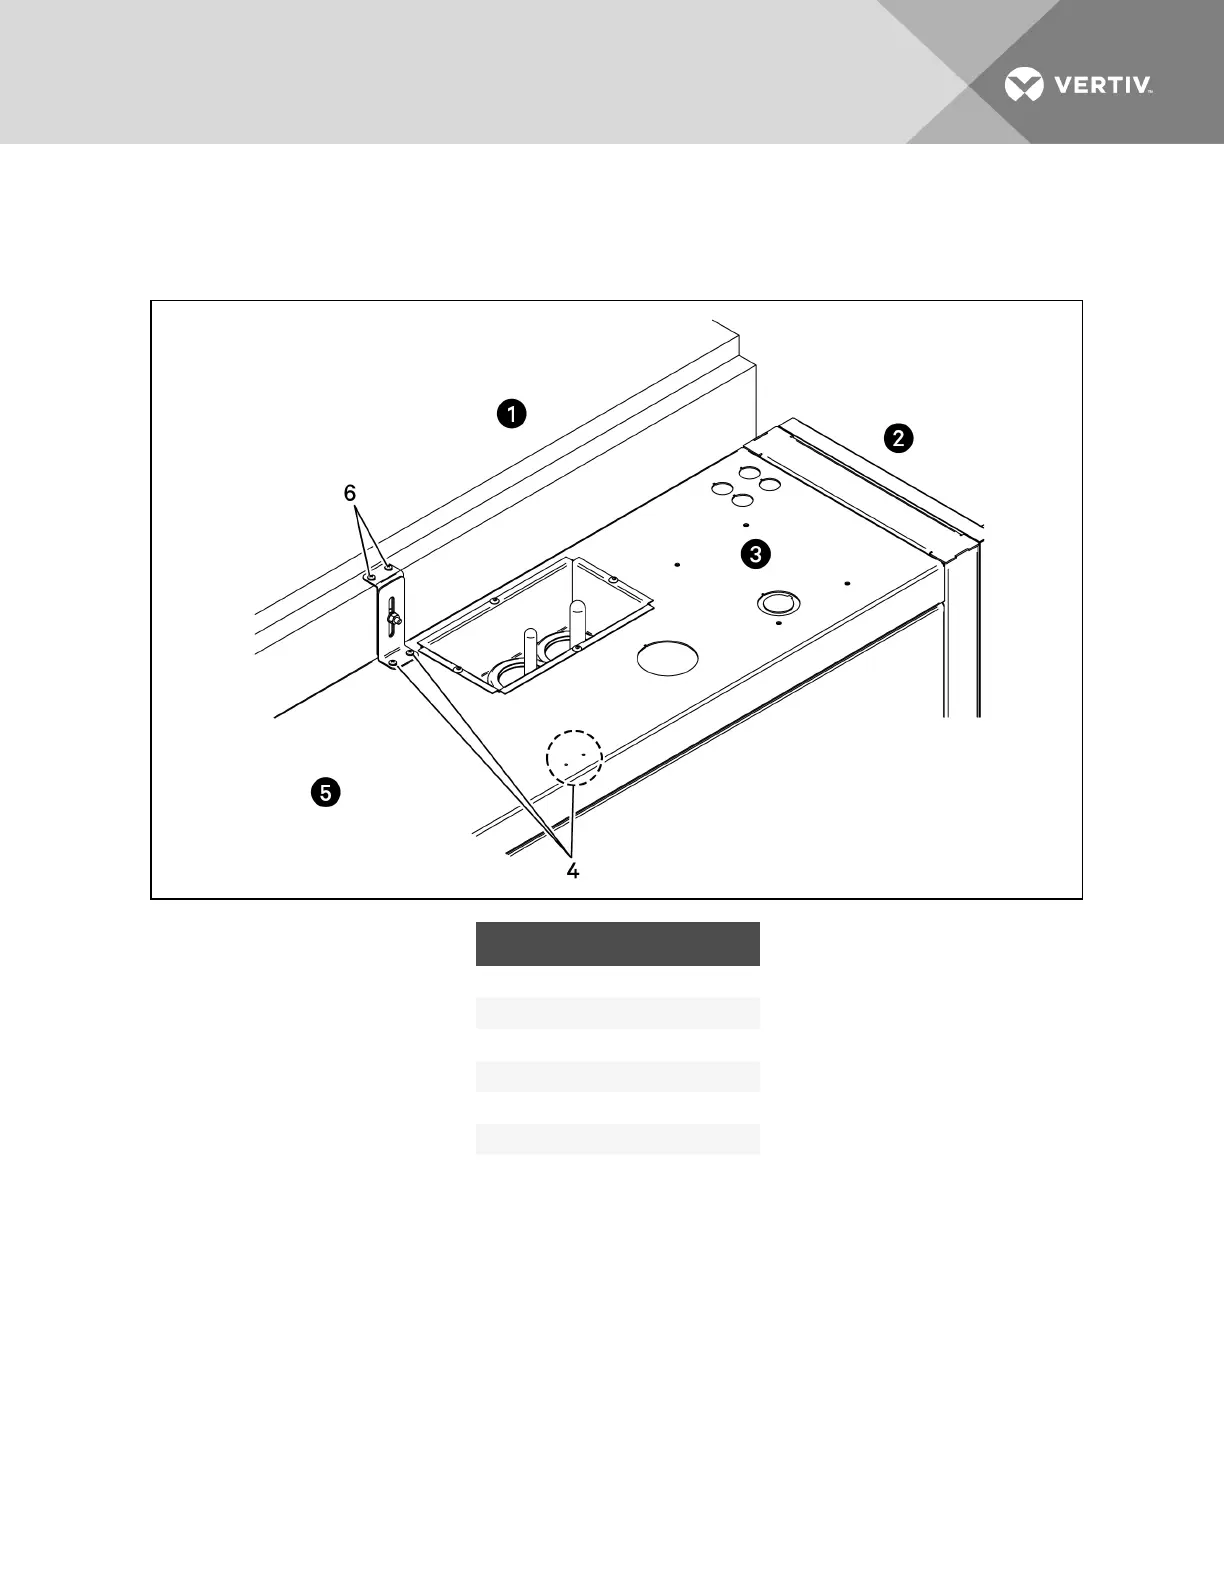
Figure 5.3 Tie-down bracket on cabinets of different heights—300mm (12 in.)
ITEM DESCRIPTION
1 Top of adjacent cabinet
2 Rear of unit
3 Top of unit
4 Screw holes for tie-down brackets
5 Front of unit
6 Screws in drilled holes.
5.2.4 Installing Tie-down Brackets on300-mm(12-in.)
andonCabinetsoftheSameHeight
To install the tie-down bracket:
1. Position the tie-down bracket over the factory-fabricated holes on the top of the Liebert CRV
and over the top of the adjacent cabinet of the same height as shown in Figure 5.4 on the next
page.
2. Mark where the self-tapping screws will attach the tie-down bracket to the adjacent cabinet.
3. Taking proper precautions to collect the metal shavings and protect equipment, drill holes in
the adjacent cabinet for the two screws.
4. Use a vacuum cleaner or other method to remove all metal particles.
Vertiv | Liebert CRV Installer/User Guide | 31