Chapter 4: Connecting to the Sensor
•
33
Making a serial connection
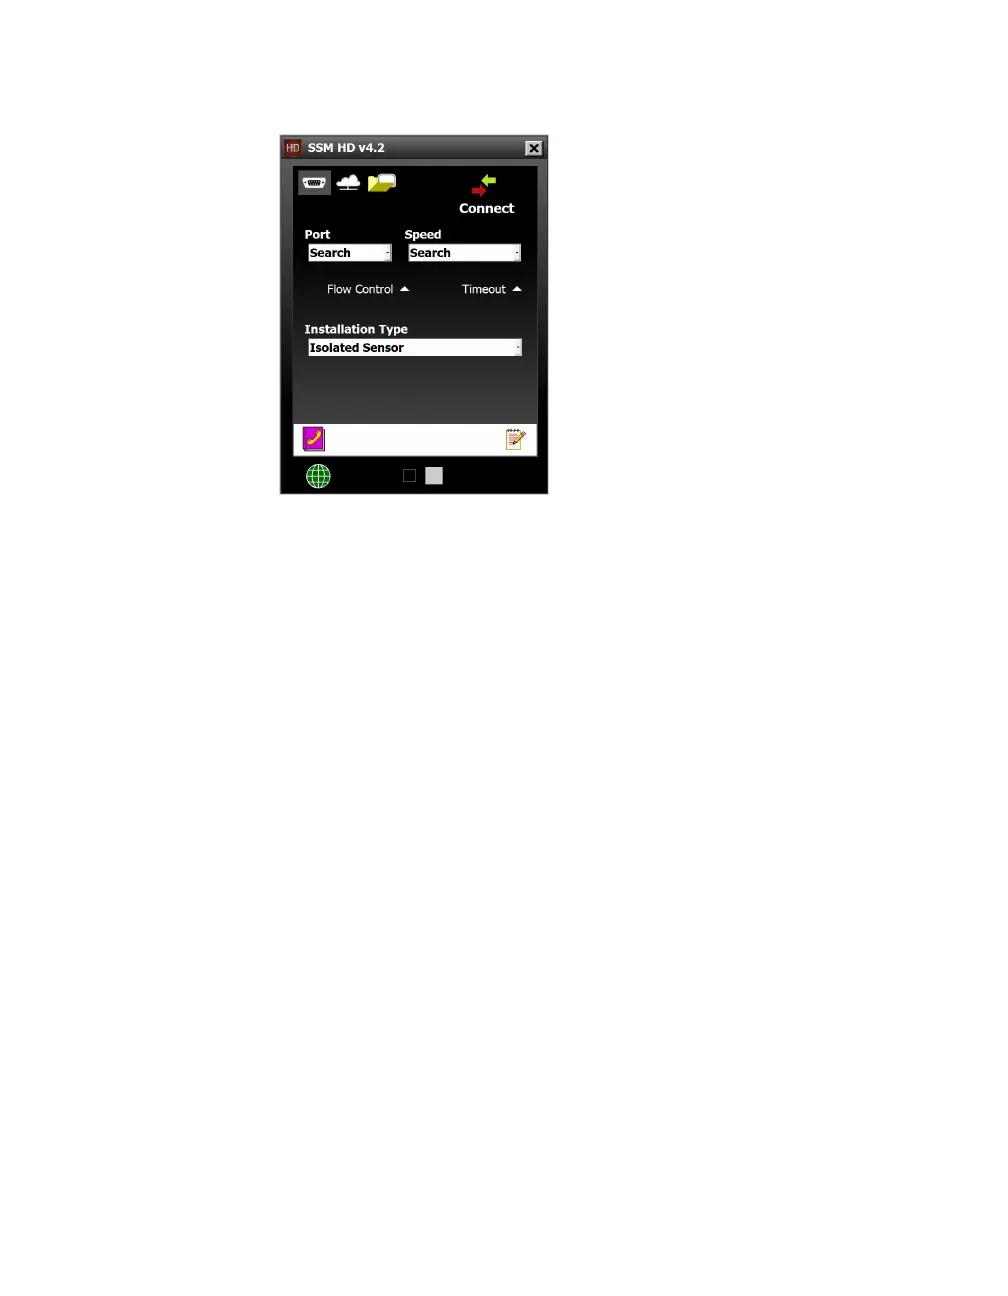
Figure 33. Serial Connection screen
1 Click the serial connector icon on the Connect button of the
main screen to open the Serial Connection screen.
2 From the Port drop-down, choose the COM port on your com-
puter that the sensor is plugged into.
3 From the Speed drop-down, choose 9600 bps (the default rate
for the SmartSensor HD), unless you have previously changed
the baud rate of the sensor.
4 Click Connect.
Advanced serial connection settings
˿
Flow Control – This should be set to None. You would want to
change this to Hardware if you’re connecting through a device
that uses RS-232 hardware handshaking (some older devices
require flow control handshaking because they cannot keep up
with the data rates of higher-performance devices).
˿
Timeout – This is how long the software tries to connect to the
sensor before it gives up. You can increase this time if you’re
having trouble connecting to the sensor.
˿
Installation Type – If there is only one sensor on the bus, leave
this set to Isolated Sensor. If your connection can see several
sensors (they’re all on a single bus, for example), set this to
Multi-drop Network and enter the sensor ID of the sensor you
want to connect to.
Note. If you are
unsure of your
port or speed, use
Search and it will
cycle through all
available COM ports
or baud rates.