34
•
SmartSensor HD User Guide
Making an Internet connection
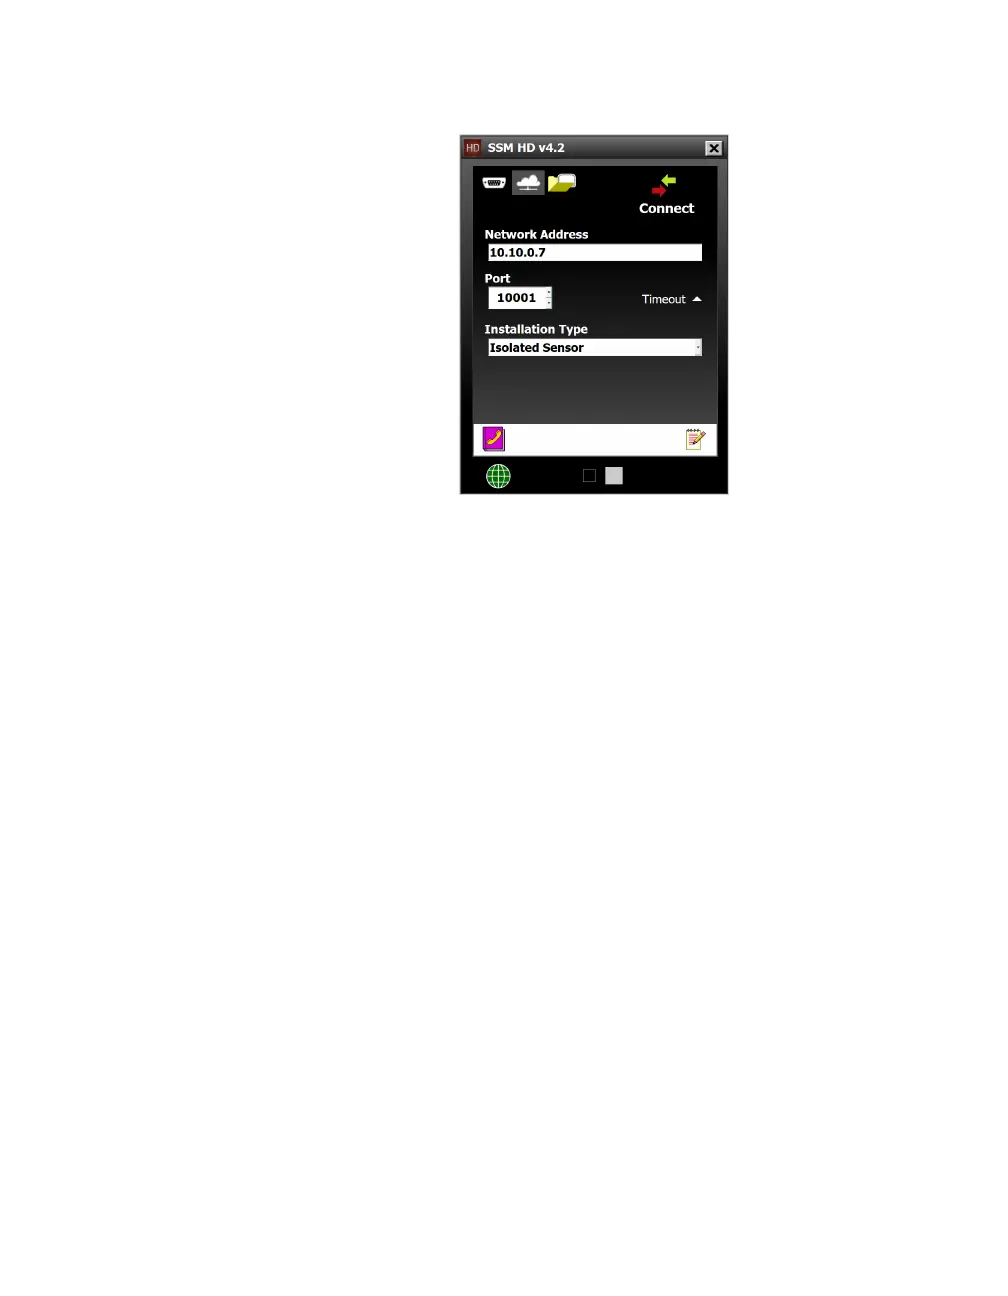
Figure 34. Internet Connection screen
1 Click the cloud icon on the Connect button of the main screen
to open the Internet Connection screen.
2 Under Network Address, enter the IP address of the termi-
nal server (such as a serial to Ethernet converter or a cellular
modem) that the sensor is connected to. Do the same with the
port number in the Port field.
3 Click Connect.
Advanced Internet connection settings
˿
Timeout – This is how long the software tries to connect to the
sensor before it gives up. You can increase this time if you’re
having trouble connecting to the sensor.
˿
Installation Type – If there is only one sensor connected to the
terminal server, leave this set to Isolated Sensor. If the terminal
server can see several sensors, set this to Multi-drop Network
and enter the sensor ID of the sensor you want to connect to.
Note. The
SmartSensor HD
is not a native IP
device. Therefore,
connecting via the
Internet requires a
terminal server, such
as a Click 301 serial
to Ethernet converter
in the cabinet, or
an external modem
to put it on a
cellular network.
Note. You may need
a USB to serial
adapter to connect
to your computer.