Chapter 6: Configuring Lanes
•
53
1 Open the Tools menu by clicking the hammer and wrench icon,
then select Clear Edit Area.
2 Click on the sidebar button until sidebar 1 appears.
3 Open the Tools menu again and select Restart Auto Cfg.
4 Let the configuration process run (this could take a few sec-
onds to a few minutes) until all of the lanes have been found
by SSMHD; they will appear as blue bars in the sidebar and, if
Show Auto Lanes is turned on, in the edit area.
5 If the software’s set to Show Auto Lane, change it: open the
View menu by clicking the magnifying glass icon, and select
Hide Auto Lanes; the automatically detected lanes will disap-
pear from the edit area.
6 If you want to capture all the lanes that appear in the sidebar,
click anywhere in the sidebar; in the Automatic Lane window
that appears, click Copy Sidebar. If you only want to capture
certain lanes, click on those lanes in the sidebar; in the Auto-
matic Lane window that appears, click Copy Lane. Repeat as
needed. Captured lanes will appear black.
Excluding or including a lane or area
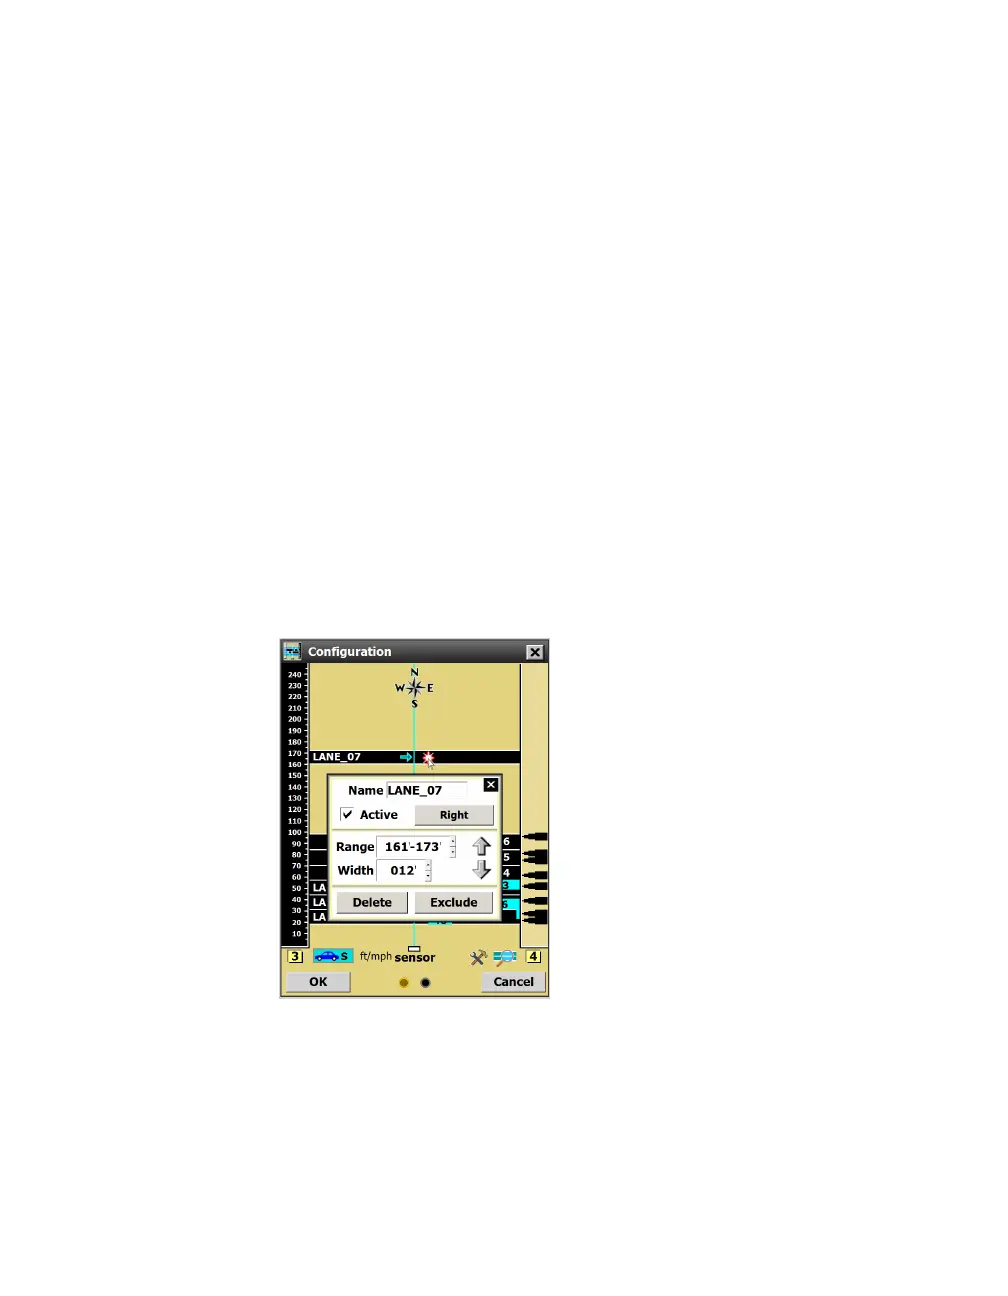
Figure 56. Lane window
1 Click on the lane or shoulder area you want to exclude. The
Shoulder Area window or Lane window will appear, based on
which you clicked.
2 Click the Exclude button.
3 To include an area that has previously been excluded, click on it
to open this window again, and click Include.
Note. Excluding
a lane or area is
useful when you’re
aligning the sensor
and there are non-
parallel lanes that are
making the alignment
dicult. It can also
stop events from
being generated in
any non-lane areas.