Chapter 6: Configuring Lanes
•
51
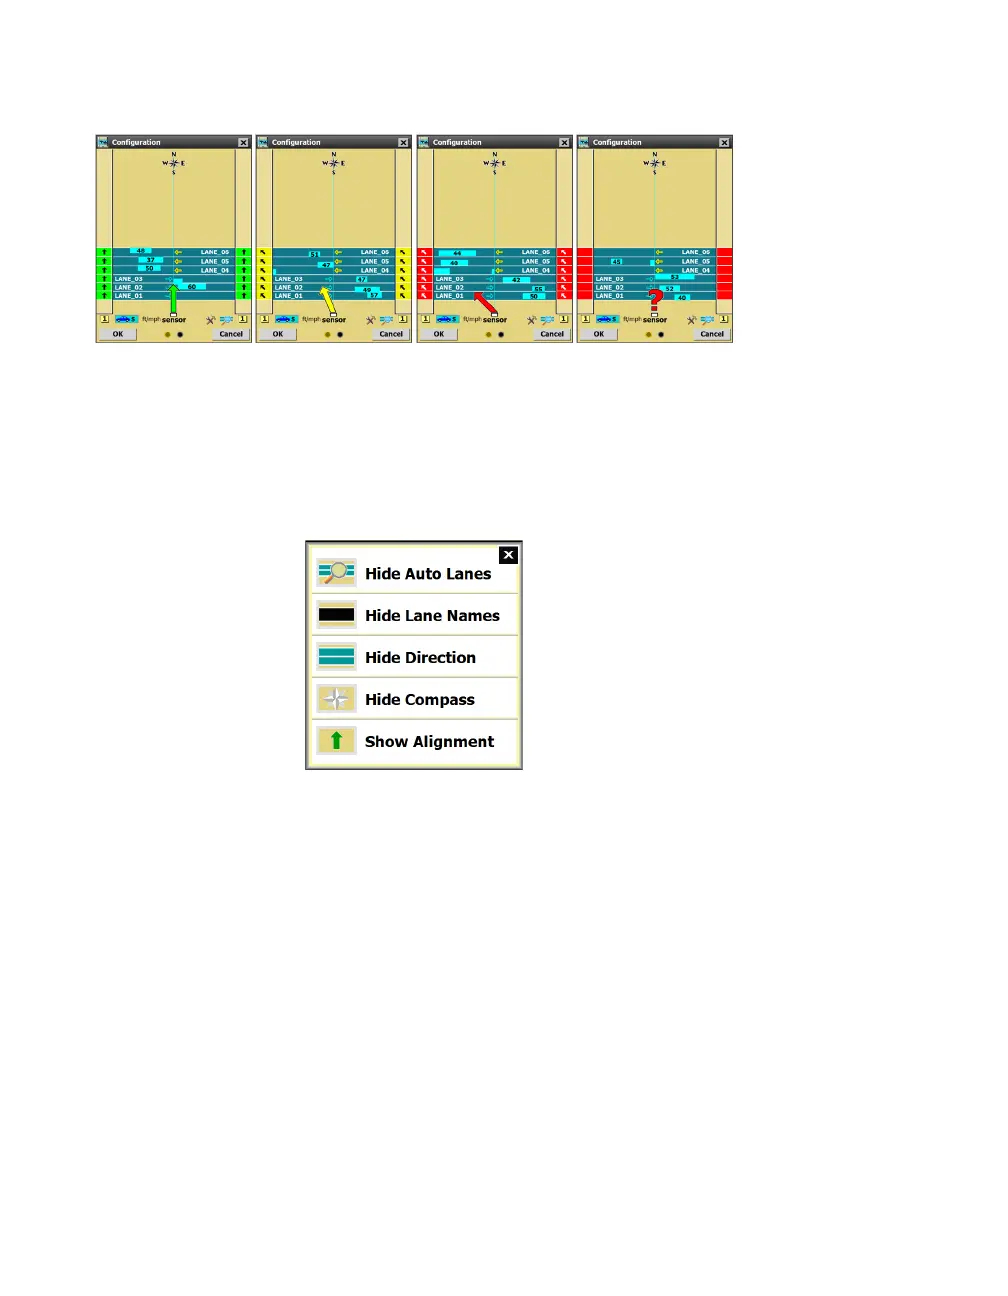
Checking sensor alignment
Figure 52. Good, mediocre, bad, and very bad alignment (left to right)
1 Be sure trac is flowing freely on the road in order to get this
tool to work best.
2 If you don’t see the alignment arrow, click the magnifying glass
icon to open the View menu, then select Show Alignment.
Figure 53. View menu
3 If you don’t see the alignment sidebars, click the >> button on
either side of the screen until the number 1 is displayed.
4 Watch the arrows to see where the sensor’s alignment is at.
5 Move the sensor manually to fix it. Give the software a few
moments after each sensor movement to adjust; a few vehicles
need to pass by before it can report on the new alignment.
6 If you’d like, hide the arrow again using the View menu.
Troubleshooting the alignment tool
˿
The software needs a few vehicles to pass before it can start
getting a read on the alignment. If you’re having trouble, there
might not be enough trac on the road; wait until more vehicles
have passed, or get in your own vehicle and drive in front of the
sensor a few times.
Note. Lane
configuration won’t
work as well as it
should if the sensor
is misaligned, so
don’t skip this step!
Note. The large
arrow in the center
shows the average
alignment of all lanes;
the small arrows
in the sidebars
show the alignment
in each lane.