2-15Installation: CPU-NXT 3.2 into the BBxD
16-1408348
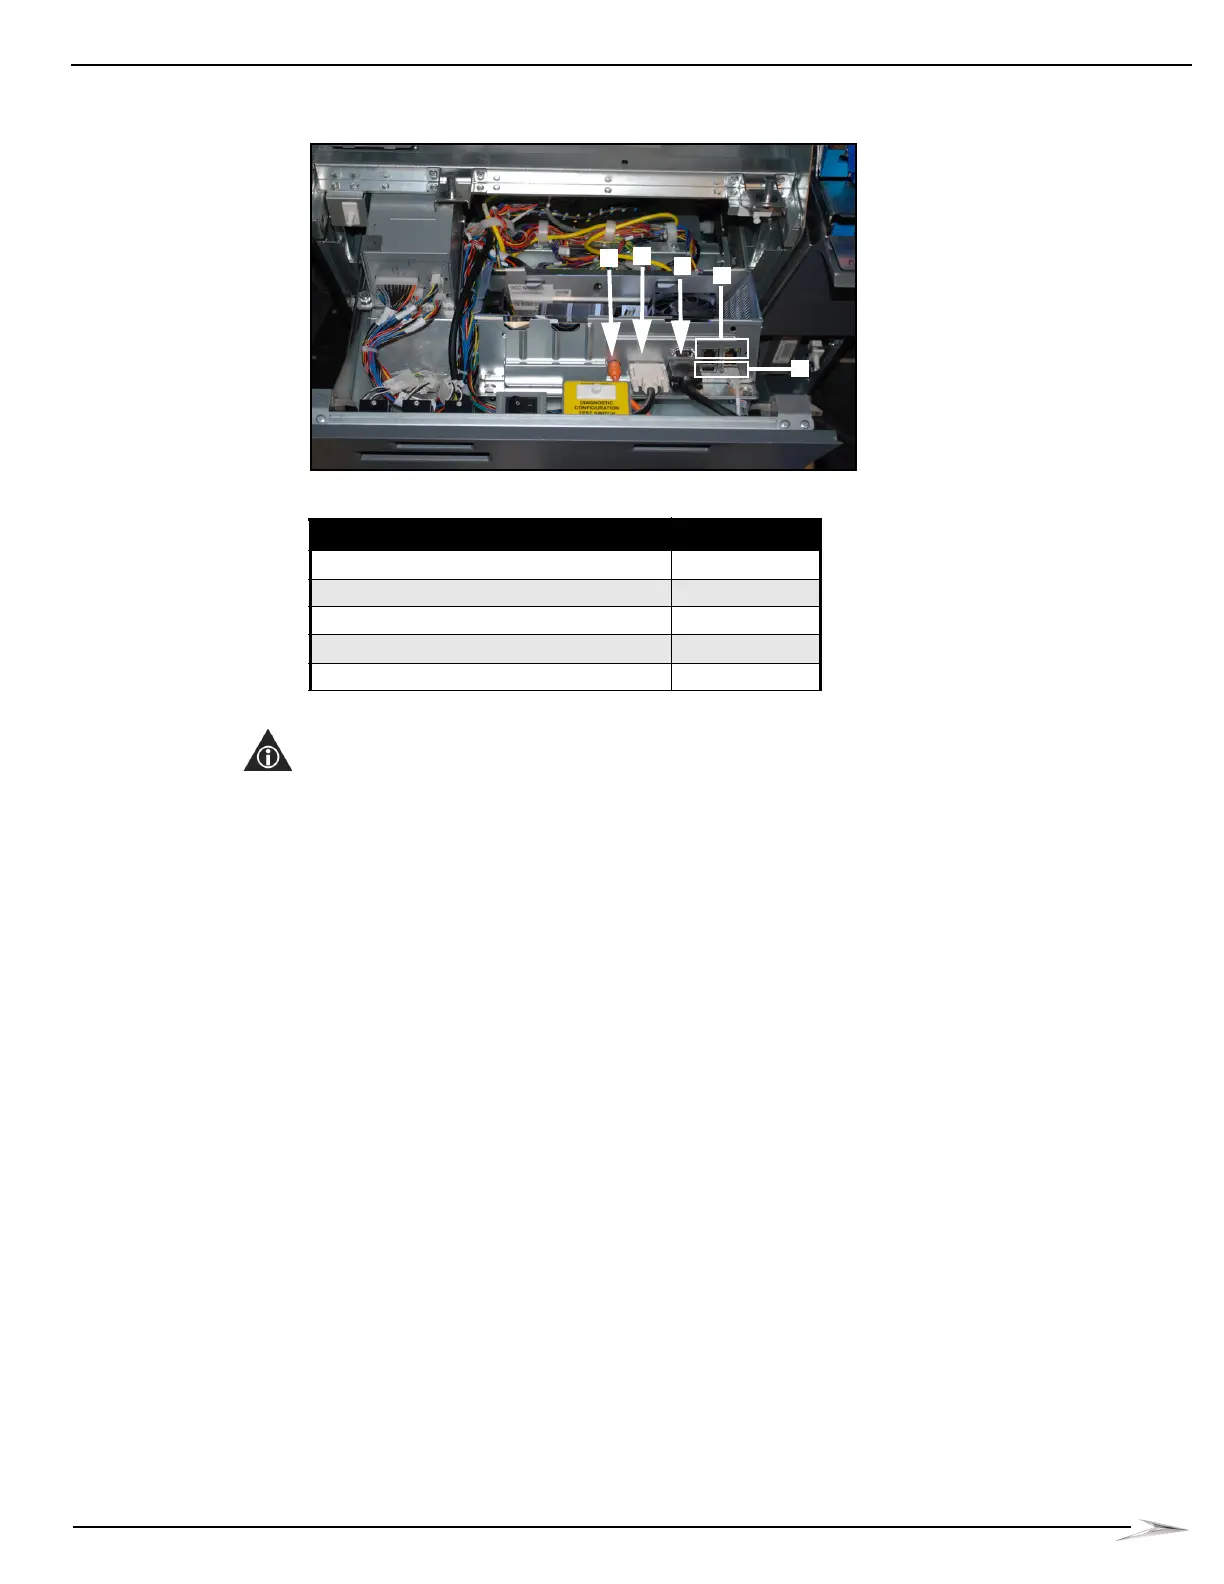
4 Disconnect the DVI Cable, Figure 2-30 (B), as defined in Table 2-2.
Figure 2-30 Connections to CPU-NXT2 (top) and CPU-NXT3 (bottom).
5 If applicable, disconnect the VGA Cable, Figure 2-30 (C), as defined in Table 2-2.
NOTE: After the VGA Cable is disconnected from the Accessory/Top Box LCD, it is to remain in the
game.
6 Disconnect the SPDIF Cable, Figure 2-30 (A), as defined in Table 2-2.
7 Disconnect the USB Cable, Figure 2-30 (D), as defined in Table 2-2.
8 If applicable, disconnect the Ethernet Cable, Figure 2-30 (E).
9 Push right on the black mounting tab located below the CPU Assembly, Figure 2-29 (B), on the
left-hand side, to enough to disengage the lock lever from its latch.
10 Pull the lever towards the front of the game.
11 Lift the CPU Assembly up and away from the four hooks, Figure 2-29 (C), that hold the CPU
Assembly in place.
12 Remove the CPU Assembly from the game.
Table 2-2 CPU Assembly Connections.
Connection Location
SPDIF Port Figure 2-30 (A)
DVI Video Port Figure 2-30 (B)
VGA Video Ports Figure 2-30 (C)
Ethernet Ports Figure 2-30 (D)
USB Ports Figure 2-30 (E)
 Loading...