3-14
Chapter 3: Maintenance
Aug 2012
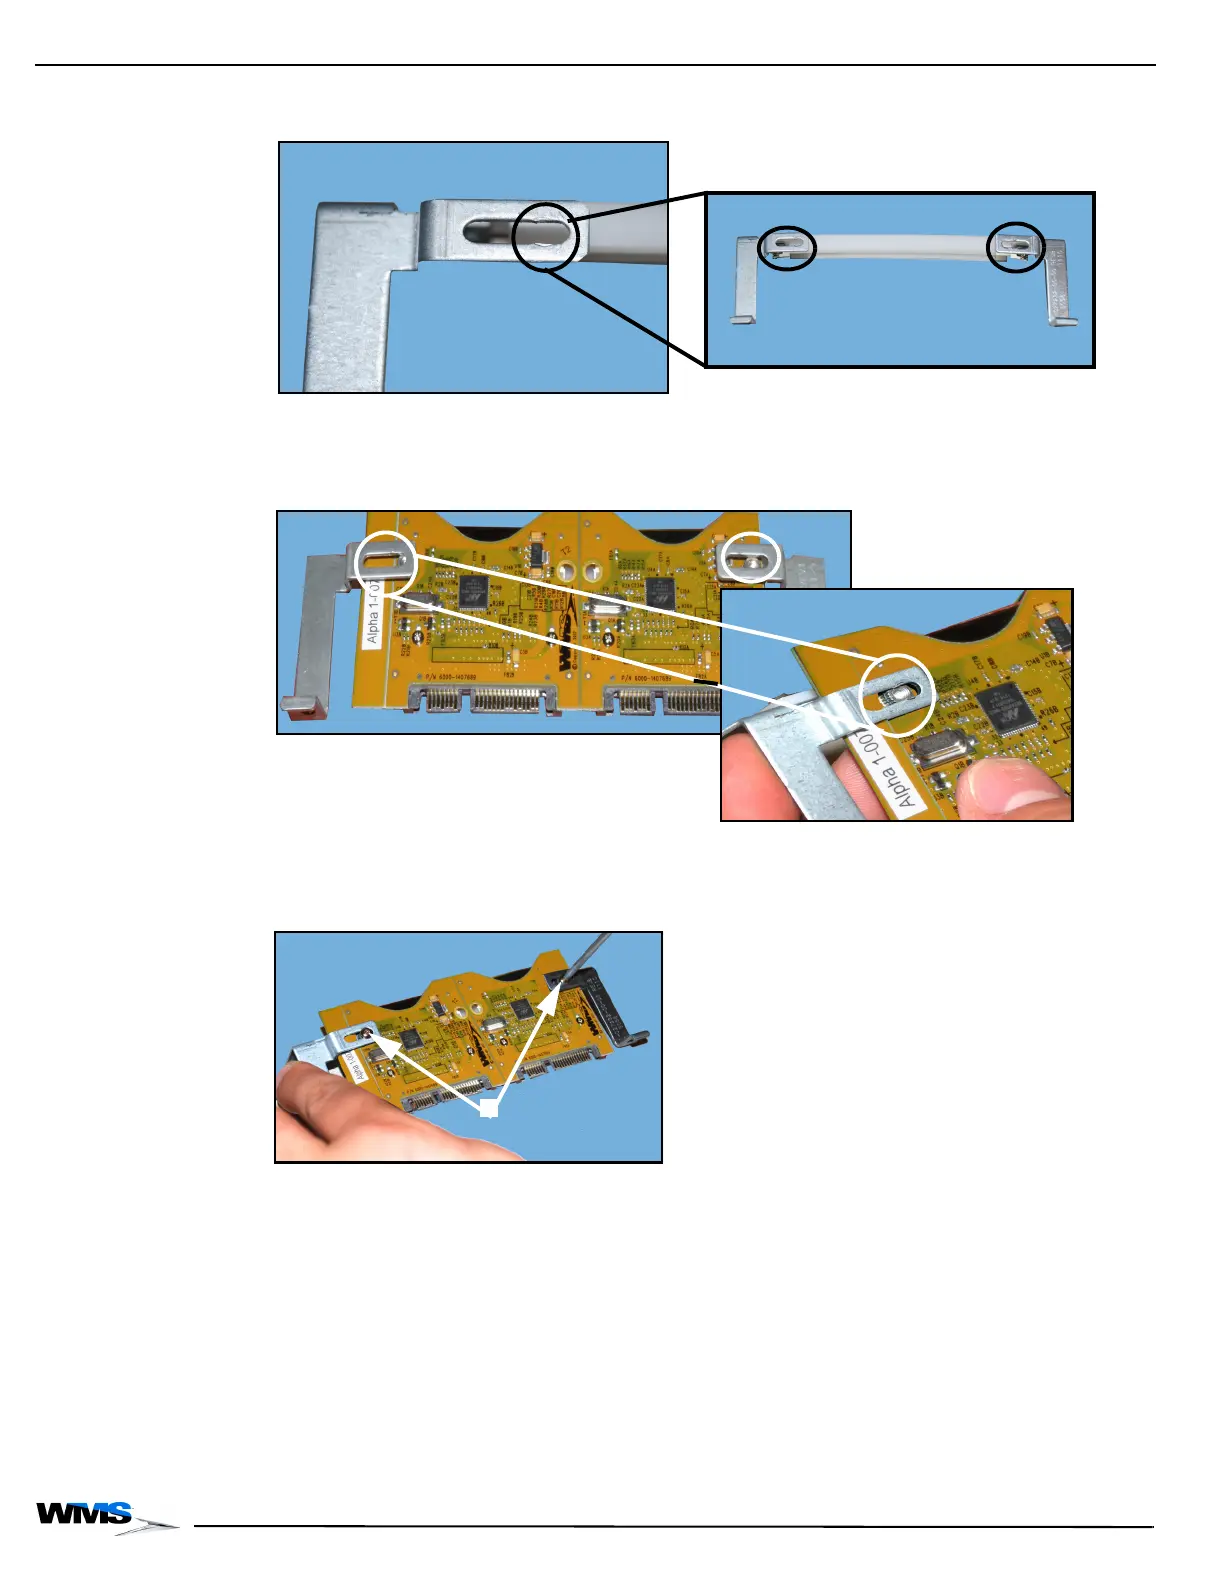
5 Find the notches at the end of the screw holes, Figure 3-30, located on the Board Bracket.
Figure 3-30 Closeup of screw hole notches (left) and screw holes on Board Bracket (right).
6 Position the new PATA Board (A-1101020) so that the screw holes line up with the notches,
Figure 3-31, on the bracket.
Figure 3-31 Line up PATA Board screw holes with notches on bracket (left) and closeup (right).
7 Using a T8 Security Torx screwdriver, tighten the two security screws, Figure 3-32 (A), that
secure the PATA Board to the bracket.
Figure 3-32 Tighten security screws to secure PATA Board to bracket.
 Loading...