Address Book
Xerox WorkCentre 3315DN/3325DN/3325DNI
User Guide
139
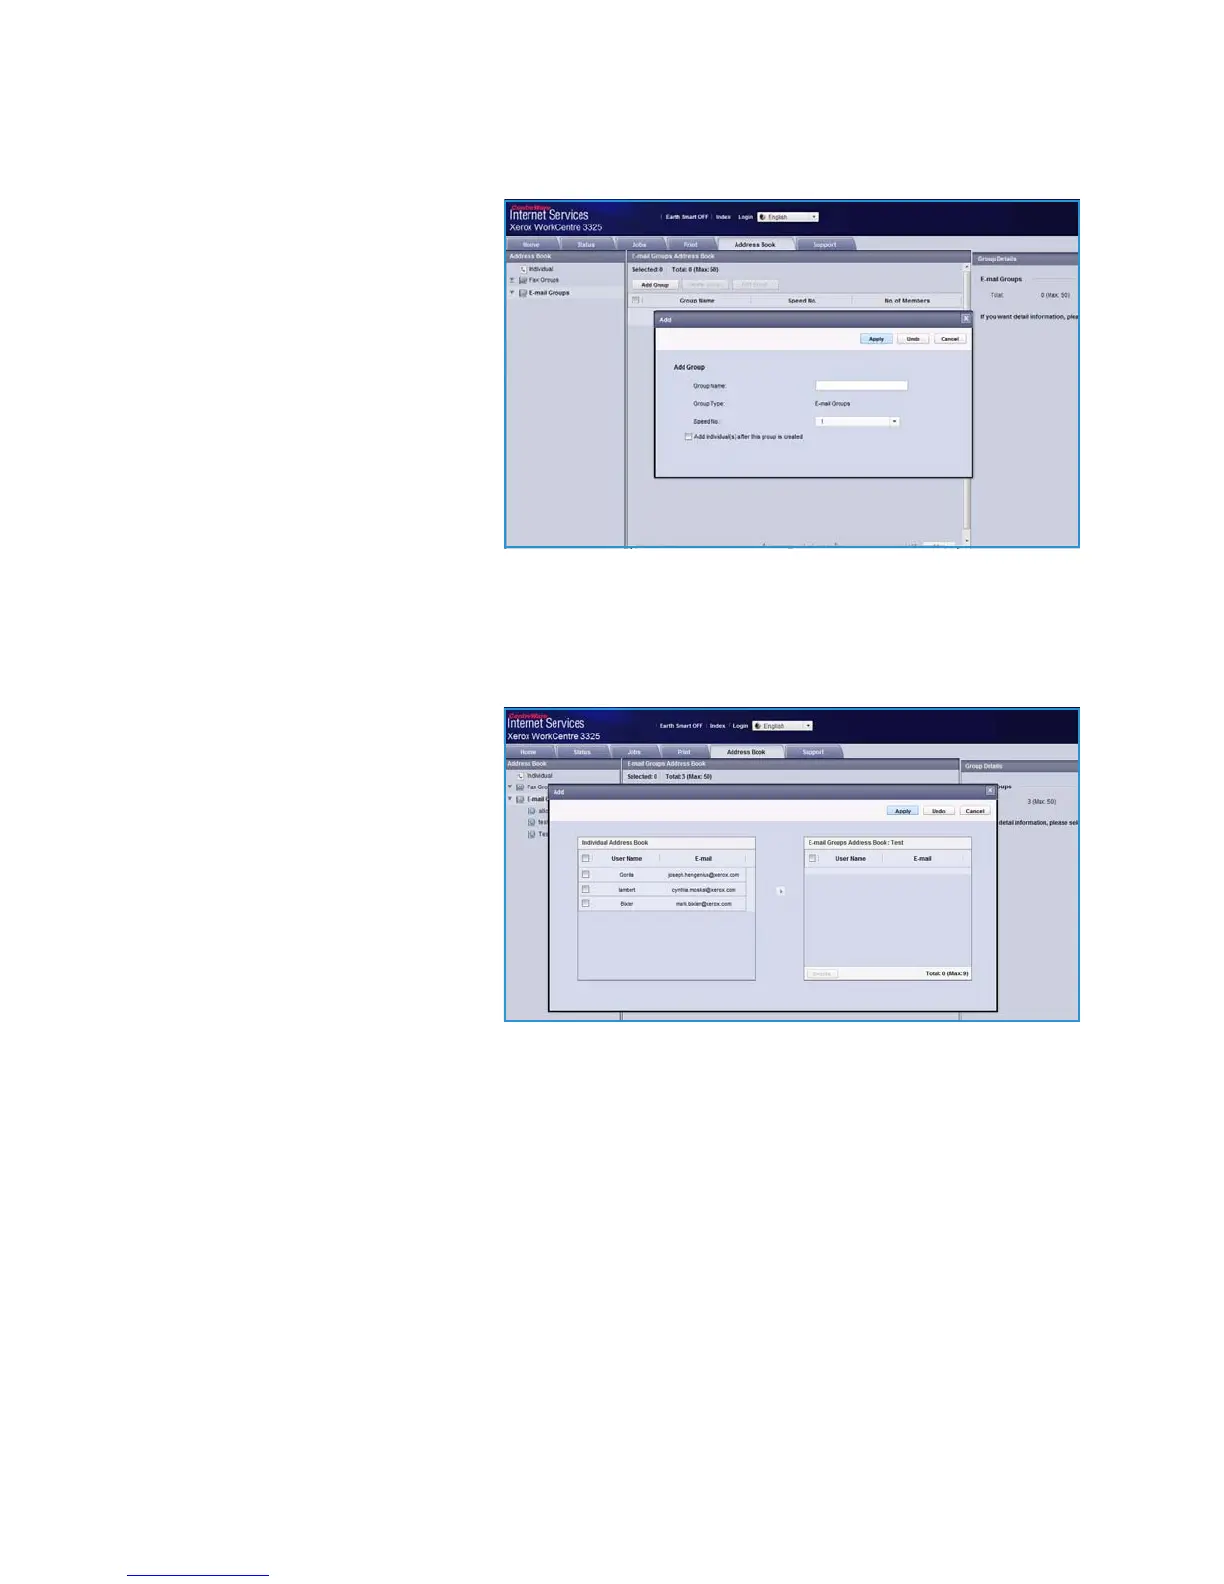
Create a Group Address Book using Internet Services
1. At your Workstation, open the
web browser and enter the IP
Address of the machine in the
Address Bar.
2. Press Enter.
3. Select the Address Book icon.
4. Select the E-mail Groups link.
5. Select Add Group.
6. Enter a name in the Group
Name field.
7. Select the required Speed Dial
number.
8. Select the Add Individual(s)
after this group is created checkbox to add individual addresses immediately after the group has
been created.
Note: If this option is not selected, when Apply is selected you will return to the E-mail Groups
Address Book page.
9. Select Apply to save the changes.
The Add window is displayed
10. Select an individual address from
the left window and click on the
arrow to add the individual to
the new group. The address is
shown in the right window.
Continue adding the individuals
required.
11. When all the individuals have
been added to the group, select
Apply. The E-mail Groups
Address Book page is displayed.
Note If an address book is already established, you may be warned that duplicate entries exist
and that the new entries will be ignored.
Edit a Group in the Address Book
1. In the E-mail Group Address Book area, check the checkbox for the group you want to edit.
2. Select the Edit Group button.
Add or remove individuals as required using the arrow button.
3. Select Apply. The group is updated and the E-mail Groups Address Book page is displayed.

 Loading...


