January 2016
4-169
WorkCentre WorkCentre 4150/4250/4260WorkCentre 4150/4250/42604150/
REP 12.4
Repairs and Adjustments
CAUTION
The top of the Front Door Assembly is secured by a clip. Take care when removing the assem-
bly. The clip is easily broken.
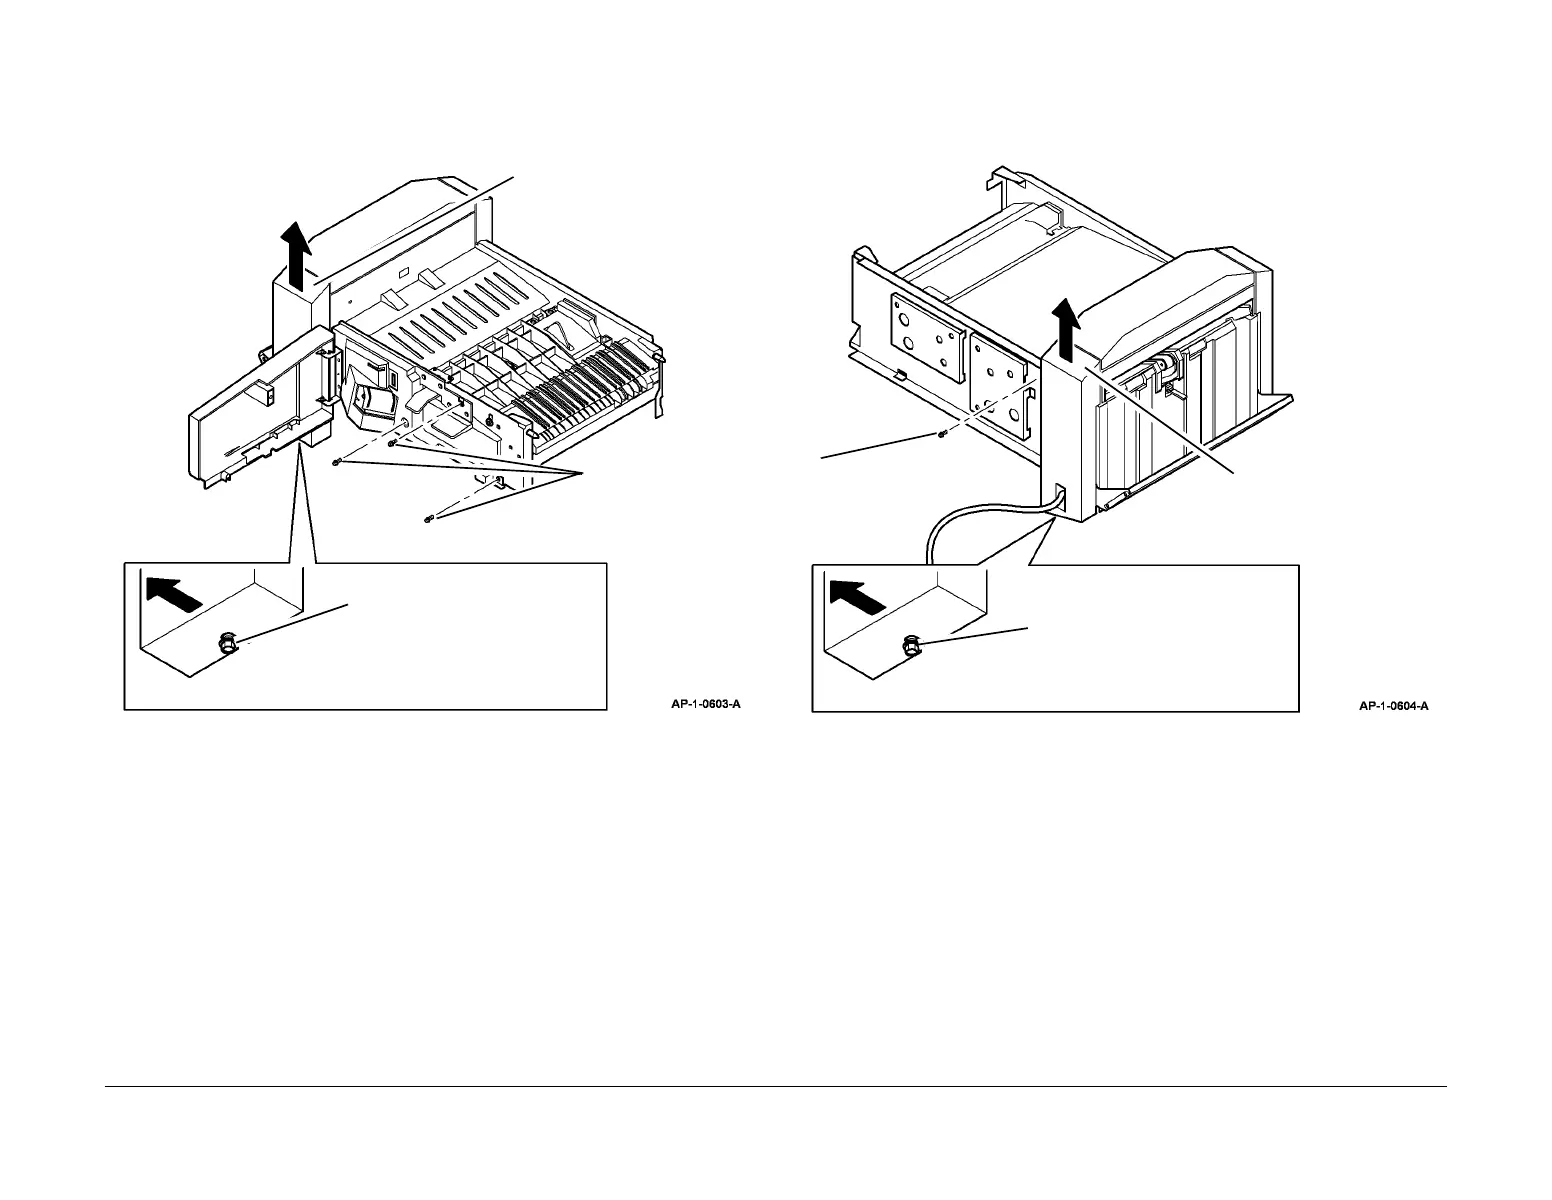
4. Remove the Front Door Assembly (Figure 1).
Figure 1 Removing the Front Door Assembly
CAUTION
The top of the Rear Cover is secured by a clip. Take care when removing the cover. The clip is
easily broken.
5. Remove the Rear Cover (Figure 2).
Figure 2 Removing the Rear Cover
6. Remove the Top Cover, PL 12.10 Item 7.
Replacement
Replacement is the reverse of the removal procedure.
2
Loosen the screw then release
the bottom of the Front Door
Assembly.
1
Remove 3 screws.
3
Lift, then remove the Front Door
Assembly (see CAUTION)
2
Loosen the screw then release
the bottom of the Rear Cover.
3
Lift, then remove the Rear
Cover (see CAUTION).
1
Remove 1 screw.

 Loading...


