03/02 8.8 Stapler Finisher
WorkCentre Pro 423/428 8-21 CHAPTER 8 ACCESSORIES
14. Return the Right Cover Cap (Upper) to its original position.
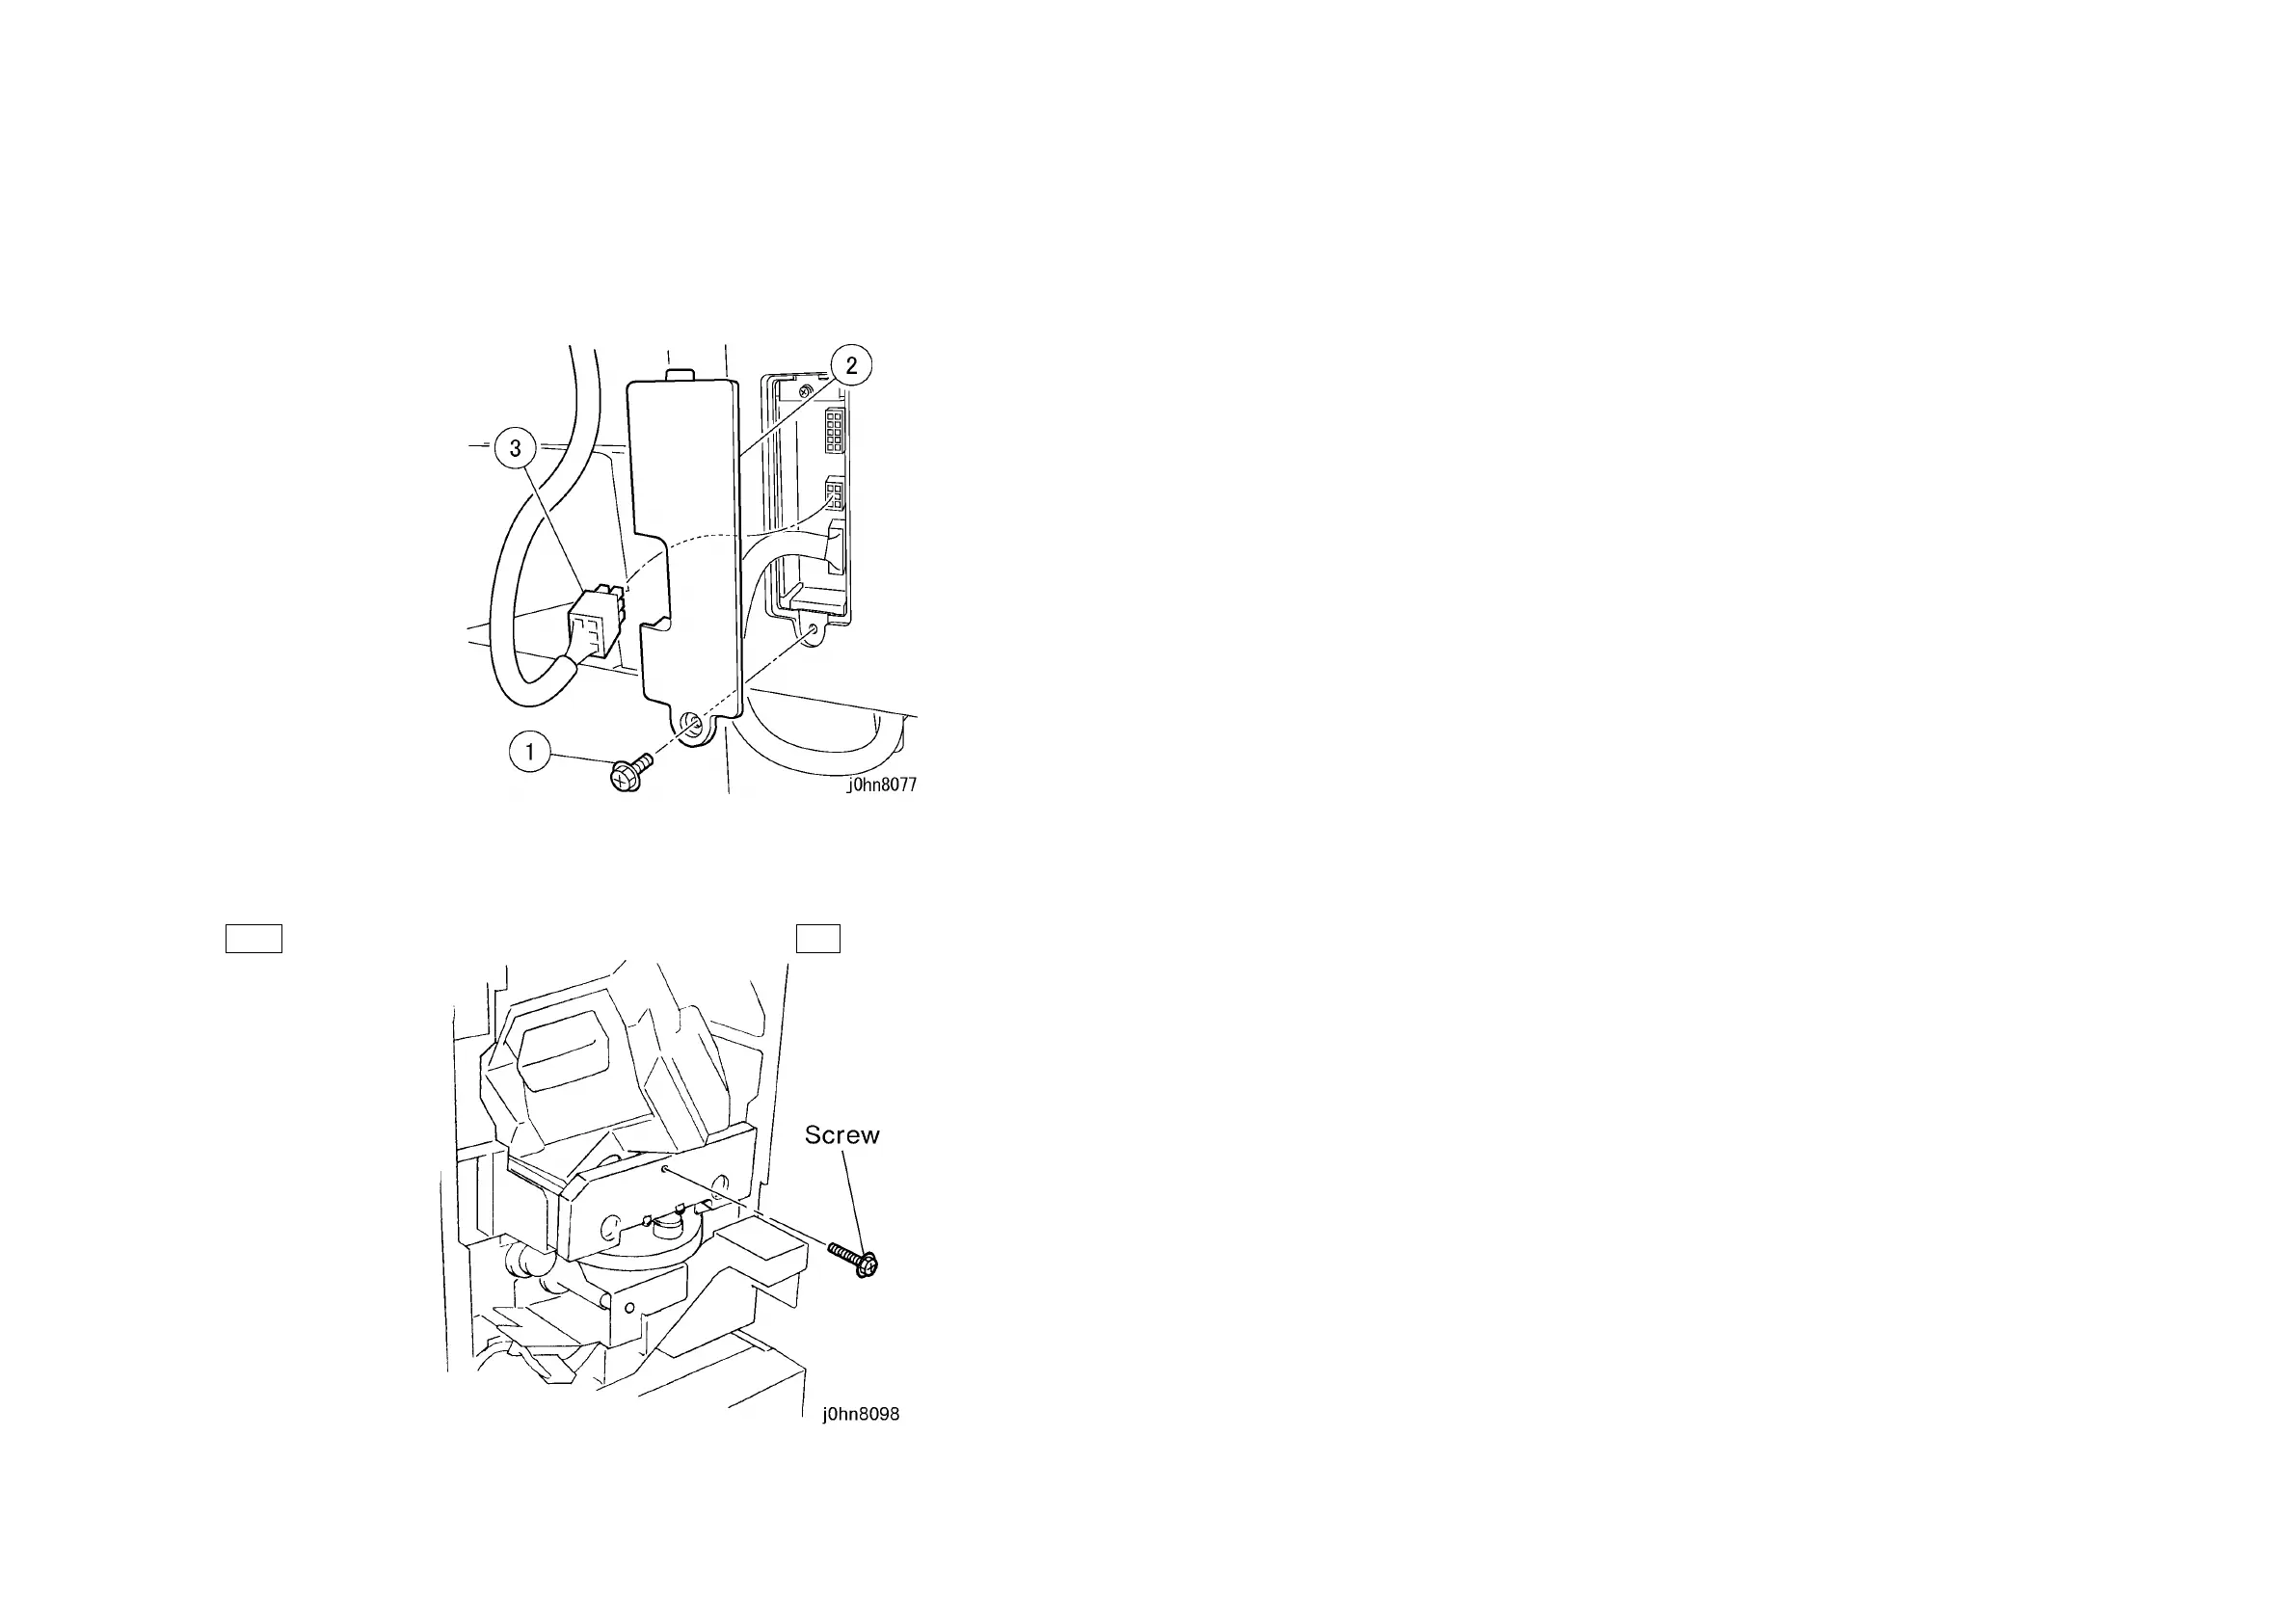
15. Connect the Wire Harness. (Figure-13)
1) Remove the screw.
2) Remove the Right Cover Cap (Lower).
3) Connect the Connector.
(Figure-13) j0hn8077
16. Return the Right Cover Cap (Lower) to its original position.
17. Open the Finisher Front Door and remove the screw that secures the Stapler. (Figure-
14)
Note If the screw is not removed, “Finisher Error”… H5 fault occurs at power on.
(Figure-14) j0hn8098
18. Connect the power cord and turn on the power.
19. Check whether the Finisher is installed.
1) Enter C/E Mode.
2) Set the Chain/Function code "50/51" and press the Start button.
3) Check the set value is 1.
4) Exit C/E Mode.
20. Ensure that the “Output” is displayed on the IIT display.
21. Check the Finisher operation.
22. Store the Blind Cover and Screws (2) removed in Steps 4 and 5.
23. Explain to the key operator how to use the Finisher.

 Loading...


