EasyManuals Logo

Xerox WorkCentre Pro 423 Service Manual

Xerox WorkCentre Pro 423
619 pages
To Next Page IconTo Next Page
To Previous Page IconTo Previous Page
Page #521 background imageLoading...
Page #521 background image
WorkCentre Pro 423/428 8-44 CHAPTER 8 ACCESSORIES
03/02 8.18 Printer Kit
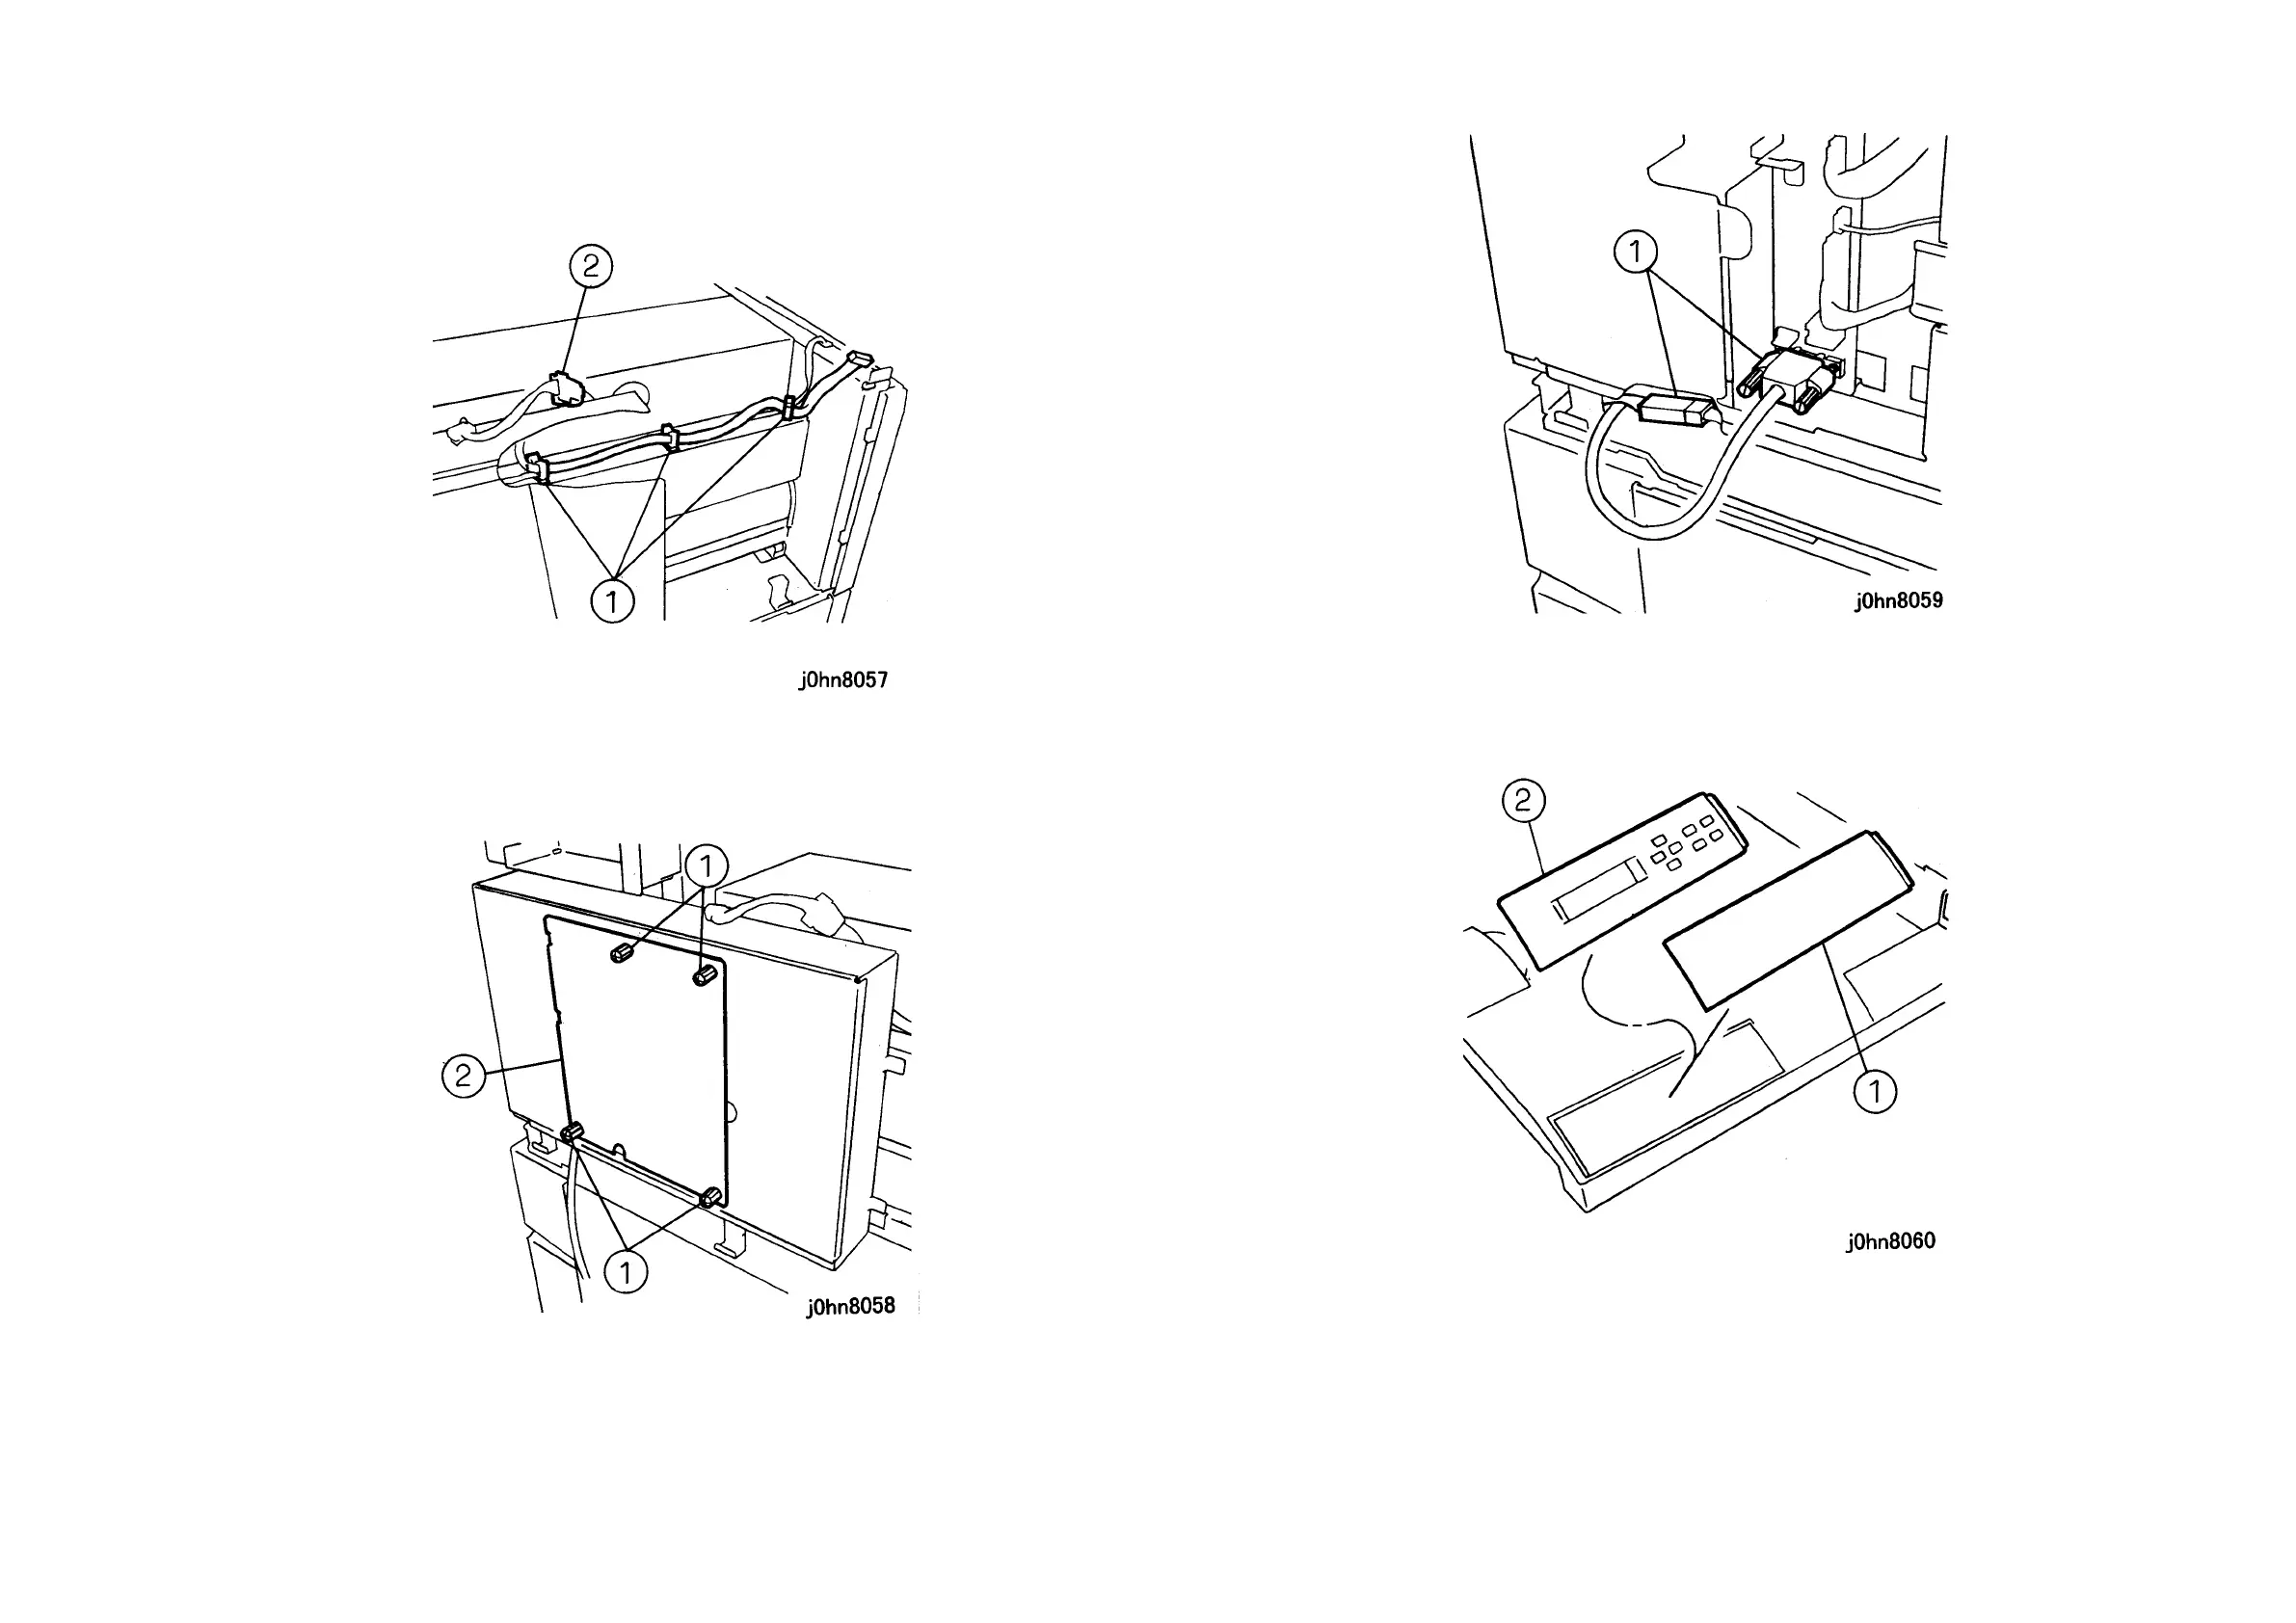
15. Connect the Connector. (Figure-5)
1) Secure the Control Panel Wire Harness with the Clamps (3).
2) Connect the Connector.
(Figure-5) j0hn8057
16. Remove the ROM Cover. (Figure-6)
1) Loosen the screws (4).
2) Remove the ROM Cover.
(Figure-6) j0hn8058
17. Connect the Connector (2). (Figure-7)
1) Connect the Connector (2).
(Figure-7) j0hn8059
18. Remove the Blind Cover from the Top Cover and install the Control Panel. (Figure-8)
1) Remove the Blind Cover.
2) Install the Control Panel.
(Figure-8) j0hn8060

Table of Contents

Other manuals for Xerox WorkCentre Pro 423

Questions and Answers:

Question and Answer IconNeed help?

Do you have a question about the Xerox WorkCentre Pro 423 and is the answer not in the manual?

Xerox WorkCentre Pro 423 Specifications

General IconGeneral
BrandXerox
ModelWorkCentre Pro 423
CategoryAll in One Printer
LanguageEnglish

Related product manuals