EasyManuals Logo

Xerox WorkCentre Pro 423 Service Manual

Xerox WorkCentre Pro 423
619 pages
To Next Page IconTo Next Page
To Previous Page IconTo Previous Page
Page #527 background imageLoading...
Page #527 background image
WorkCentre Pro 423/428 8-50 CHAPTER 8 ACCESSORIES
03/02 8.20 Token Ring
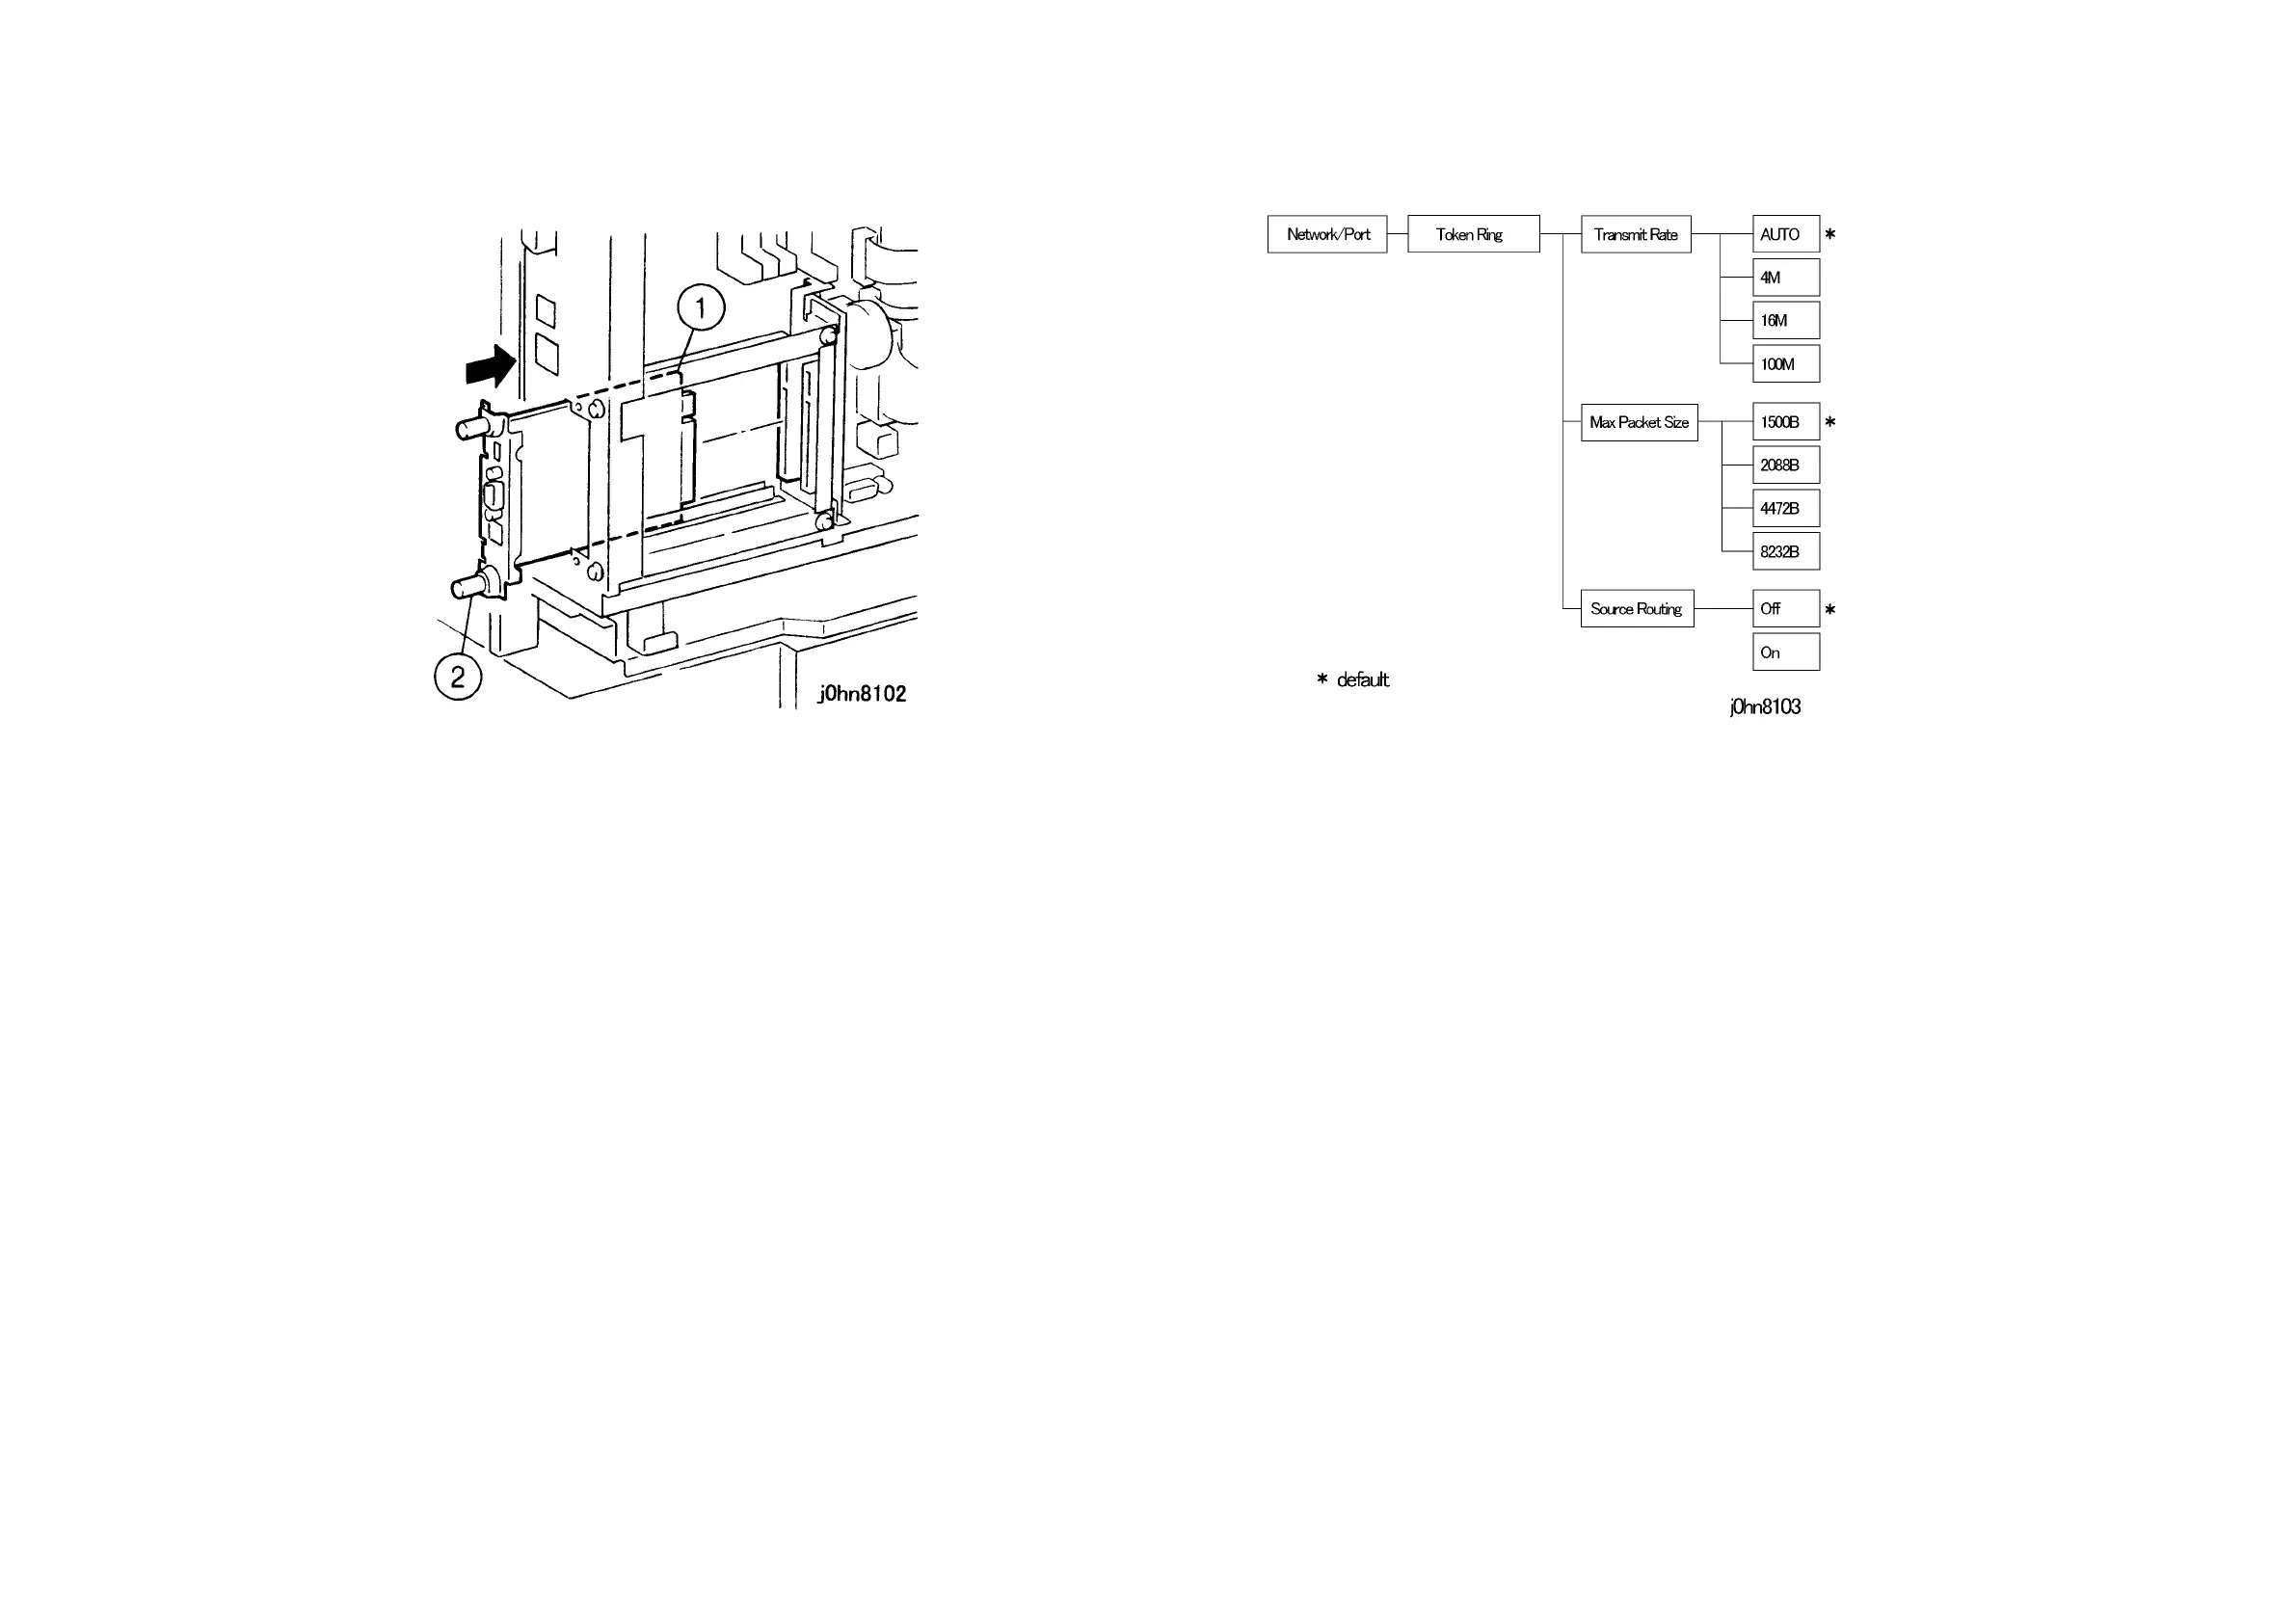
6. Insert the Interface Board and secure it. (Figure-5)
1) Insert the Interface Board.
2) Tighten the Screws (2).
(Figure-5) j0hn8102
7. Return the machine to its original state.
8. Connect the Interface Cable.
9. Connect the power cord and turn on the power.
10. If necessary, change the setting on the Printer UI. (Figure-6)*
(Figure-6) j0hn8103
11. Store the Slot Cover removed in Step 4.

Table of Contents

Other manuals for Xerox WorkCentre Pro 423

Questions and Answers:

Question and Answer IconNeed help?

Do you have a question about the Xerox WorkCentre Pro 423 and is the answer not in the manual?

Xerox WorkCentre Pro 423 Specifications

General IconGeneral
BrandXerox
ModelWorkCentre Pro 423
CategoryAll in One Printer
LanguageEnglish

Related product manuals