HW-130 Programmer User Guide
B-2 Xilinx Development System
To start the auto-calibration, follow these steps after turning on the
power on your programmer:
1. Install the HW-130-CAL calibration adapter, shown in Figure B-1.
The calibration adapter includes test points for measuring the
voltage and current levels of the programmable power supplies.
2. Select Options ➝ Auto-Calibration.
A dialog box is opened showing the status of the available
supplies.
Note: Depending on the version of the hardware, PV
sp
may or may
not be displayed.
3. To measure the voltage and current for each power supply, use the
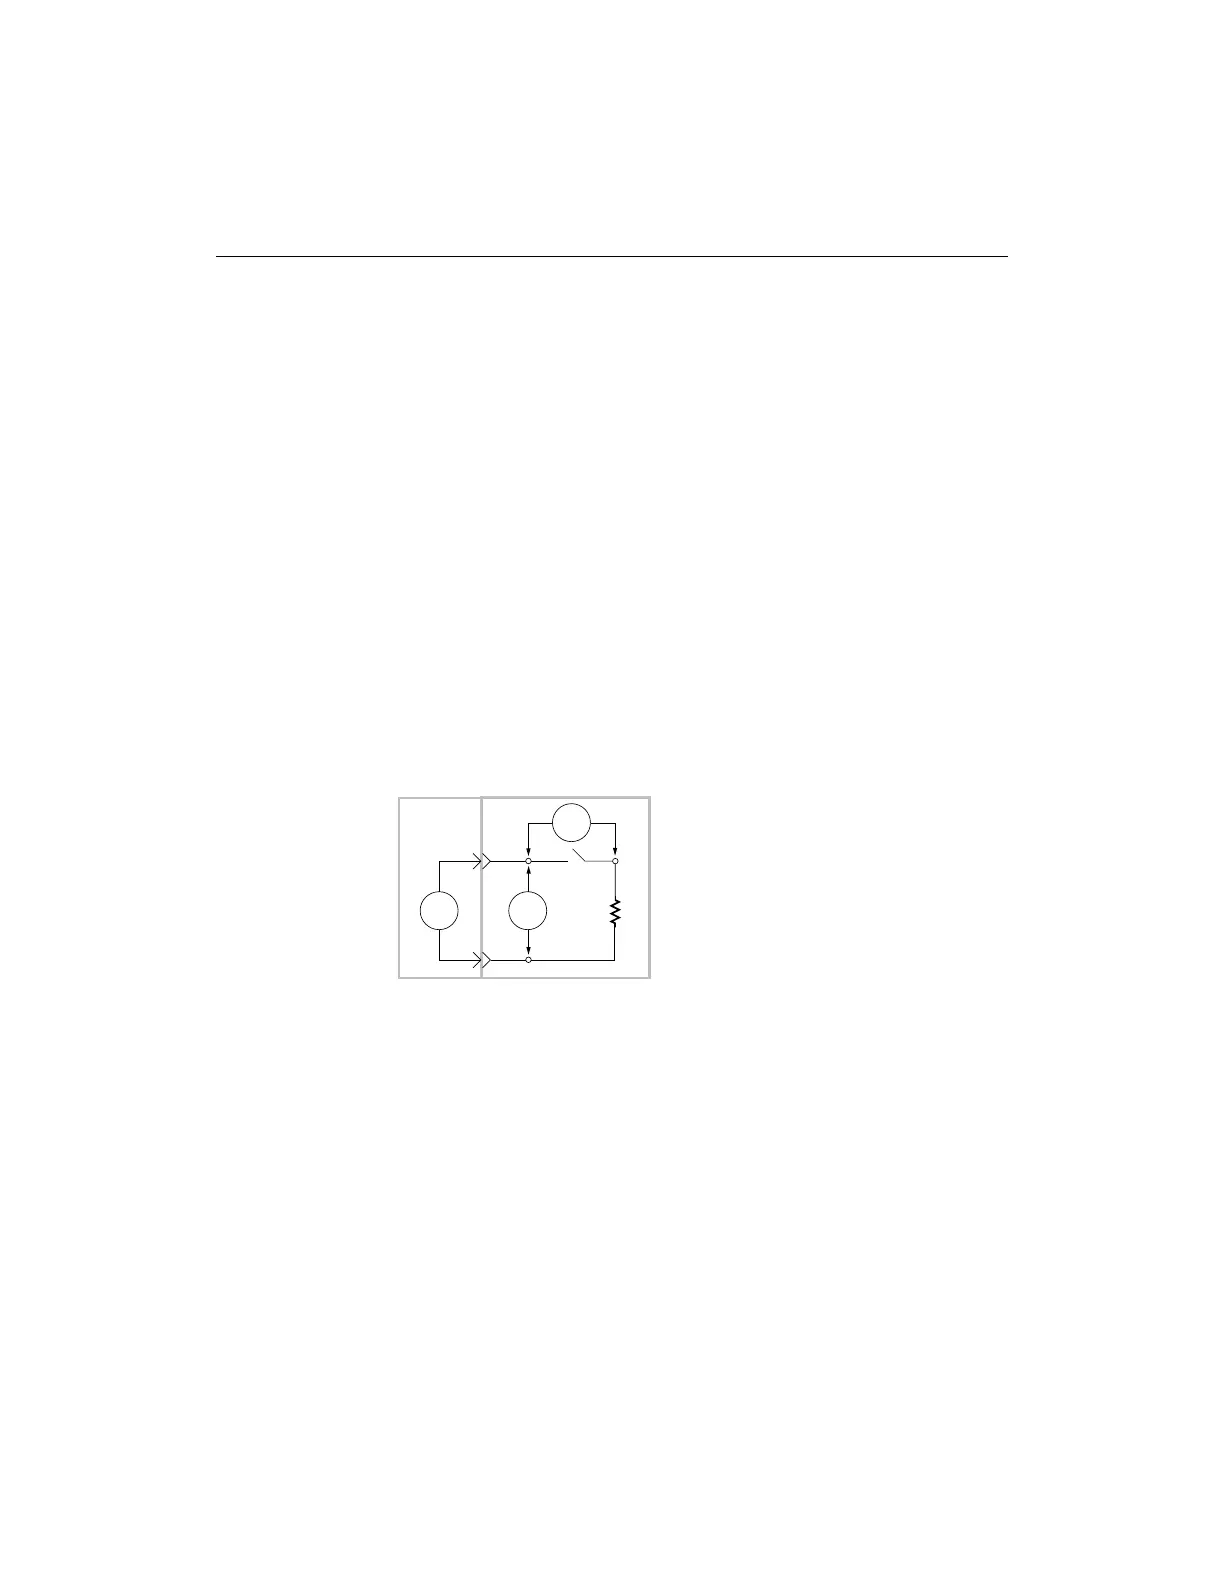
provided switches (see Figure B-2).
In the closed position, the switches on the adapter connect load
resistors to their respective power supplies. Open the switch to
measure current that corresponds to the supply being measured.
Figure B-2 Measuring Voltage and Current
4. To measure current, open the switch that corresponds to the
supply being measured and connect the external current
measuring equipment to the adapter, as shown in the preceding
figure. The HW-130 results that are displayed in the Auto-
Calibration dialog box should agree with the value measured by
the current measuring equipment by the following percentages:
● PV
cc
should be ±1%
● I
cc
should be ±10%
X4965
PVxx
Im
R
HW-130
Calibration Adapter
L
+
-
Vm