Getting Started
HW-130 Programmer User Guide 1-5
Caution: The Programmer may be damaged by static discharge into
the adapter connector or socket. Please follow normal Electro Static
Discharge (ESD) precautions when handling devices and the
programmer in order to avoid damage or misprogramming. Use a
ground strap when loading and unloading devices into the socket on
the adapter. Use caution when inserting or removing the socket
adapters.
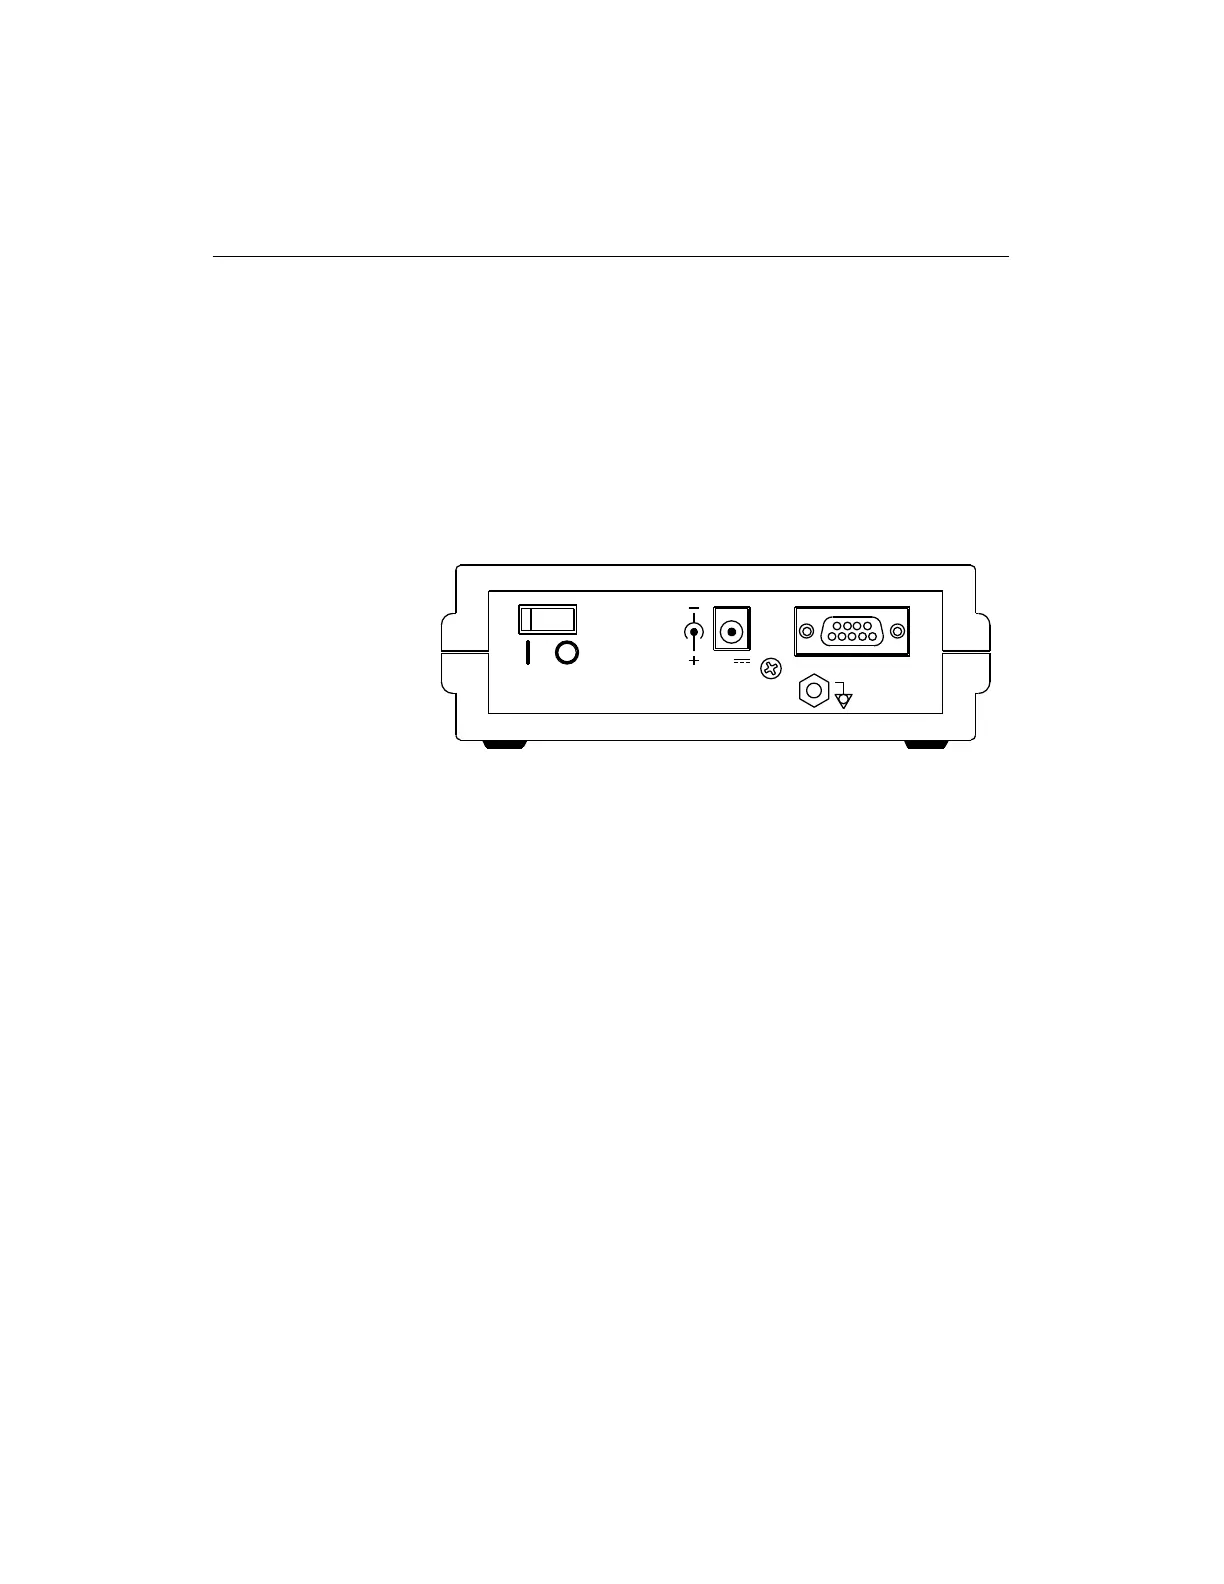
Figure 1-2 Rear Panel of Programmer
Installation
Use the following instructions to set up the HW-130 Programmer
using Figure 1-1 and Figure 1-2 to guide you.
1. Turn off the power switch on the rear panel of the programmer.
2. Connect the RS-232 cable to the DB9 or the DB25 serial port on
your PC or workstation and the programmer DB9 serial port.
3. Connect the AC adapter to the power connector input and AC line
source.
4. Install the appropriate socket adapter onto the programmer 96-
pin connector as shown in Figure 1-1. Ensure that there is no
device in the socket, or the power-on self-test (POST) will not
function.
5. Turn on the programmer power switch.
After the power is turned on, the POST takes a few seconds to test
the hardware. The Power Indicator LED flashes during the POST
and then remains lit.
RS-232
2A
9V