62
•
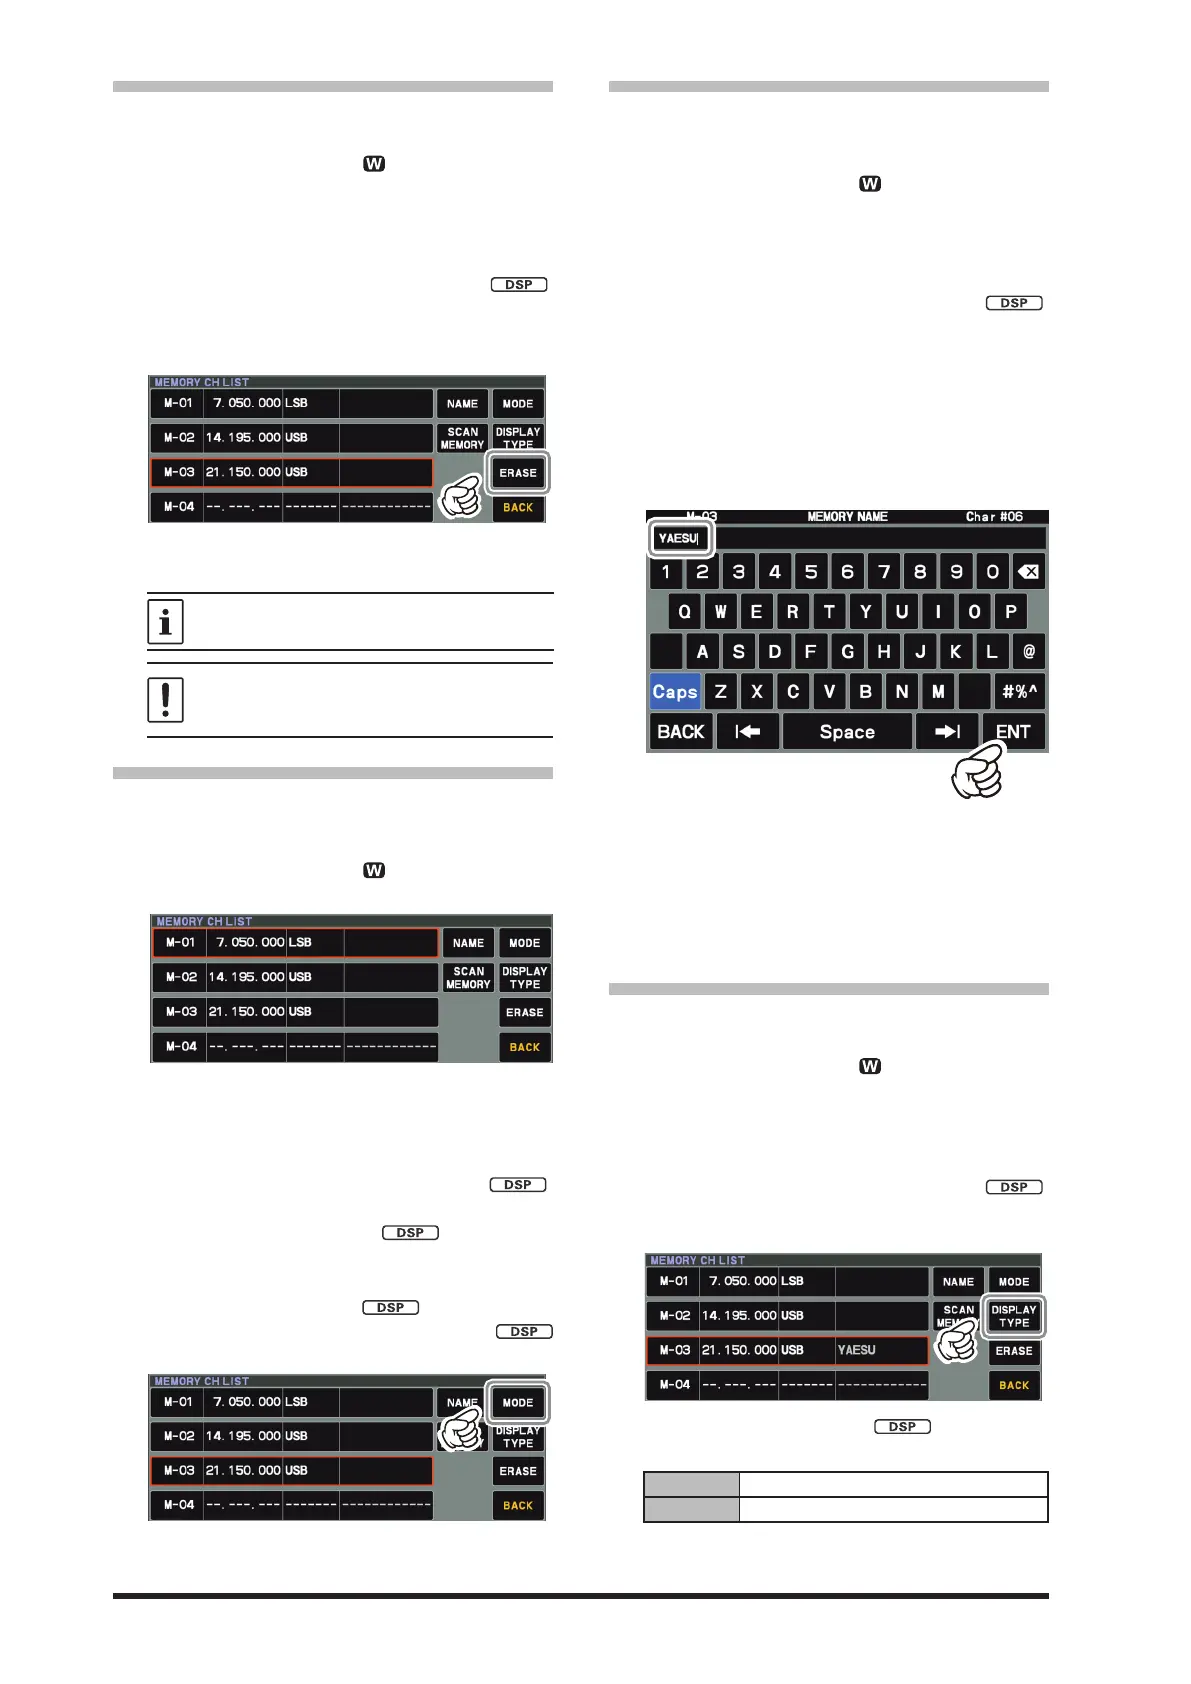
Erasing Memory Channel Data
The contents written to the memory channel may
be erased.
1. Press and hold the [V/M
] key.
The memory channel list will be displayed.
2. From the channel list, touch and select the
memory channel to be erased.
Alternately, the memory channel may be
selected by rotating the
[STEP • MCH / ]
knob.
3. Touch [ERASE] to clear the contents of the
selected memory channel.
4. Touch [BACK] to erase the contents of the se-
lected memory channel.
If you make a mistake and wish to restore a
memories contents, touch [RESTORE].
Memory channels “M-01” (and “5-01”
through “5-10”: U.S. version, “5-01” through
“5-07”: U.K. version) cannot be erased.
•
Check Memory Channel Status
Before programming a memory channel, the
current contents of that channel may be veried
without the danger of over-writing the channel.
1. Press and hold the [V/M
] key.
The memory channel list will be displayed.
2. From the channel list, touch and select the
memory channel and check, or change the
operation mode.
Alternately, the memory channel may be se-
lected by rotating the
[STEP •MCH / ]
knob.
● Press the [STEP • MCH / ] knob to en-
ter memory mode on the selected channel.
3. To change the operation mode, touch [MODE],
rotate the [STEP • MCH /
] knob to select
the mode then press the [STEP • MCH /
] knob.
4. Touch [BACK] to return to the previous
screen.
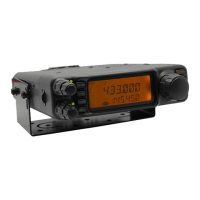
• Labeling Memories
Alphanumeric labels (“Tags”) may be appended to
memory channels, to aid in recollection of the
chan-
nel’s use (such as a club name, a location etc.).
1. Press and hold the [V/M
] key.
The memory channel list is displayed.
2. From the channel list, touch and select the
desired memory channel.
Alternately, the memory channel may be se-
lected by rotating the [STEP •MCH / ]
knob.
3. Touch [NAME] area on the screen.
The character input screen will be displayed.
4. Touch a character key on the display to enter
the letters, numbers, or symbols of the de-
sired label.
Up to 12 characters may be used in the cre-
ation of a label.
5. Touch [ENT] .
To add a label to another memory, repeat
steps 2 to 5 above.
6. Touch [BACK] to save the new settings and
return to normal operation.
• Displaying the Memory Tag
The “Frequency display” or “Alpha tag display”
format may be selected.
1. Press and hold the [V/M
] key.
The memory channel list will be displayed.
2. From the channel list, touch and select the
desired memory channel.
Alternately, the memory channel may be se-
lected by rotating the [STEP •MCH / ]
knob.
3. Touch [DISPLAY TYPE] area.
4. Rotate the [STEP • MCH / ] knob to se-
lect the desired display type.
FREQ Frequency
NAME Memory Tag
5. Touch [BACK] to save the new setting and re-
turn to normal operation.