Monitor and Cue functions
Reference Manual
106
6 CLEAR CUE button
Cancels all cue selections simultaneously. If MIX CUE mode has been selected, all of the
selected channels will be cleared.
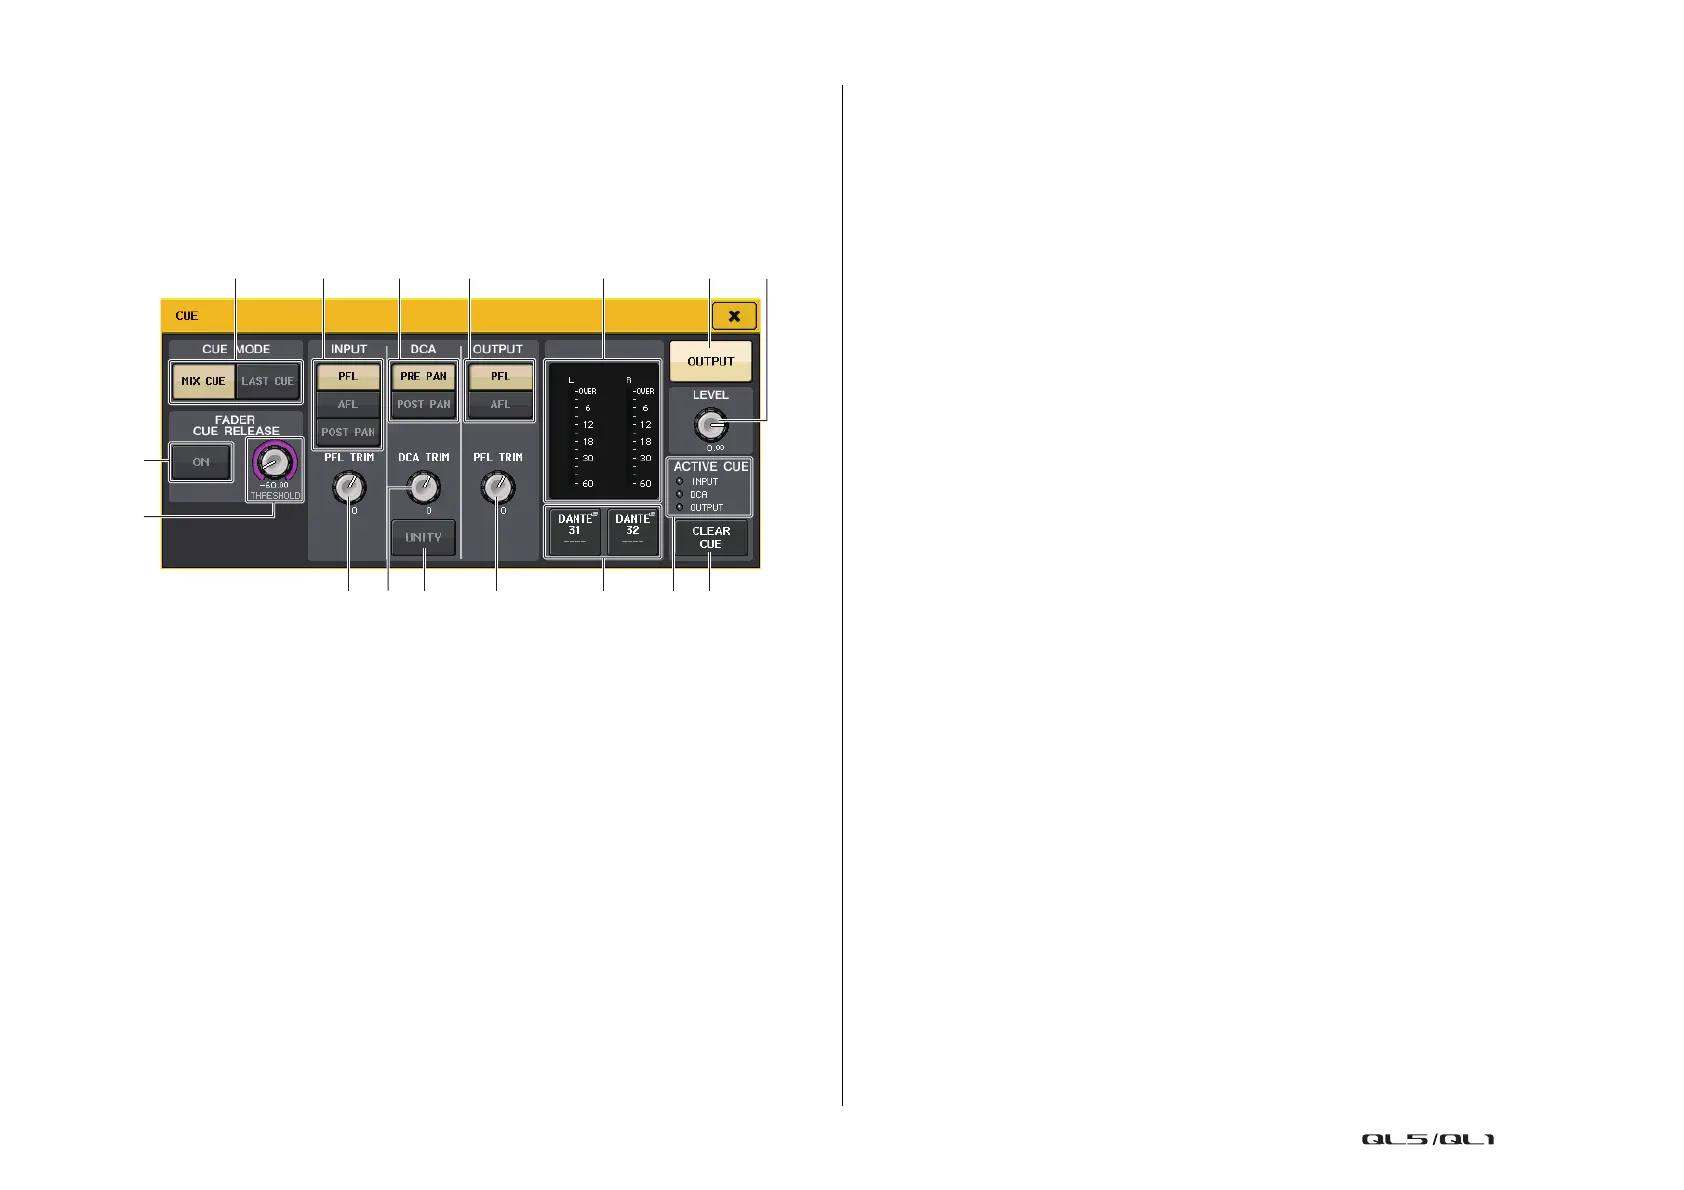
CUE window
You can make detailed settings for the cue. This window will appear when you press the
INPUT/DCA/OUTPUT CUE field.
1 CUE MODE buttons
Select one of the following two cue modes:
• MIX CUE
All selected channels will be mixed and monitored.
•LAST CUE
Only most recently selected channel will be monitored.
NOTE
All cue selections will be cleared if you switch between MIX CUE mode and LAST CUE mode in
the CUE MODE section.
INPUT CUE field
This field enables you to make settings related to the input channel cue.
2 Cue point select button
Sets the cue point to PFL (immediately before fader), AFL (immediately after fader), or
POST PAN (immediately after PAN).
NOTE
Be aware that if you turn on the POST PAN button, you will be unable to monitor signals sent to
the MONO bus from an input channel in LCR mode.
3 PFL TRIM knob
Indicates the monitor levels when PFL is selected. You can adjust the level using the
[TOUCH AND TURN] knob.
You can adjust the monitor levels in the range of -30dB to +20dB.
DCA CUE field
This section enables you to make settings related to DCA cue.
4 Cue point select button
Sets the cue point for the DCA group to PRE PAN (immediately before PAN) or POST
PAN (immediately after PAN).
5 DCA TRIM knob
Indicates the monitor level of cue signals from a DCA group. You can adjust the level
using the [TOUCH AND TURN] knob.
You can adjust the monitor levels in the range of -30dB to +20dB.
6 UNITY button
Turn on this button to monitor signals at the same volume level that was obtained when
the master level for each DCA group was set to 0 dB (unity gain).
OUTPUT CUE field
This section enables you to make settings related to output channel cue.
7 Cue point select button
Sets the cue point for the output channel to PFL (immediately before fader) or AFL
(immediately after fader).
8 PFL TRIM knob
Indicates the monitor levels when PFL is selected. You can adjust the level using the
[TOUCH AND TURN] knob.
You can adjust the monitor levels in the range of -30dB to +20dB.
Meter field
9
ACTIVE CUE indicator
Lights to indicate the type of cue currently being monitored (input: blue, DCA: yellow,
output: orange).
0 CLEAR CUE button
Cancels all cue selections simultaneously.
NOTE
If you press the CUE meter in the Function Access Area, all cue selections will be cleared.
A Meter section
This field indicates the output level of the cue L/R channels.
B CUE OUTPUT button
Switches the cue output on or off.

 Loading...


