6.5 Replacing the Cooling Fan
YASKAWA ELECTRIC EZZ010928 FSDrive-MV1000 Instructions 171
Periodic Inspection &
Maintenance
6
◆ Cooling Fan Replacement Procedure
Replace cooling fans by using the following procedure. The general steps are given here. For details, contact your
Yaskawa representative or the nearest Yaskawa sales office.
WARNING! Electrical Shock Hazard. Do not connect or disconnect wiring while the power for the main circuit and controls is on.
Failure to comply could result in death or serious injury. Before starting inspection, disconnect the power supply to all
the equipment. Internal capacitors retain some charge even after the main circuit power supply is turned off. After
shutting off the power, wait for at least the amount of time specified on the drive before touching any components.
■ Removal
1. Remove the drive ventilation cover’s mounting screws, then remove the ventilation cover at the top of the drive.
CAUTION! Take due care not to drop any of the mounting screws inside the drive.
2. Disconnect the cooling fan cables from the relay terminals.
3. Remove the cooling fan mounting screws.
4. Pull the cooling fan upward to remove.
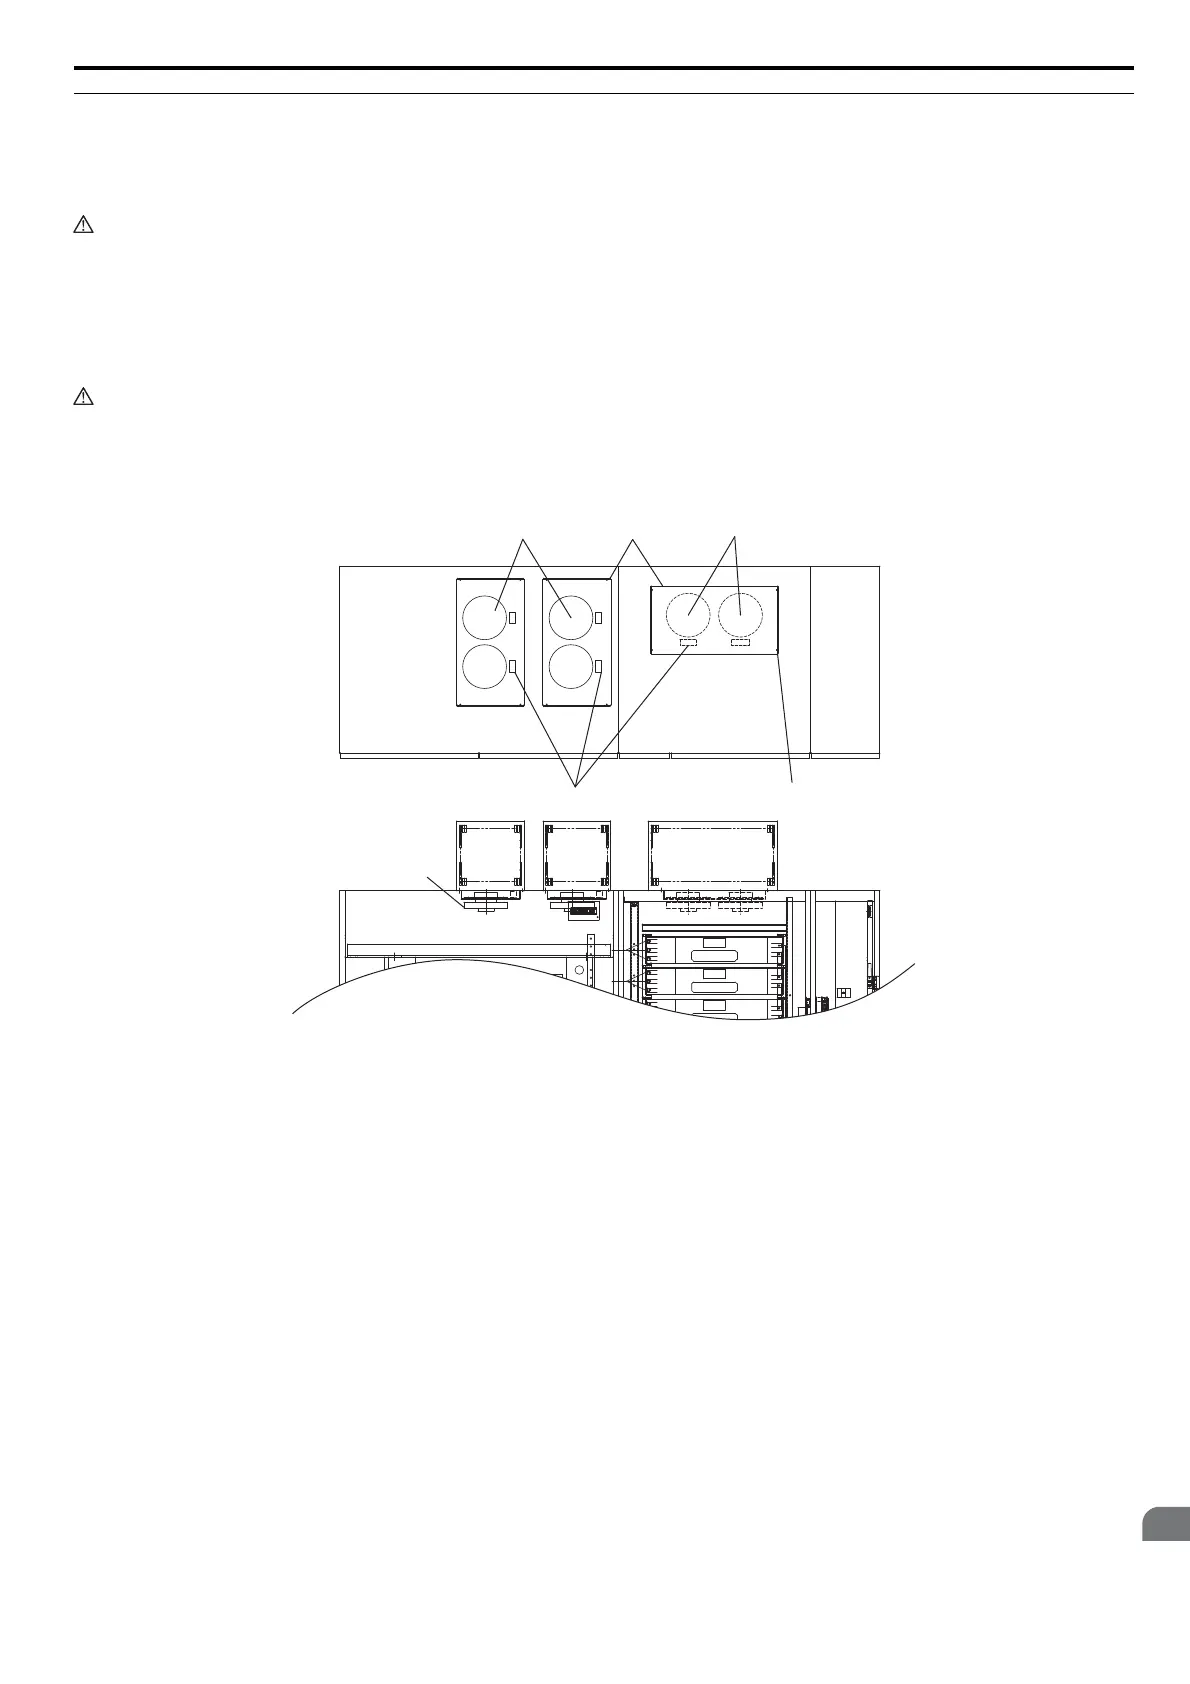
Figure 6.3
Figure 6.3 Cooling Fan Replacement (Drive: 6-kV Class, 1600 kVA)
■ Mounting
NOTICE: Arrange the cooling fan cables so that they will not make contact with, or be caught in, the fan blades.
1. Set the new cooling fan in place and tighten the mounting screws.
2. Reinstall the components in the reverse order of removal.
A – Cooling fan C – Ventilation cover mounting screws (M6)
B – Ventilation cover D – Relay terminal
C
A
AA
D
B
 Loading...