Do you have a question about the YASKAWA FS100 and is the answer not in the manual?
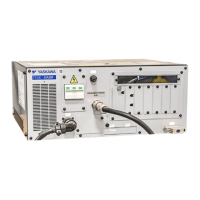
Describes the physical layout of circuit boards within the controller.
Illustrates the electrical power distribution path within the FS100 system.
Depicts the flow of control and data signals between system components.
Explains how security modes protect settings based on operator clearance and training.
Outlines routine checks for maintaining the FS100 and ensuring safe operation.
Details procedures for inspecting cooling fans to prevent overheating and malfunction.
Describes how to verify the functionality of emergency stop buttons for safety.
Explains how to confirm the proper operation of the three-position enable switch.
Covers procedures for checking the battery that backs up CMOS memory for user data.
Details the types of fuses mounted in the FS100 and their locations.
Provides replacement procedures for interior cooling fans EV2 and EV3.
Outlines the procedure for replacing the battery after a battery alarm occurs.
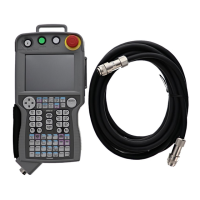
Lists and illustrates various accessories for the FS100 system.
Ranks and lists recommended spare parts for the FS100, including their manufacturers.
Explains the necessity and procedure for home position calibration after part replacement.
Describes how to use a check program to identify position deviations in the manipulator.
Details how to check for deviations by running a created check program.
Guides on setting a second home position for position confirmation and check points.
Explains how to check the system CPU version information.
Guides on how to check the manipulator model information.
Covers how to view and confirm the status of input and output signals.
Explains how to confirm and modify the status of output signals.
Details the procedure for changing the status of universal output signals.
Covers how to view specified input signals in both standard and simple windows.
Explains how to view specified output signals in both standard and simple windows.
Guides on viewing RIN input status via the RIN window.
Describes methods for searching signal numbers across various I/O types.
Explains how to search for relay numbers for different I/O types.
Details how to modify the names of universal input or output signals.
Explains how to check system operation status, such as power ON time.
Covers how to confirm alarm history across different alarm types.
Explains how to view and search I/O message history.
Describes how to check manipulator position data before and after power cycles.
Guides on checking the current position and selecting coordinate systems.
Explains how to monitor servo-related data for each axis.
Details how to change the monitor items displayed in the Servo Monitor window.
Classifies alarms by level and provides reset methods.
Explains how alarms are displayed and how to release them.
Describes how sub-data for axes, coordinates, and control groups are displayed for alarms.
Explains how to view detailed alarm information including content, cause, and measure.
Shows how to navigate between alarm windows and detail windows.
Lists various alarm messages with their causes and remedies.
Explains how errors are indicated and how to release them.
Lists general system and operation errors with their corresponding contents.
Lists errors related to concurrent I/O operations.
Lists errors encountered specifically within maintenance mode.
Discusses error messages that appear on the programming pendant due to unauthorized access.
Explains errors caused by unauthorized transactions or software failures.
Covers various other errors that might trigger a message box.
Describes the operation status indicated by the six LED spots on the CPU201R board.
Explains how the 7-segment LED indicates start-up status and error causes.
Details the operation status indicated by LEDs on the SF2300 board.
Explains the start-up status and error causes indicated by the 7-segment LED on the IFM board.
Details LED status during alarm occurrences in the communication system.
Explains the LED indicators during the start-up process.
| Manufacturer | YASKAWA |
|---|---|
| Model | FS100 |
| Programming Language | INFORM III |
| Weight | Approx. 15 kg |
| Protection Class | IP20 |
| Control Method | Digital Servo Control |
| Communication Protocols/Interface | Ethernet, DeviceNet, Profibus |
| Power Supply | 200-230V AC, 50/60Hz |
| Operating Temperature | 0°C to 45°C |
| Ambient Humidity | 20% to 80% (non-condensing) |