2.2 Mechanical Installation
YASKAWA ELECTRIC EZZ010928 FSDrive-MV1000 Instructions 43
◆ Installing Cooling Exhaust Covers
• Cooling exhaust covers to be fitted at the top of the drive are delivered as accessories.
Install the cooling exhaust covers provided as accessories after installing the drive.
• Bolts for securing the cooling exhaust covers are provisionally set in the drive where the covers are to be installed.
Remove these bolts and install the cooling exhaust covers with them.
• The number of locations where the cooling exhaust covers should be installed differs depending on the model of the
drive.
• When transporting the drive or installing the cooling exhaust covers, be careful not to damage the cooling fans.
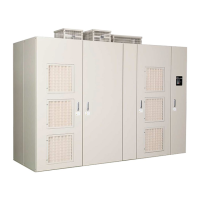
◆ Installing a Drive on a Floor
The table below shows the dimensions and the number of mounting holes for each input voltage when installing a drive
on a floor.
Use mounting bolts and nuts of M12 diameter to secure the drive.
Even in normal installation environments where there is no vibration, secure the drive with bolts in all the designated
holes.
Table 2.9 Drive Installation Dimensions, and Sizes and Numbers of Mounting Holes
Voltage
Class
(kV)
Model
CIMR-MV2
Bottom
Dimension
Drawing
Installation Dimensions (mm)
Mounting Holes
N - φ (mm)
W1 W2 W3 d
2
A6AA052 Figure 2.11 720 – – 980 6 - φ17
A6AA058 Figure 2.11 720 – – 980 6 - φ17
A6AA077 Figure 2.11 720 – – 980 6 - φ17
A6AA093 Figure 2.11 720 – – 980 6 - φ17
A6AA102 Figure 2.11 720 – – 980 6 - φ17
A6AA115 Figure 2.11 720 – – 980 6 - φ17
A6AA135 Figure 2.11 720 – – 980 6 - φ17
A6AA160 Figure 2.12 730 780 – 1220 12 - φ17
A6AA180 Figure 2.12 730 780 – 1220 12 - φ17
A6AA205
<2>
––––––
A6AA220 <2>
––––––
A6AA280 <2>
––––––
A6AA330
<2>
––––––
A6AA390
<2>
––––––
A6AA440
<2>
––––––
A6AA505 <2>
––––––
A6AA550 <2>
––––––
A6AA600 <2>
––––––
 Loading...