6-1
IM80B80T10E 21th Edition : Jul.1,2007-00
< 6.INSTALLATION >
6. INSTALLATION
CAUTION
Do not use a megger for inspection purposes except for on-board power supply terminals.
Otherwise, the equipment may be damaged.
6.1 Precautions on Installation
6.1.1 Seawater Valve and Measurement Rod
(1) Install the sensor near the bow-to-stern line and pivoting point.
(2) The bottom of the ship's hull must be at and smooth.
(3) There must be no water inlet or outlet disturbing the ow of water near the sensor.
(4) There must be not protrusions in the area around the sensor on the bottom of the ship's hull :
5m toward the bow; 2.5 m to the right and left; 2.5 m toward the stern.
(5) (a) Conrm the sensitive unit should be projected by 50 mm (30 mm for HS1) from ship's bot
-
tom after installation of sea valve while the vessel. (at Ø35 sensor)
(b) Following maintenance space should be kept to pull out the rod meter. The length of rod-
meter + 450 mm from the top of tank. (at a double bottom)
(c) When pull out the rod meter, do not remove the chain setting until the sea valve is closed
perfectly. Conrm maintenance space to pull out the rod meter. (at Ø35, Ø48, Ø70 sen-
sor)
(6) Align the bow mark on the measurement rod with the bow.
(7) Do not apply a lubricant or oil to the electrodes. This may cause an error.
6.1.2 Junction Box
(1) Allow for a length of between the measurement rod and junction box long enough for the
measurement rod to be pulled up easily during maintenance.
(2) Use the supplied cable between the measurement rod and junction box.
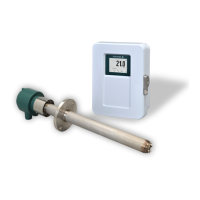
6.1.3 Master Unit
(1) Install the master unit where operation and maintenance can be performed easily (the main
power switch is on the master unit).
(2) Connect the ground terminal of the case to the ship.
(3) Do not use a megger except when checking the on-board power supply terminals.
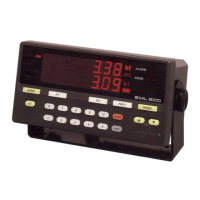
6.1.4 Indicator
(1) General Install the indicator where it can be seen clearly.
(2) LR522 Connect to TB1-11, 12, set output.
Refer to 6.3.3 for the setting of output.
 Loading...