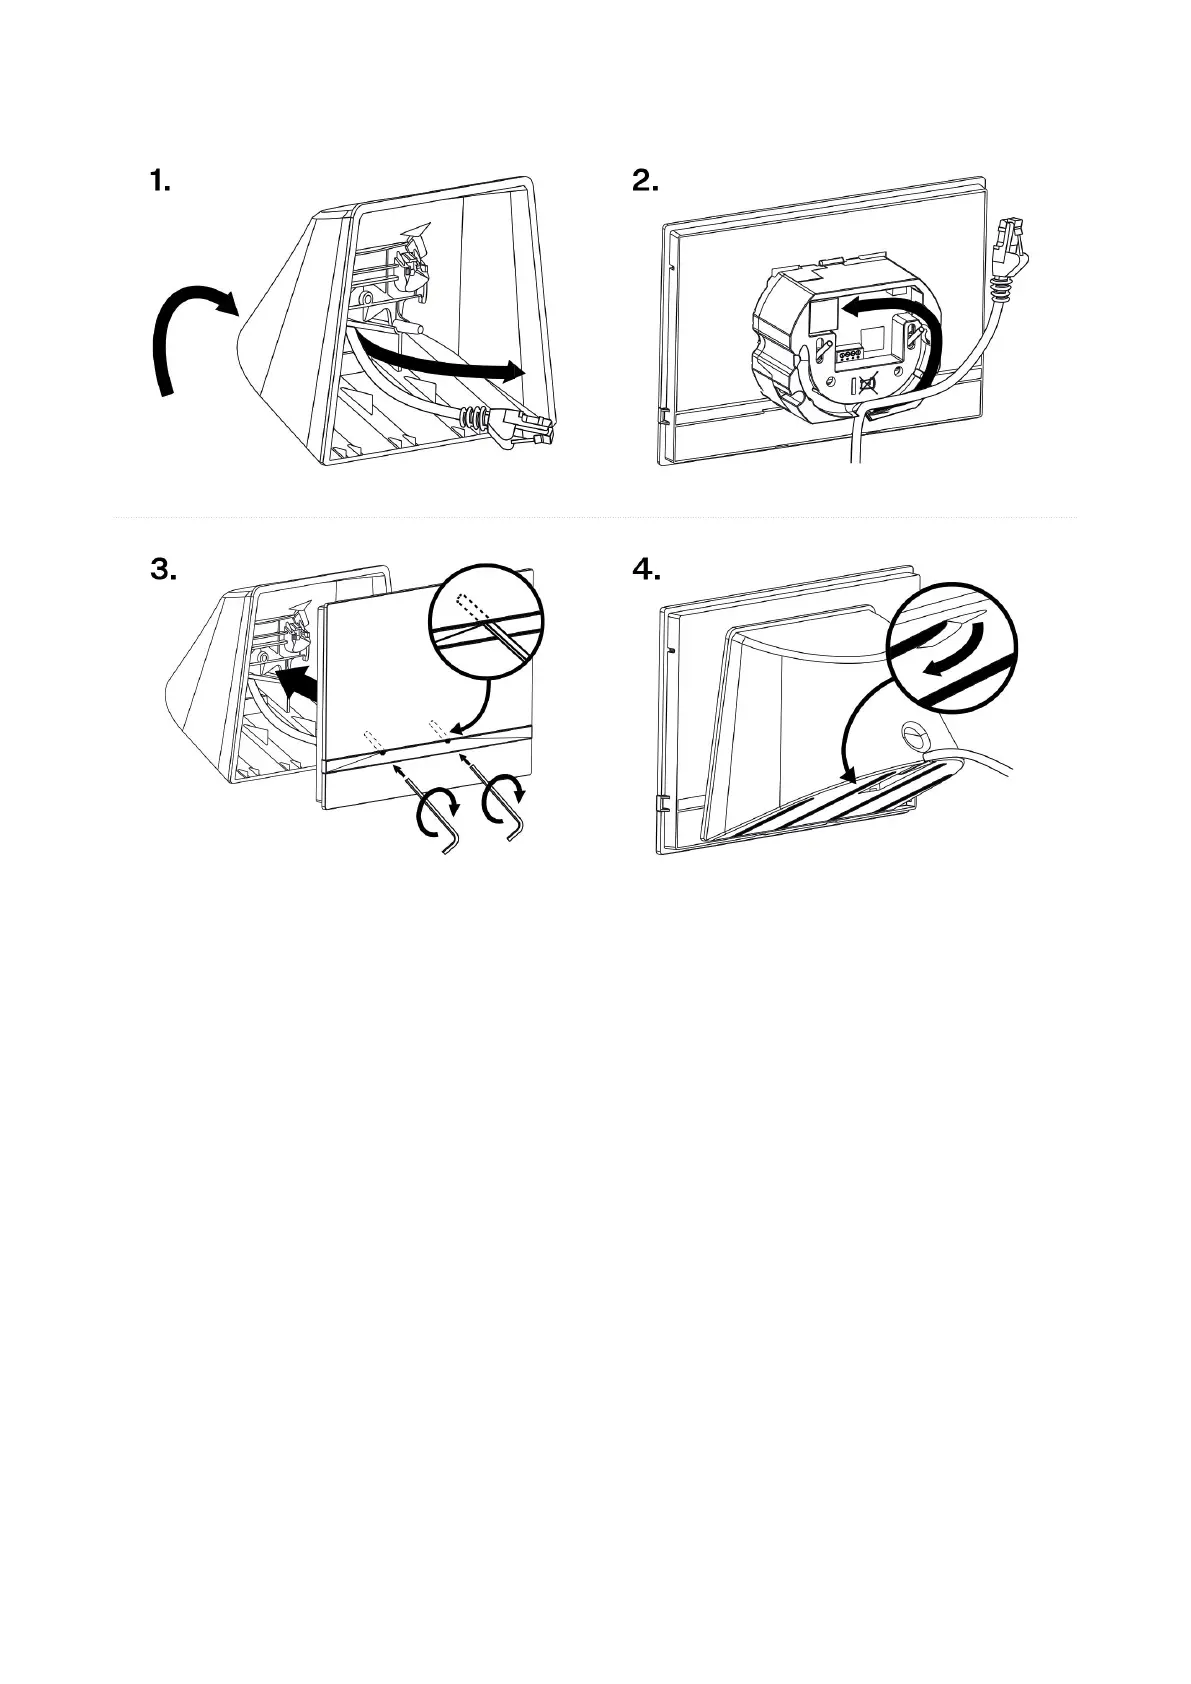
1. Pull the cables through the hole in the stand bottom.
2. First connect the green power supply/doorbell connector to the device. Connect the LAN connector.
Install the cables carefully into the pre-prepared groove on the back side so that they cannot get in the
way and prevent free movement in the final installation stage.
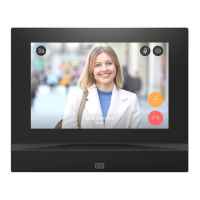
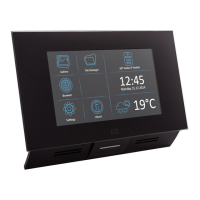
3. Put the device on the stand making sure that it fits onto the centering pins. The alignment of the stand
bottom edge and the device bottom strip means that the device is installed properly. Fit the device to the
stand by tightening the screws through the front side. Use a hexagon key wrench for tightening. Tighten
the screws gently.
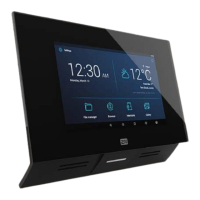
4. Remove the protective foil from the antislip belts on the stand bottom and install the device on a
selected place.
Now the device is ready for basic operation. It is necessary to perform software configuration (p. 25) to
achieve a full functionality of the device.
Power Supply
Power supply must comply with PS1 class output.
You can feed 2N Indoor Compact as follows:
1. Use an Ethernet cable connected to a PoE supply or PoE supporting Ethernet switch/router.
2. Using a 12 V / 1 A DC power adapter connected to the backside terminal board.
It is recommended that the power adapter be connected to the mains via a UPS and reliable overvoltage
protection.
Mechanical Installation
14