773D SYSTEMS, INC.
10. Reconnect the lter to machine in this order:
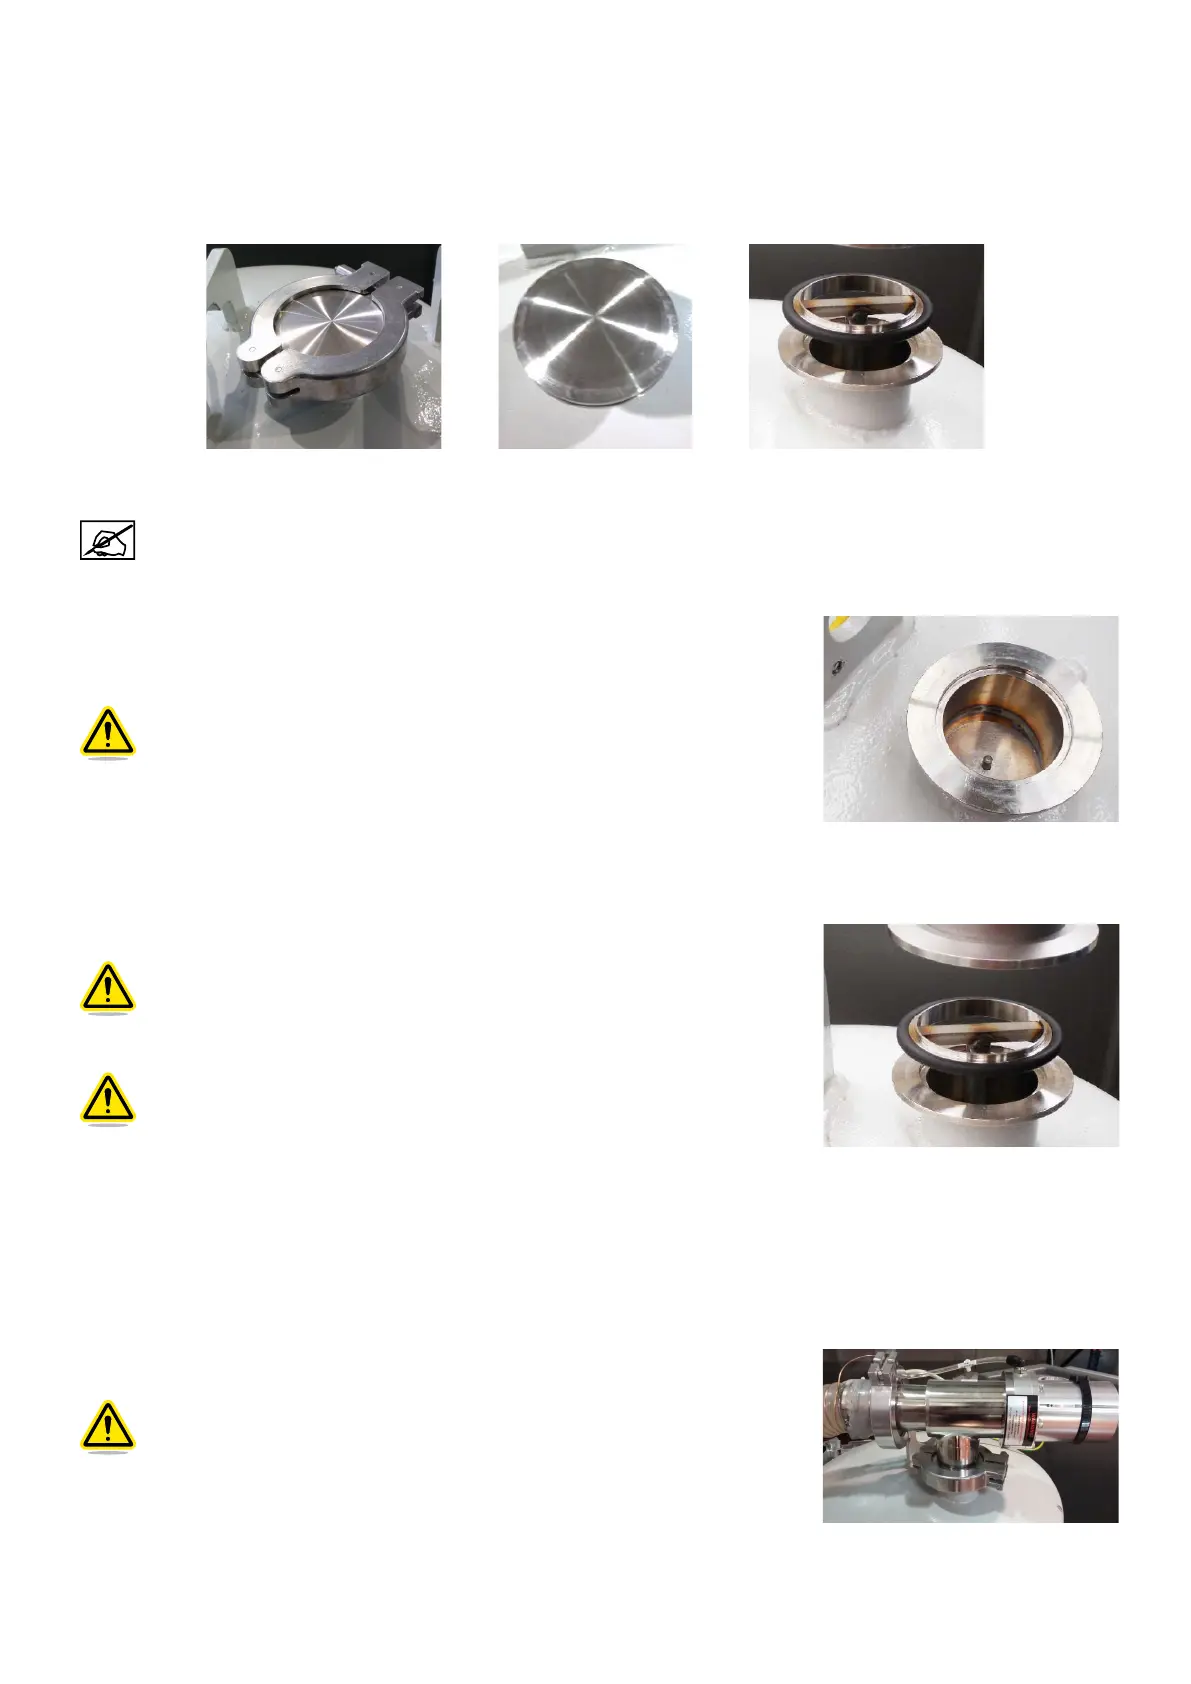
• Remove the closing set of the lter outlet port (top connection):
- step a: remove the clamp,
- step b: remove the cover lid,
- step c: remove immediately the centering ring with stand-off tube.
The lter is charged with argon gas. It is normal for some of the argon gas to be expelled from the lter
when the centering ring is removed.
• Inspect the internal valve and make certain the valve is closed after the
centering ring is removed.
WARNING: DO NOT USE THE FILTER IF THE VALVE WILL NOT CLOSE.
• Install the centering ring with standoff tube in the lter outlet port. The stem of the centering ring must be placed
directly on the locating pin of the internal valve.
Caution : make sure to install the special centering ring with stand off
tube in the right orientation (tube should point to the lter vessel).
The tube will open the closing mechanism inside the vessel. Proceed
immediately to the lter outlet port connection, in order to prevent too
much air coming into the lter vessel.
Caution : make sure to connect with the outlet pneumatic valve. Do not
mix up the valves. The valve at the top of the vessel is the outlet, and
the valve at the side of the vessel is the inlet.
• Press the outlet pneumatic valve directly on top of the centering ring.
• The internal valve is spring loaded. Push the outlet pneumatic valve down against the centering ring until the
anges meet.
• Install the clamp to secure the lter outlet connection (tightening torque 4Nm +0/+0.5).
Caution : make sure to secure the closing set by tightening the clamping
according to the specied torque.
• Store the cover lid in a safe area. This cover lid will be needed to close the dirty lter on the next replacement (for
example, in a closed bag attached to the cart).
Step c : centering ring removalStep b : cover lid removalStep a : clamp removal