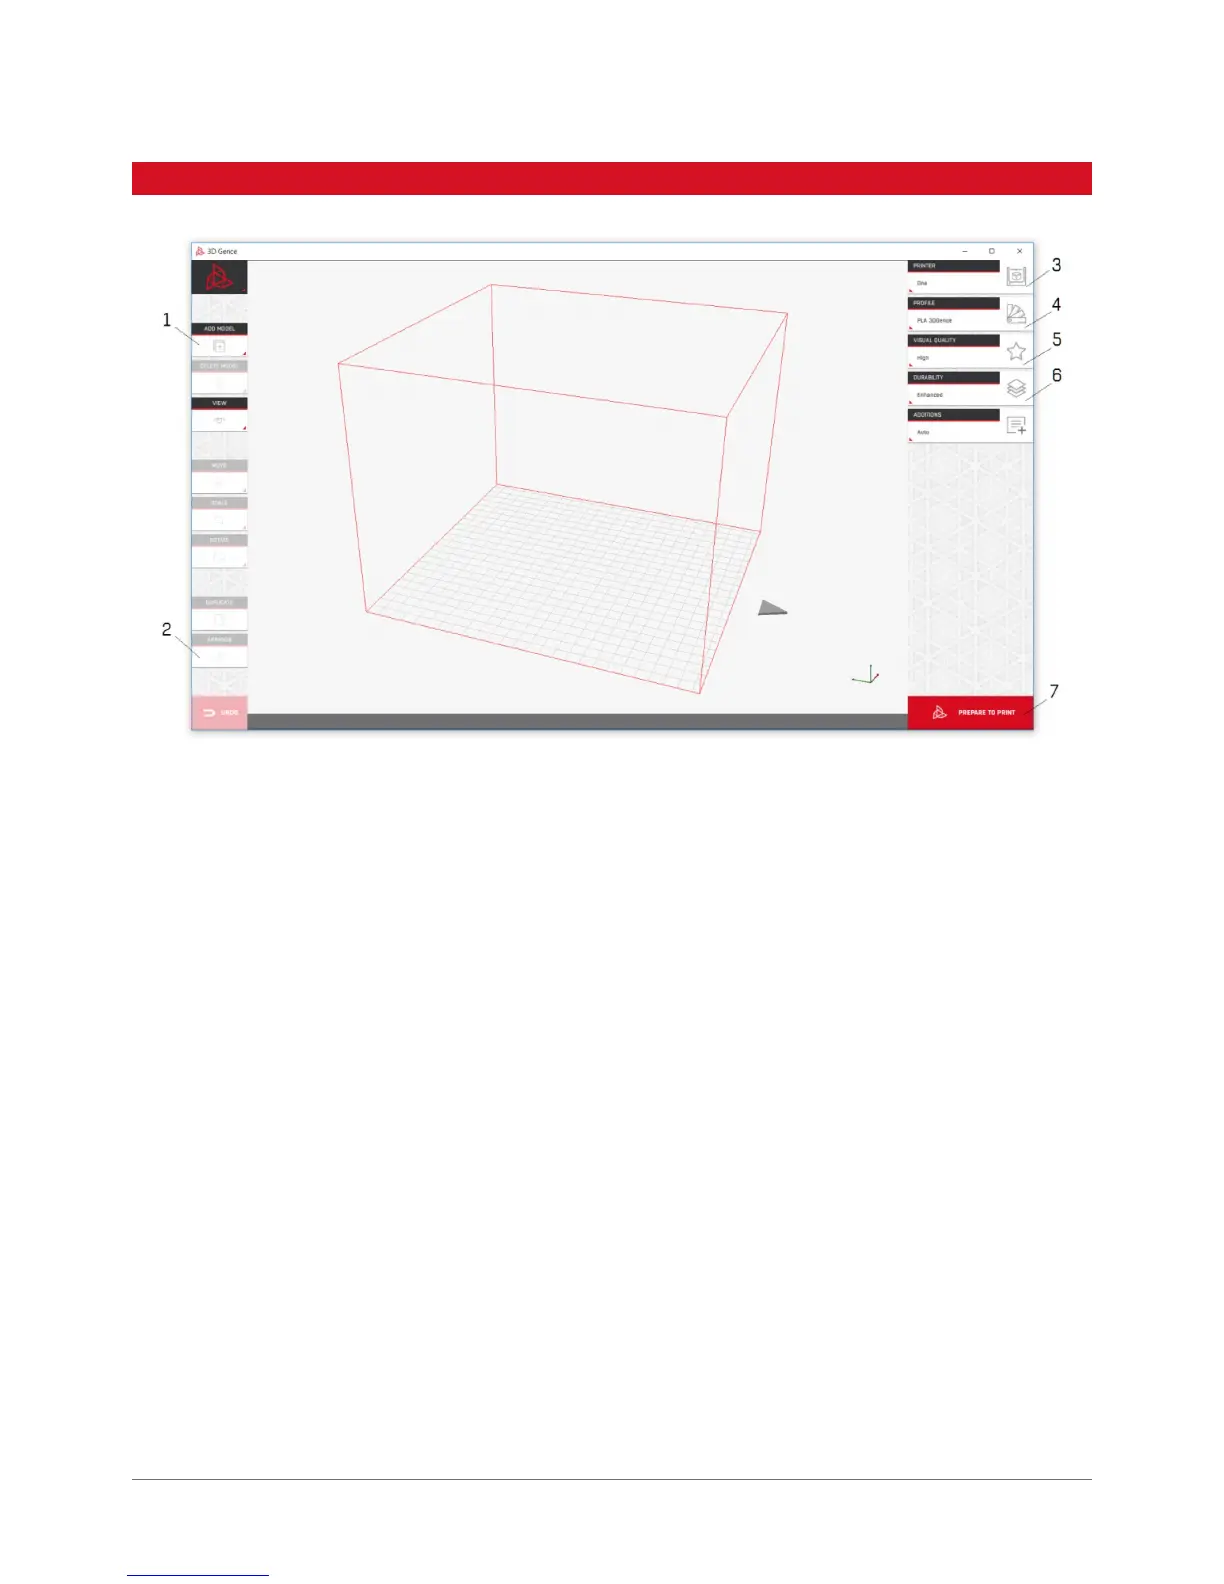
1. Load .stl le of your solid or solids with the „Add model” button or by dragging the les to the main software window.
2. Ensure the models are arranged properly in the workspace with the „Arrange” button.
3. Select the printer you want to use to make your model.
4. Select the material you want to use to make your model.
5. Select the visual quality expected (better quality means longer printing time).
6. Select your models desired durability.
7. Prepare your le with the „Prepare to print” button.
8. Save the executable .gcode le to SD card with the „Save File” button which replaces the „Prepare to print” button in
the bottom right corner.
9. The le can be read out in the printer control panel. The le will be accessable from the printers „Print” menu.
3. QUICK START
 Loading...