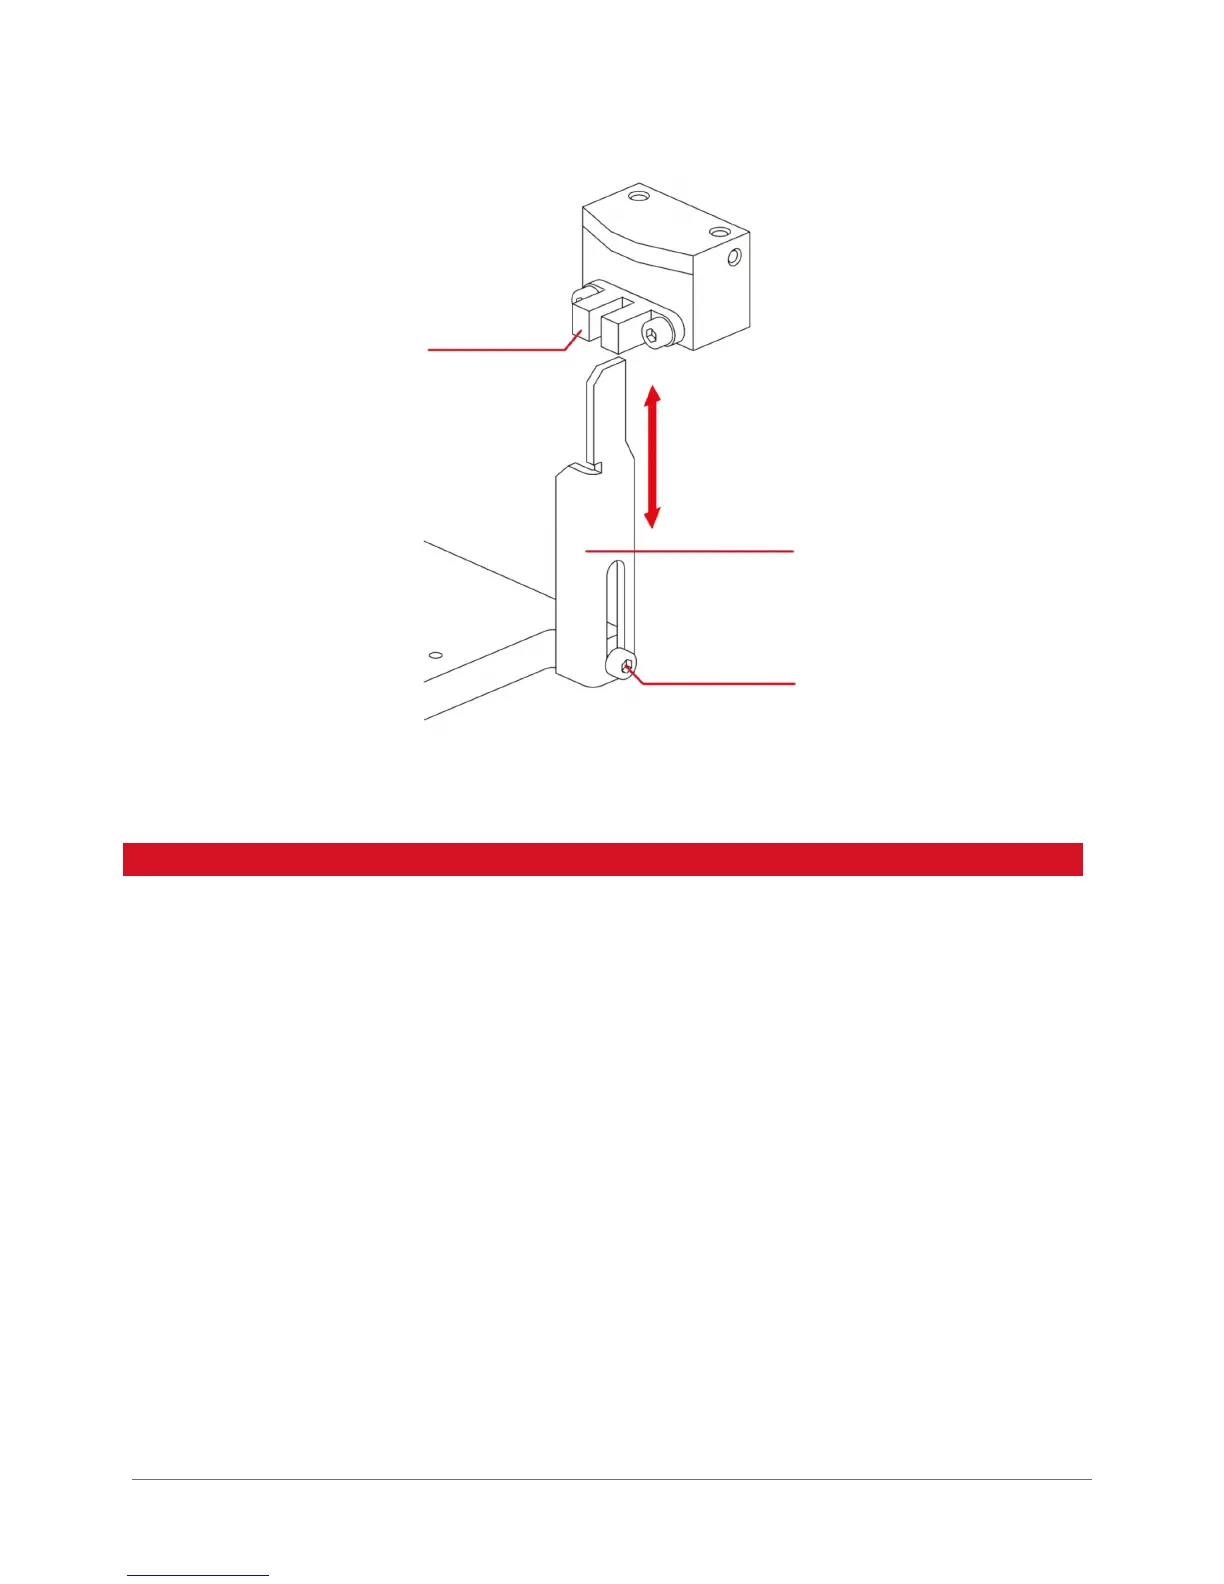
Fig. 25. Z axis endstop and stopper located on the right of the bed.
4. HANDLING THE MATERIAL
3DGence INDUSTRY F340 printer is tted with the Smart Material Manager system that facilitates working with various
plastics. Below there are procedures of installing and removing laments for recommended materials provided in the
Base of Certied Materials. It is also possible to indicating the installed material manually, which is why it is necessary
to carefully follow the instructions provided below.
4.1. Installing the material
1. Make sure that there is no material installed on the extruder holder where you want to install your new material. It also
applies to the presence of lament in the extruder and PTFE tube that extracts the material from the extruder. (It does not
apply to the rst material installation.) If the material is installed, at rst use the „Filament removal” option, its procedure
description is available below.
2. If no fragments of previously used material are present in the holder or in PTFE tubing, the material installation should
be continued. From the MATERIAL STATUS level select the LOAD MATERIAL option located under the specic extruder (0
or 1). A semi-automatic manager is started which, by displaying successive commands, leads the user through the rest
of the process.
3. The rst step of the wizard is to indicate the selected material type. It can be done in two ways:
1. If the material comes from the Base of Certied Materials:
Move the NFC sticker on the spool closer to NFC antenna on the side wall of the device. Wait until the display shows a
conrmation of successful material loading.
2. If the material does not come from the Base of Certied Materials:
1. Choose the option „Select Material Manually”.
2. From the list presented choose a polymer type corresponding to the installed one.
Z-axis endstop
adjusting screw
Z-axis limit switch