Pannoramic SCAN II 2.2.0 User’s Guide 5.2.2 Microscope Control Panel
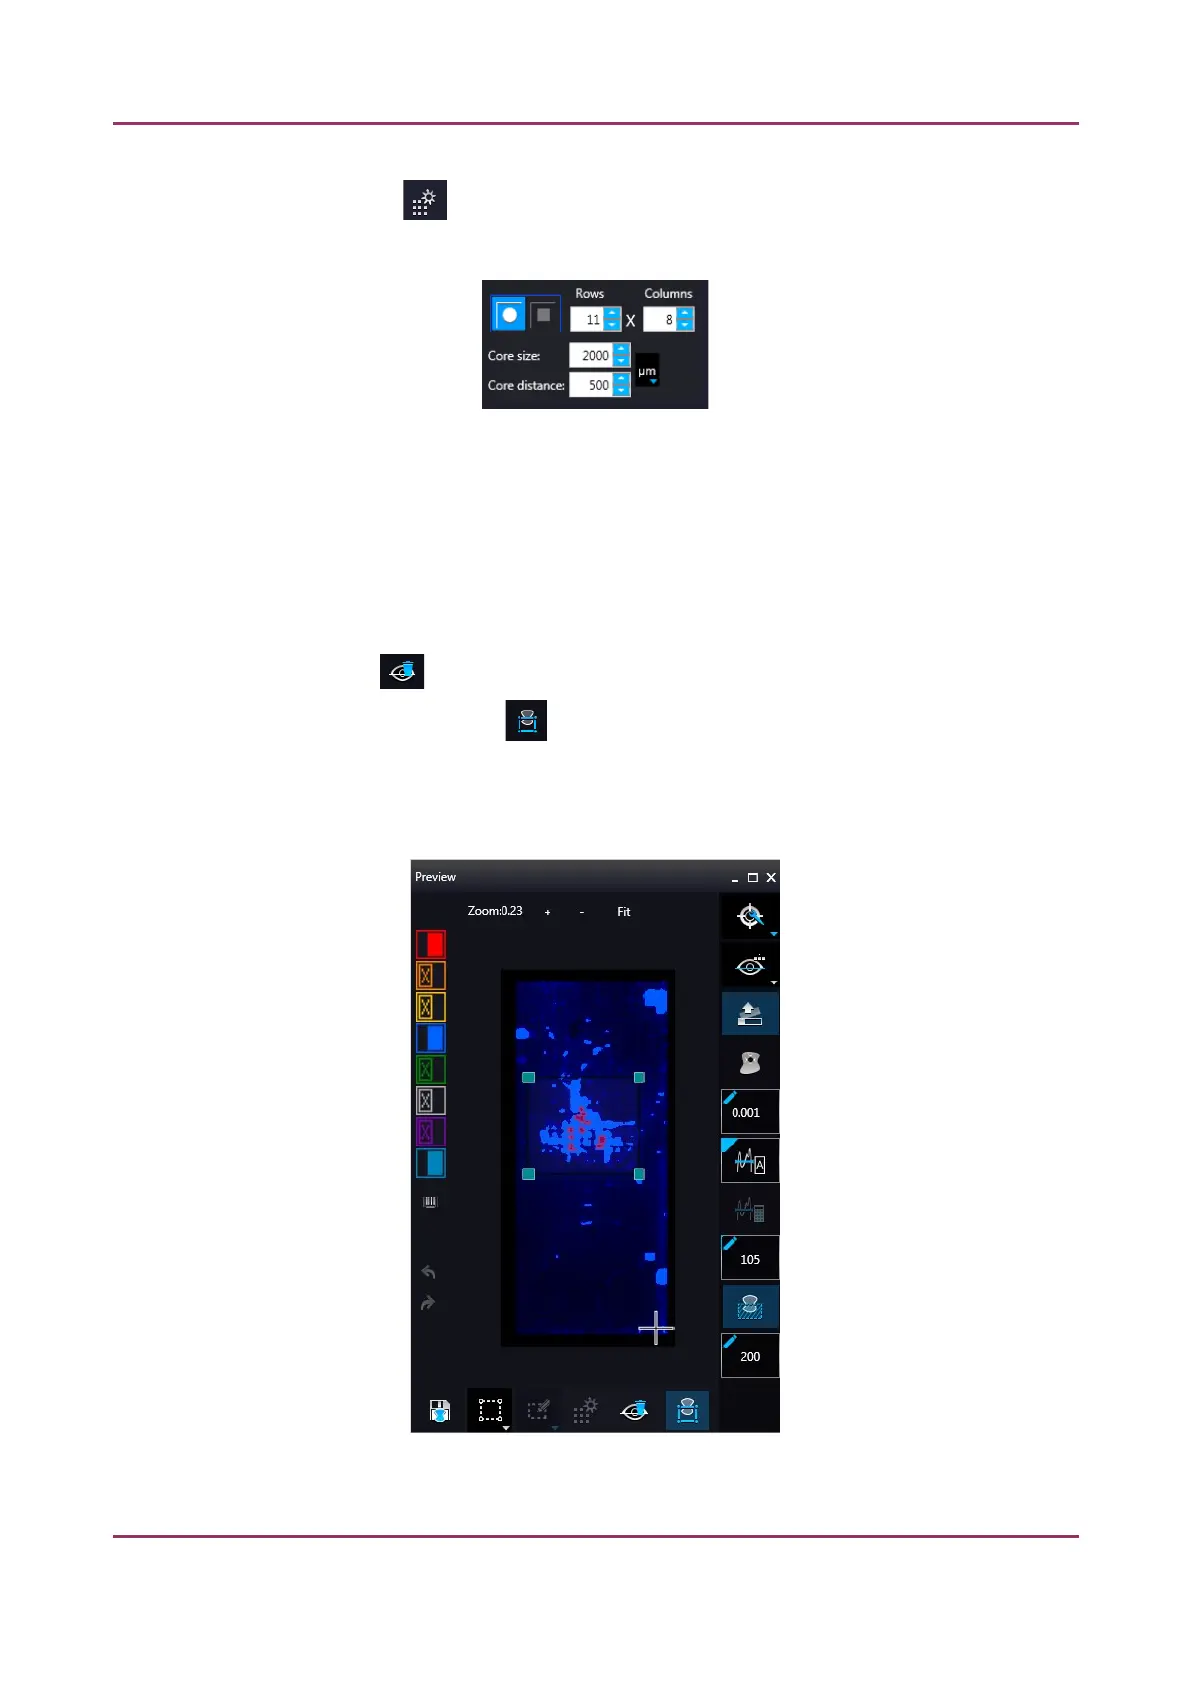
• TMA Grid Setting : This function is enabled only if a TMA grid has already been placed
on the preview image. Set grid parameters (row and column numbers) and spot shape (round
or rectangle).
Figure 49 – TMA tool: Grid selector
Delete TMA grid by clicking the X at the top right corner, and rotate grid by clicking the icon
at the bottom right corner. Enter the number of rows and columns in the Rows and Columns
fields or select the appropriate values with the arrows. Enter the distance between two spots
on the X and the Y axis in µm in the Core distance fields or select the appropriate values with
the arrows. Enter the average diameter of the spots in the Core size field or select the
appropriate value with the arrows.
• Clear scanmap : The entire scanmap area will be cleared and reset to default.
• Use selection box restriction : If selected, only the area inside the box is scanned. It is
useful if you only want to scan the area that is equivalent with the size of the coverslip, so
external specks will not be scanned. The preview image shows the area that will be digitized
with a red and/or an orange mask. If the Use selection box is enabled, there is a black frame
displayed in the image.
Figure 50 – Use selection box
January 24, 2020 - Rev. 2 3DHISTECH Ltd. 91(156)