NoteAction
If the robot is to be calibrated with fine
calibration:
Remove all external cable packages
(DressPack) and tools from the robot.
Removing motors axes 2 and 3
Use this procedure to remove motors axes 2 and 3.
The procedure is the same for both motors.
NoteAction
Decide which calibration routine to use, and
take actions accordingly prior to beginning the
repair procedure.
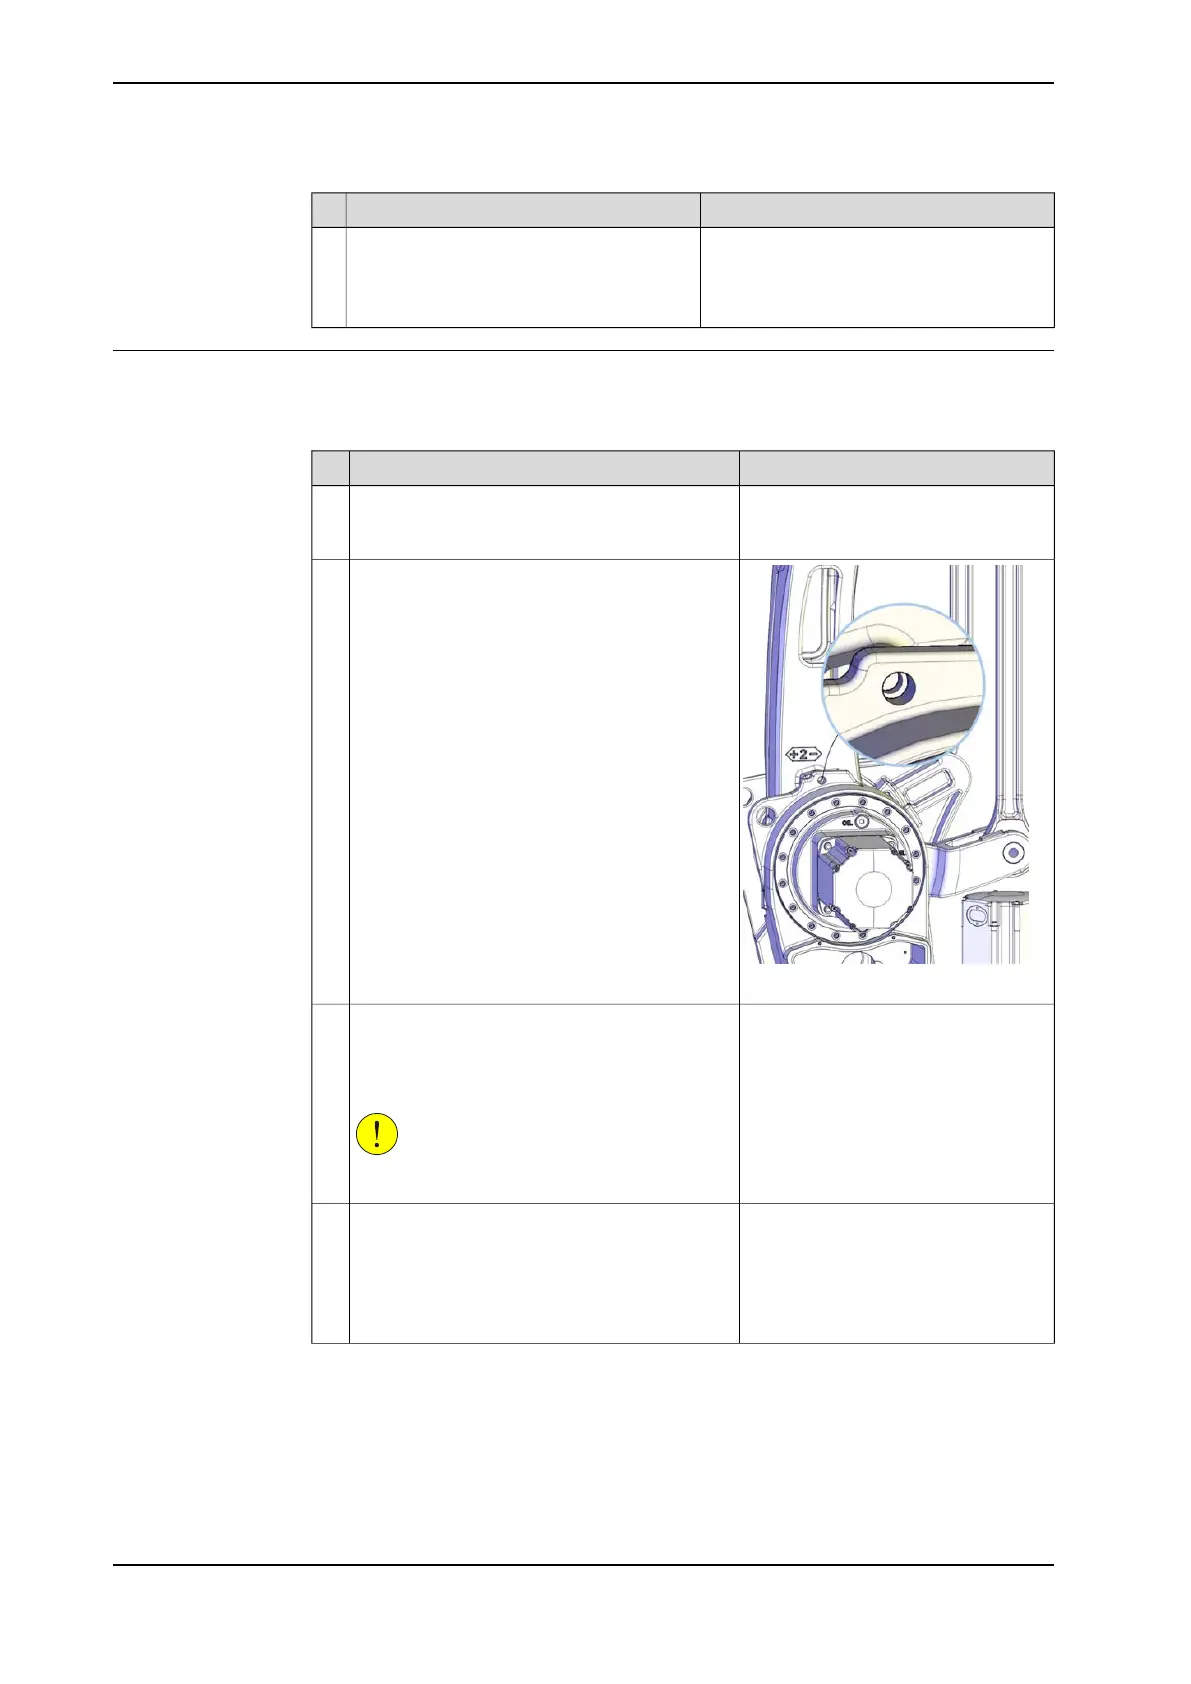
1
xx1000001179
Run the robot to a position close enough to its
calibration position, to allow the lock screw to
be inserted into the hole for lock screw.
2
See figure above.Lock the lower arm by inserting the lock screw
into the hole of the frame.
3
This is done in order to secure axis 2 from col-
lapsing when the axis 2 motor is being removed.
CAUTION
Tighten by hand!
Run axis 3 to the end position so that it rests
against the mechanical stop. Release the brake
of axis 3 in order to set the weight of axis 3
against the mechanical stop.
4
This is done in order to secure axis 3 from col-
lapsing when the axis 3 motor is being removed.
Continues on next page
296 Product manual - IRB 460
3HAC039842-001 Revision: P
© Copyright 2012-2018 ABB. All rights reserved.
4 Repair
4.5.2 Replacing motors, axes 2 and 3
Continued

 Loading...


