Refitting the axis 3 gearbox
Use this procedure to refit the axis 3 gearbox.
NoteAction
Slide the gearbox carefully on the guide pins
to its mounting position, using an overhead
crane (or similar)..
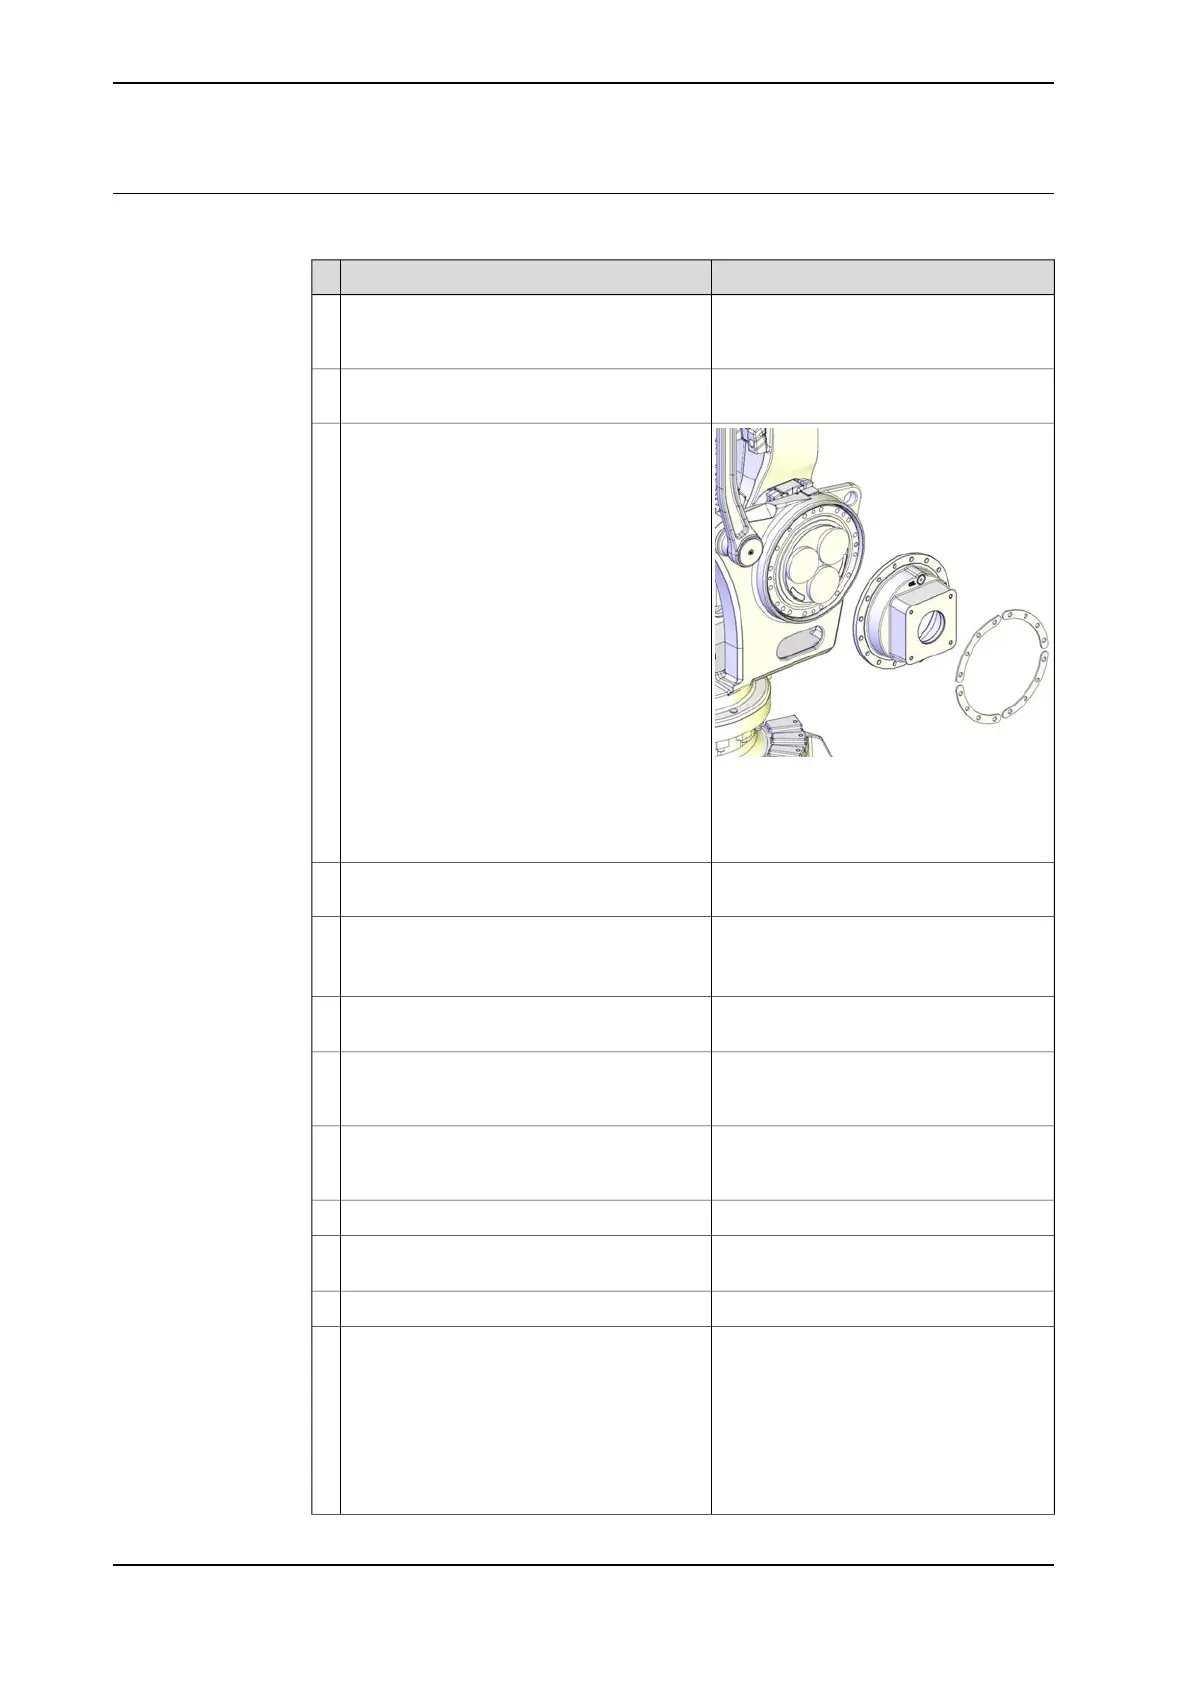
1
Use a crank to move the gearbox in order to
find the holes for the attachment screws.
2
xx1100000219
Secure the gearbox and the motor flange to
the frame with the attachment screws and
washers.
3
Attachment screws: M12x60 quality 12.9
gleitmo (16 pcs)
Tightening torque: 120 Nm
Remove the guide pins and replace them with
the remaining attachment screws.
4
Attachment screws: M12x40 quality 12.9
gleitmo (21 pcs)
Secure as many attachment screws that is
possible to fit in this position, in the parallel
arm and secure the axis 3 gearbox.
5
Tightening torque: 120 Nm
See Replacing motors, axes 2 and 3 on
page 294.
Refit the axis 3 motor.6
Tightening torque: 120 NmJog axes 2 and 3 to a position where the re-
maining attachment screws can be fitted and
secured.
7
Jog axis 3 (the parallel arm) very carefully to
the position where the parallel rod can be
refitted to the parallel arm.
8
See Replacing parallel rod on page 257.Refit the parallel rod.9
See Performing a leak-down test on
page 140.
Perform a leakdown test.10
Draining, axes 2 and 3 on page 128Refill the gearbox with oil.11
Pendulum Calibration is described in
Operating manual - Calibration Pendulum,
enclosed with the calibration tools.
Recalibrate the robot.12
Axis Calibration is described in Calibrat-
ing with Axis Calibration method on
page 357.
General calibration information is included
in section Calibration on page 347.
Continues on next page
336 Product manual - IRB 460
3HAC039842-001 Revision: P
© Copyright 2012-2018 ABB. All rights reserved.
4 Repair
4.6.3 Replacing the axis 3 gearbox
Continued

 Loading...


