11
Art: 730078-00A Rev. Date: 26-Oct-11
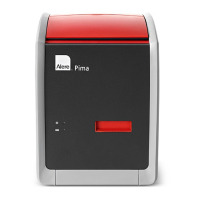
14. Select the way in which you would like control results to be displayed.
• Numeric: liquid QC results are displayed in numeric format
• Suppressed: the following symbol “< >” is displayed next to each liquid QC test name
in place of the quantitative (numeric) results.
Note 14.1: The “Suppressed” option should only be chosen if “Automatic via EVAS” is chosen
for the liquid QC Pass/Fail Determination.
Note 14.2: The Control Results Display Format is also customizable through the i-STAT 1
handheld keypad.
1. Power on the i-STAT 1 handheld and press MENU to get to the
Administration Menu
2. Press 4 – Customization
3. Press 2 – Change
4. Type in your password and press ENT (If no password is set, just press ENT)
5. Press 4 – QC Tests
6. Press 2 – Cartridge QC
7. Press 4 to set Result Format
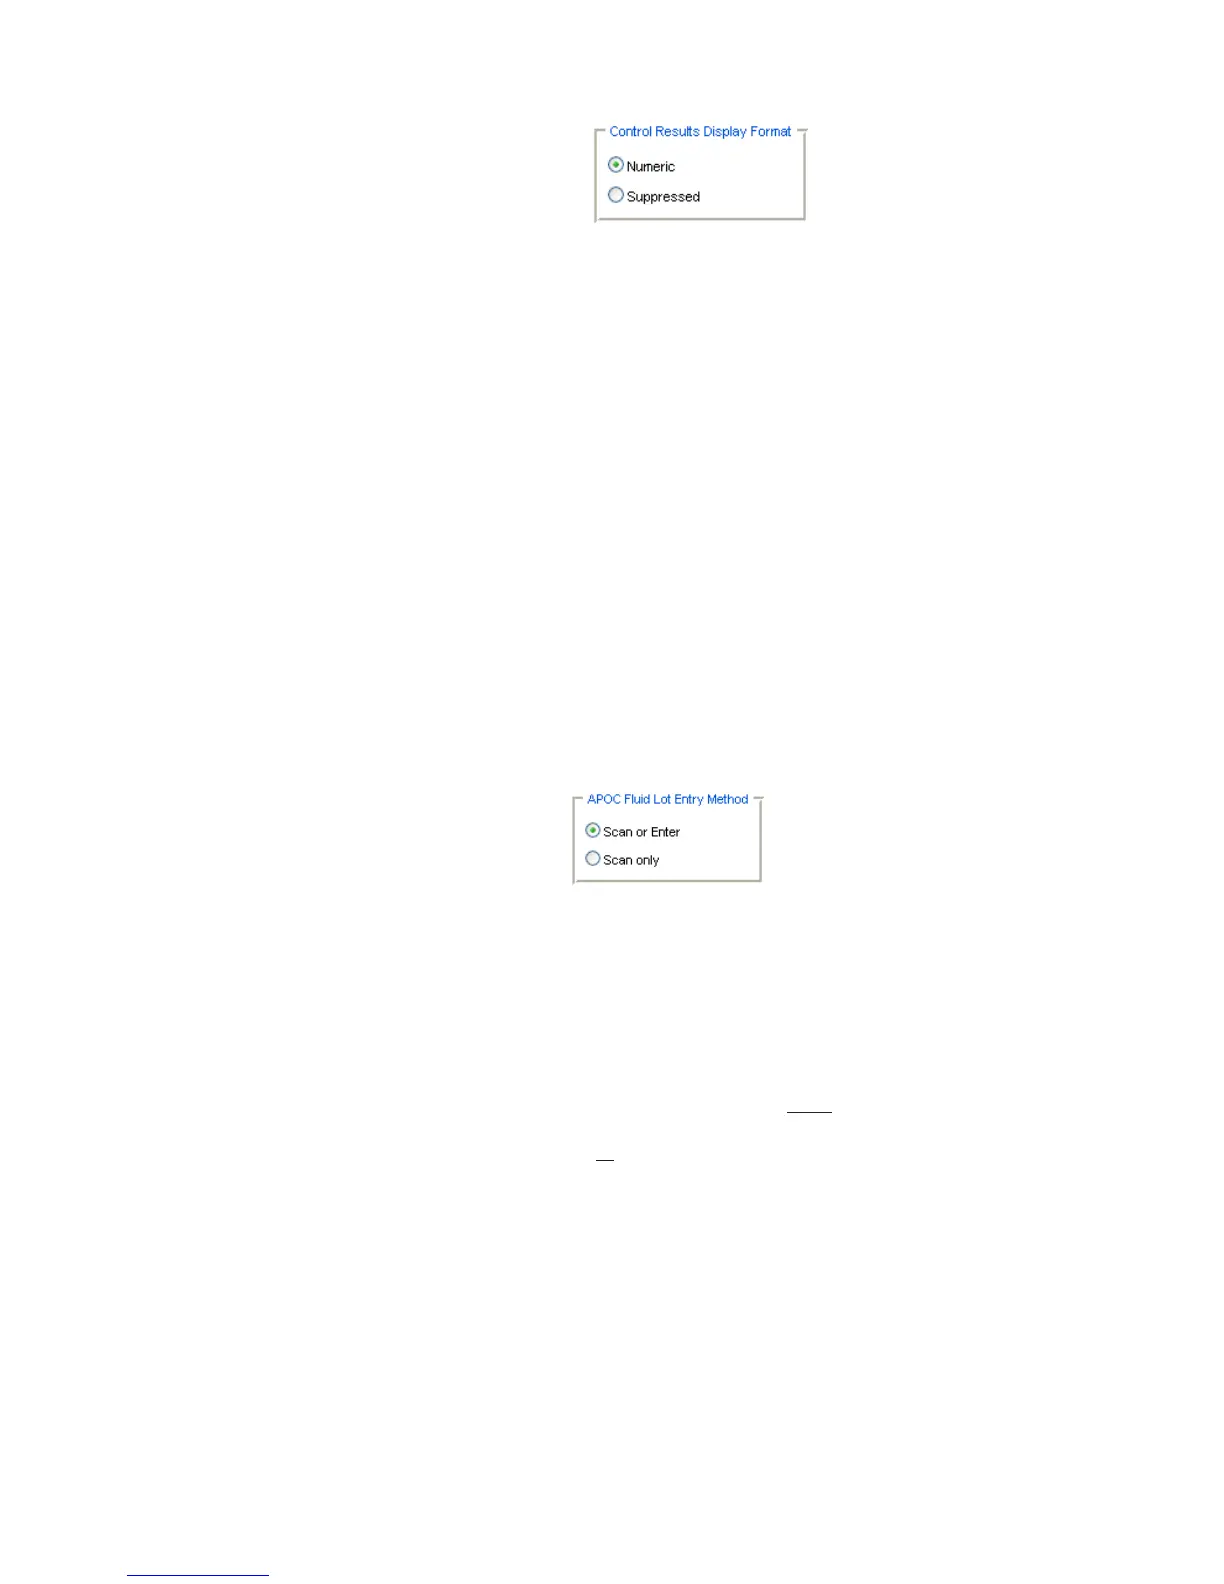
15. Select the method in which control lot number information will be entered into the handheld.
• Scan or Enter: allows the user the option of manually entering the liquid QC lot
information into the handheld or scanning it from the barcode on the quality control vial
being tested.
• Scan only: the fluid lot information must be entered by scanning the barcode on the
control vial being tested.
Note 15.1: If customizing handhelds for Auto QC P/F, users must scan the barcode on the APOC
control vial when testing APOC liquid QC samples. If testing non-APOC controls, users may
scan the barcode from the control vial or enter the control lot number manually.
Note 15.2: The APOC Fluid Lot Entry Method is also customizable through the i-STAT 1
handheld keypad.
1. Power on the i-STAT 1 handheld and press MENU to get to the Administration
Menu
2. Press 4 – Customization
3. Press 2 – Change
4. Type in your password and press ENT (If no password is set, just press ENT)
5. Press 4 – QC Tests
6. Press 2 – Cartridge QC
7. Press 5 to set APOC Fluid Lot Method
 Loading...