User Manual – General instruction for use
USER MANUAL • X-MIND prime • (19) • 01/2020 • NXMPEN010C
1. Ask the patient to remove all metallic objects located in the area to be X-rayed
(necklaces, earrings, glasses, hairpins, removable dental prosthesis, etc.). Ensure
there are no thick garments in the area to be X-rayed (coats, jackets, ties, etc.).
2. Ask the patient to put on the protective apron, or something similar, making sure it
does not interfere with the trajectory of the X-ray beams.
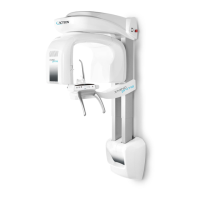
3. Place the patient in a standing position at the Panoramic chin rest. With the "Column
movement" keys (1 - Figure 10), raise/lower the column until the chin support is
aligned with the patient's chin.
Warning
During the patient positioning, make sure the equipment cannot collide with any
object in the room.
4. Position the patient with the temple clasps ensuring that the chin is positioned on
the dedicated support; the hands should rest on the front handles. Ask the patient
to bite the reference notch of the bite with his incisors (Figure 18). In the case of
edentulous patients, he/she must rest the chin against the reference shoulder of the
edentulous chin support.
5. Tell the patient to close his eyes.
6. Press the "Luminous centring devices" key (2 - Figure 10). Two laser beams will light
up the sagittal medial plane line and the horizontal line for the Frankfurt plane
reference (the plane that identifies a line that ideally links the ear hole - the auditory
meatus - with the lower part of the orbital fossa). Position the patient's head in such
a way as to ensure that the luminous beams fall in correspondence with respective
anatomical references (Figure 18). The luminous beam of the Frankfurt plane can
be adjusted according to the patient's height; this can be adjusted using the laser
knob (4 - Figure 18).
7. At this point, the patient must move his feet towards the column, making sure he
keeps his head within the pre-aligned anatomical references. This ensures a greater
extension of the spine in the cervical area, improving the darkening of the X-ray in
the apical area of the incisors, and avoiding the collision of the tube-head with the
patient's shoulders. Check that the Frankfurt plane is still horizontal.
Note
The laser centring devices remain on for approximately 2 minute; shutdown can
be anticipated by pressing the "Luminous centring device" key (2 - Figure 10)
or, with alignment complete, by pressing the "Patient entrance" key (6 - Figure
10) to begin preparation for exposure.
8. Close the temple clasps to help the patient maintain a correct position.
9. Press the "Patient Entrance" (6 -
Figure 10
) key to confirm the parameters. The
luminous centring devices switch off and the rotating arm goes to the exam start
position. Once alignment has been completed, the green LED "Ready for X-ray" (3
-
Figure 10
) lights up to indicate that pressing the X-ray button once more will start
the radiation phase.