1-86
Making Measurements
Using Ripple Limits to Test a Device
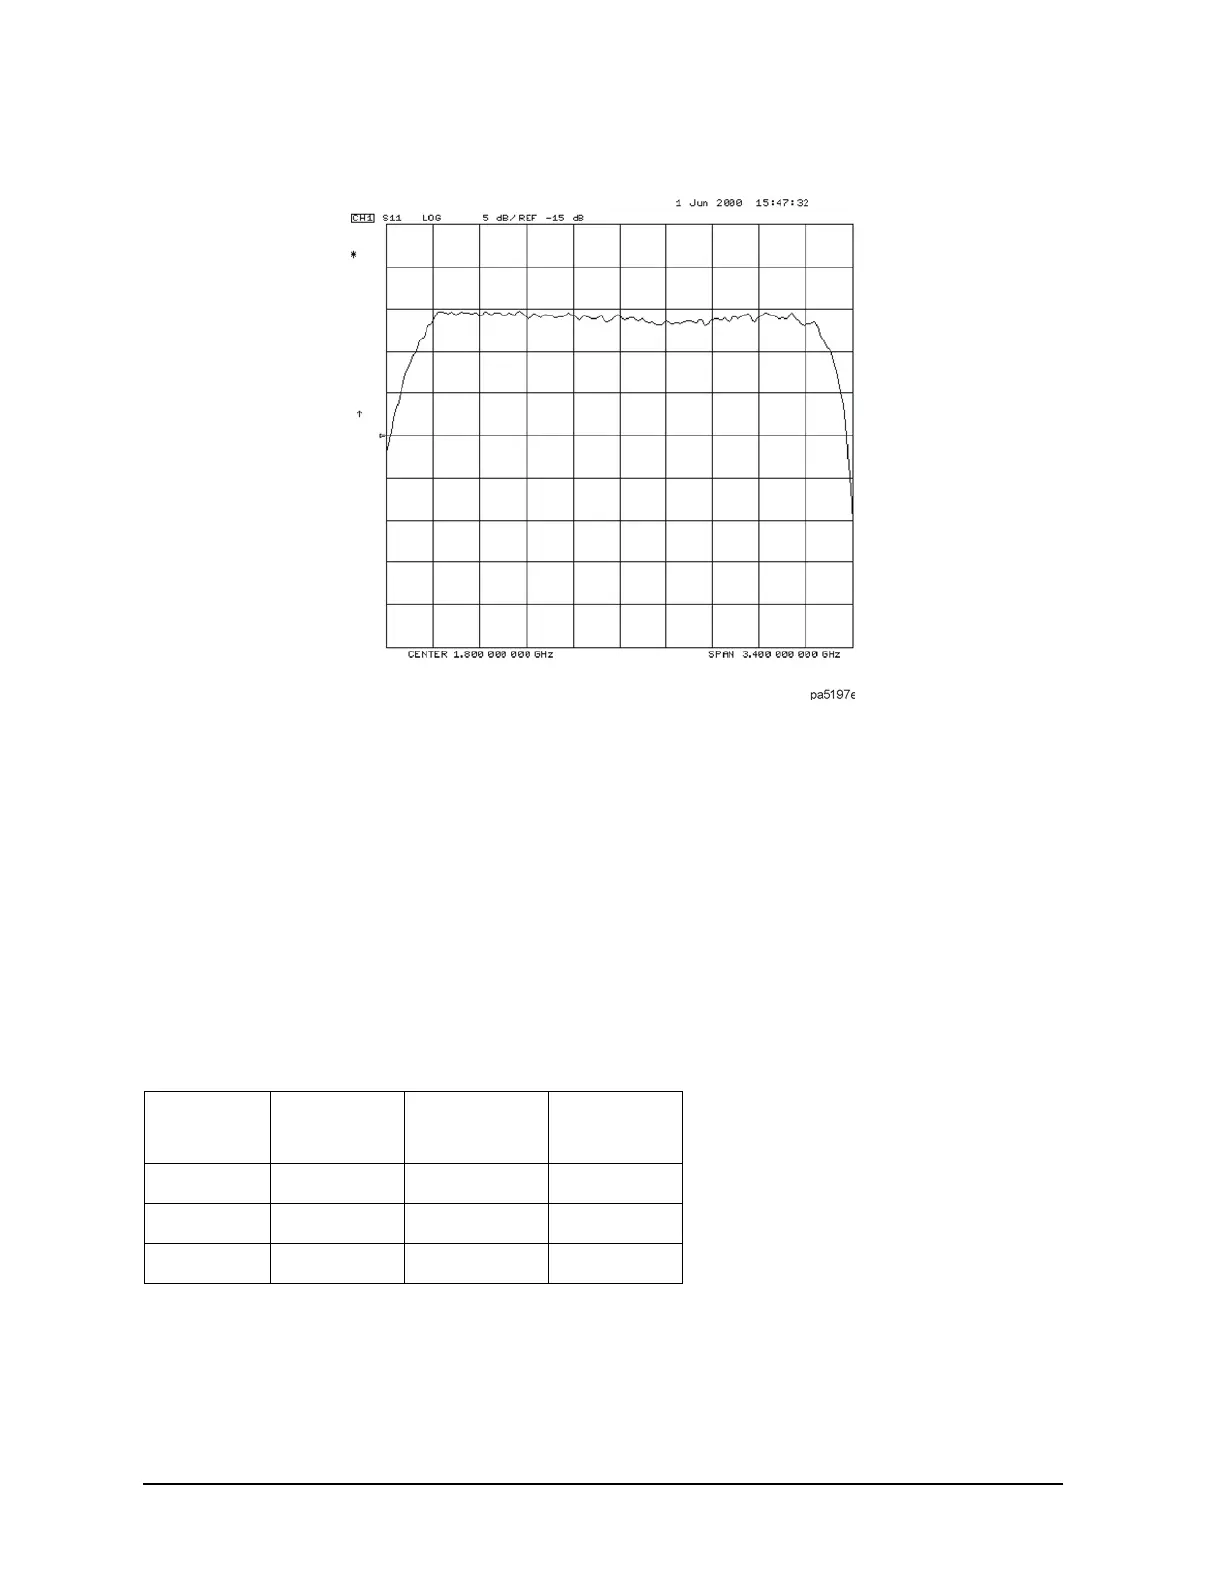
Figure 1-68 Filter Pass Band Before Ripple Test
Setting Up Limits for Ripple Testing
This section instructs you on setting up the ripple test parameters. You must set up the analyzer to check the
DUT at the correct frequencies and compare the measured values against the maximum allowable ripple
value for each frequency band. To do this, you set up individual frequency bands. You define the stop and
start frequency and the maximum allowable ripple value of each frequency band. You may set up as many as
12 frequency bands for testing ripple. The frequency bands are combined in a list that is displayed while the
ripple frequency bands are being edited.
In this example, we will create one ripple limit (or frequency band) that spans the entire pass band from 500
MHz to 3.0 GHz. We will also create two additional frequency bands that when merged, will span the pass
band with tighter limits. Using the Ripple Edit Menu, we will create a ripple limits list on the analyzer that is
similar to the following table.
Notice that Frequency Band 1 overlaps in frequency the remaining frequency bands. Whereas, Frequency
Bands 2 and 3 are separate bands that cover the same span of frequency. This can be done to put tighter
limits over narrower frequency spans within the bandpass or to customize the ripple test to meet your
specific requirements.
Tab le 1-4 Ripple Limits for Ripple Test Example
Frequency
Band
Minimum
Frequency
Maximum
Frequency
Maximum
Ripple
1 500 MHz 3.2 GHz 2.0 dB
2 500 MHz 1.85 GHz 1.3 dB
3 1.85 GHz 3.2 GHz 1.3 dB

 Loading...


