Contact: AIRSYS North America Phone: (855) 874-5380 Page 89 of 112
Email: ASNSupport@air-sys.com Web: http://airsysnorthamerica.com Rev 1.15
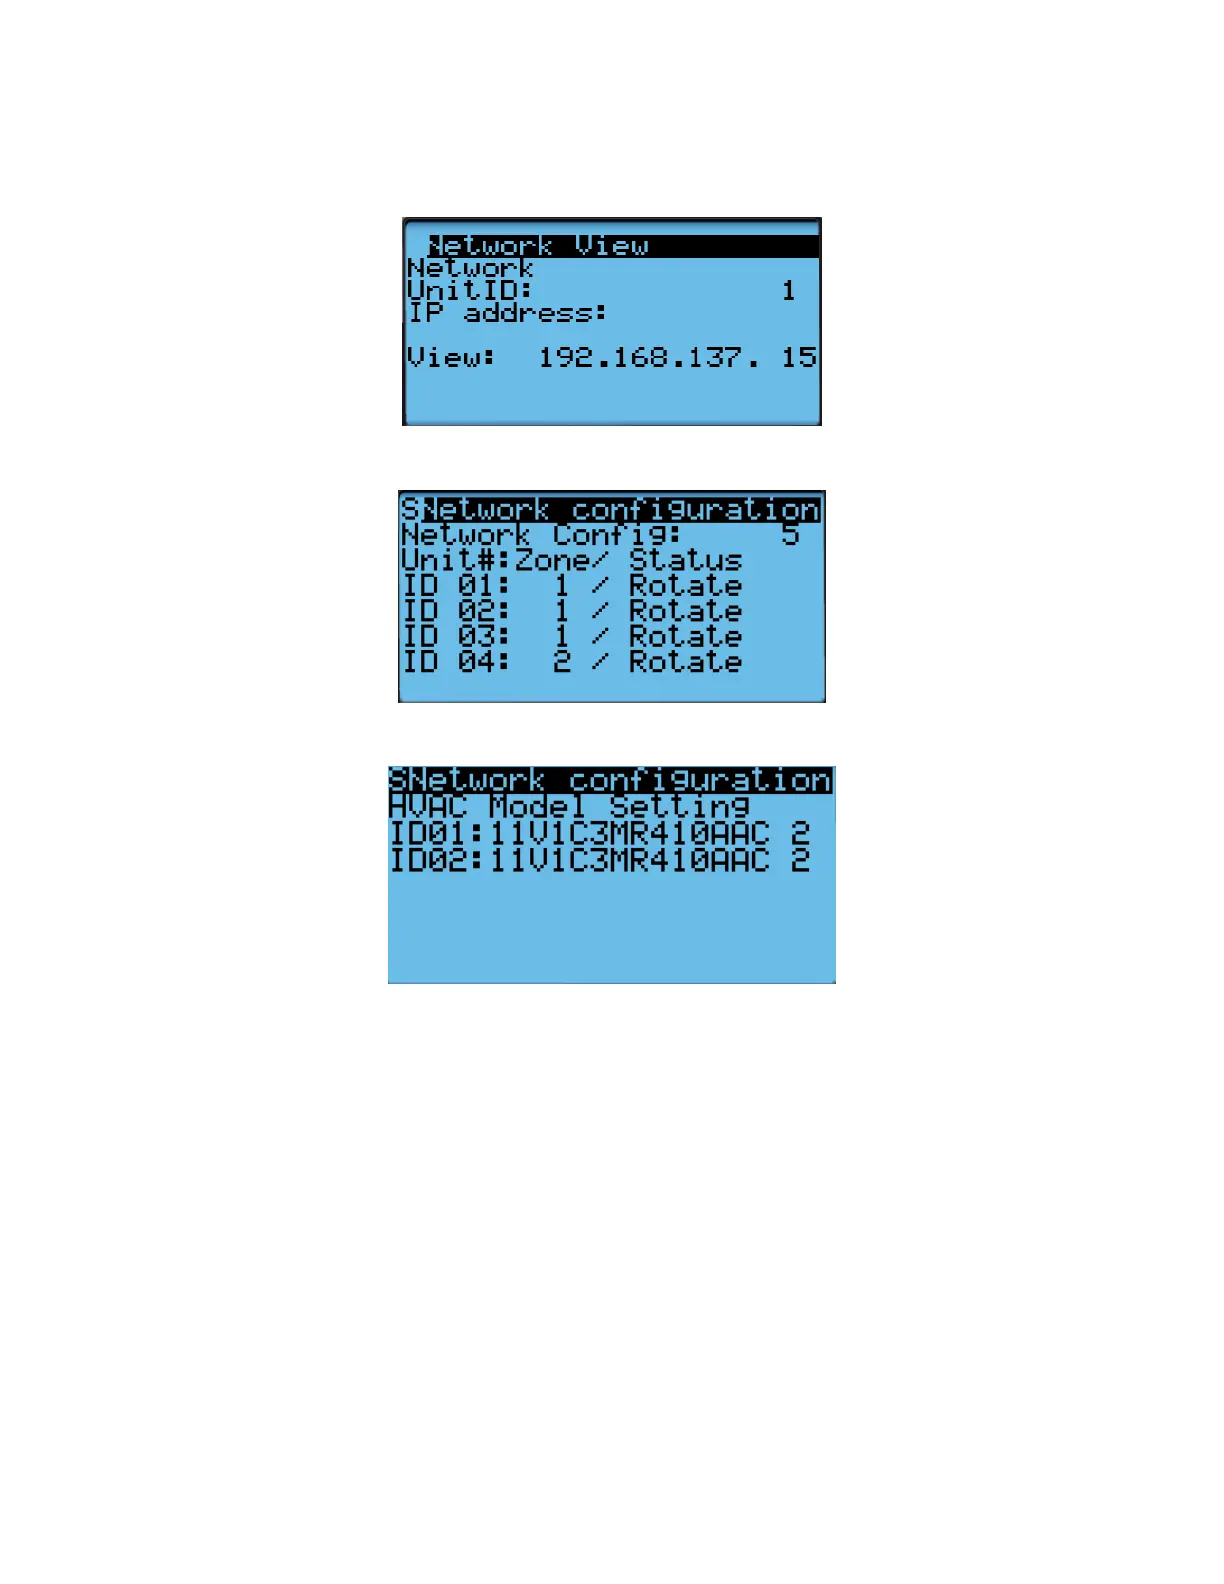
b. IP address of all connected HVAC units (Press Enter and use the Up and Down buttons to
cycle through units. Press Enter to display the IP of each unit.)
c. Zone assignment (which units are assigned to which zones).
d. Model numbers of connected units.
5. (Optional) Record any other settings, such as temperature setpoint, that are to be maintained.
Step 3: Upgrade Controller (ASMUC)
1. Connect the computer to the micro USB port on the controller board inside the ASMUC. The
controller should become visible as external storage “USB Drive” on the PC.
2. Copy the AP1 file to the “Upgrade” folder.
3. Copy the HTTP folder to the root directory and overwrite the existing files.
4. Disconnect the USB cable from the controller. The upgrade process will automatically start.
5. Once the upgrade is complete, the screen will display “Upload successful” and return to the main
screen. This may take up to 5 minutes.
6. Power cycle the controller by turning off the breaker and turning back on after a few seconds.
 Loading...