123
REPLACEMENT OF MAIN COMPONENTS
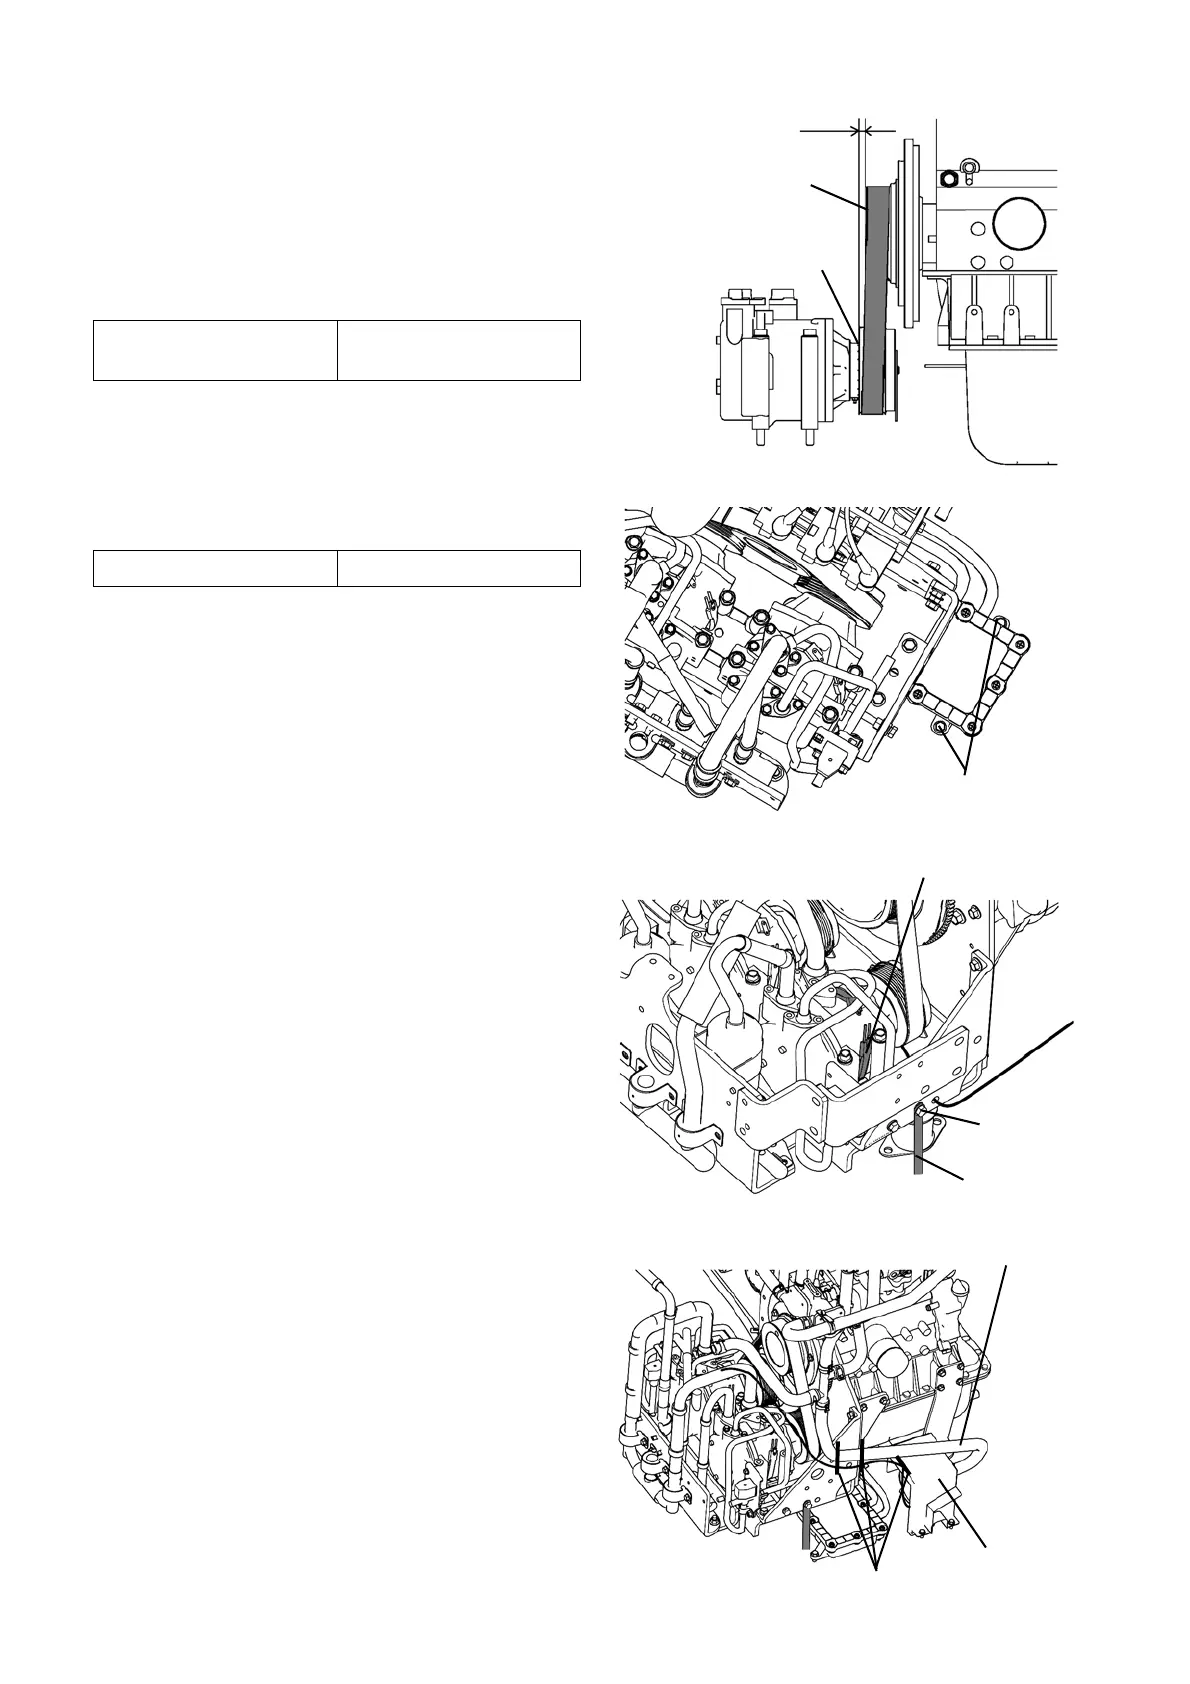
NOTE) Make sure that misalignment between the
edge line of the crank pulley groove and the
edge line of the compressor pulley groove is
1/8 inch (3 mm) or less when measured on the
crankshaft axis.
3) Tighten a locknut of the adjustment bolt.
4) Tighten 2 bolts to mount the exhaust water drain
filter box.
5) Mount the grounding wire with a bolt.
6) Connect the connectors of the compressor heaters,
the clutch (No. 2 compressor only) and the electro-
magnetic compressor capacity valve.
7) Fix the wire harnesses to their original positions
with bundling bands.
8) Install the engine coolant pump inlet side hose as
before. Fix the engine coolant pump wire harness
to the engine coolant pump inlet side hose and the
cover with 3 clamps.
9) Refill the refrigerant oil as required.
3/8 inch or less
Compressor pulley
Crank pulley
Tightening torque
7.4 ~ 11.1 lb·ft
(10 ~ 15 N·m)
Bolts
Tightening torque 14.8 lb·ft (20.0 N·m)
Compressor heater
Bolt
Grounding wire
Inlet side hose
Clamps
Cover
 Loading...