93
REPLACEMENT OF MAIN COMPONENTS
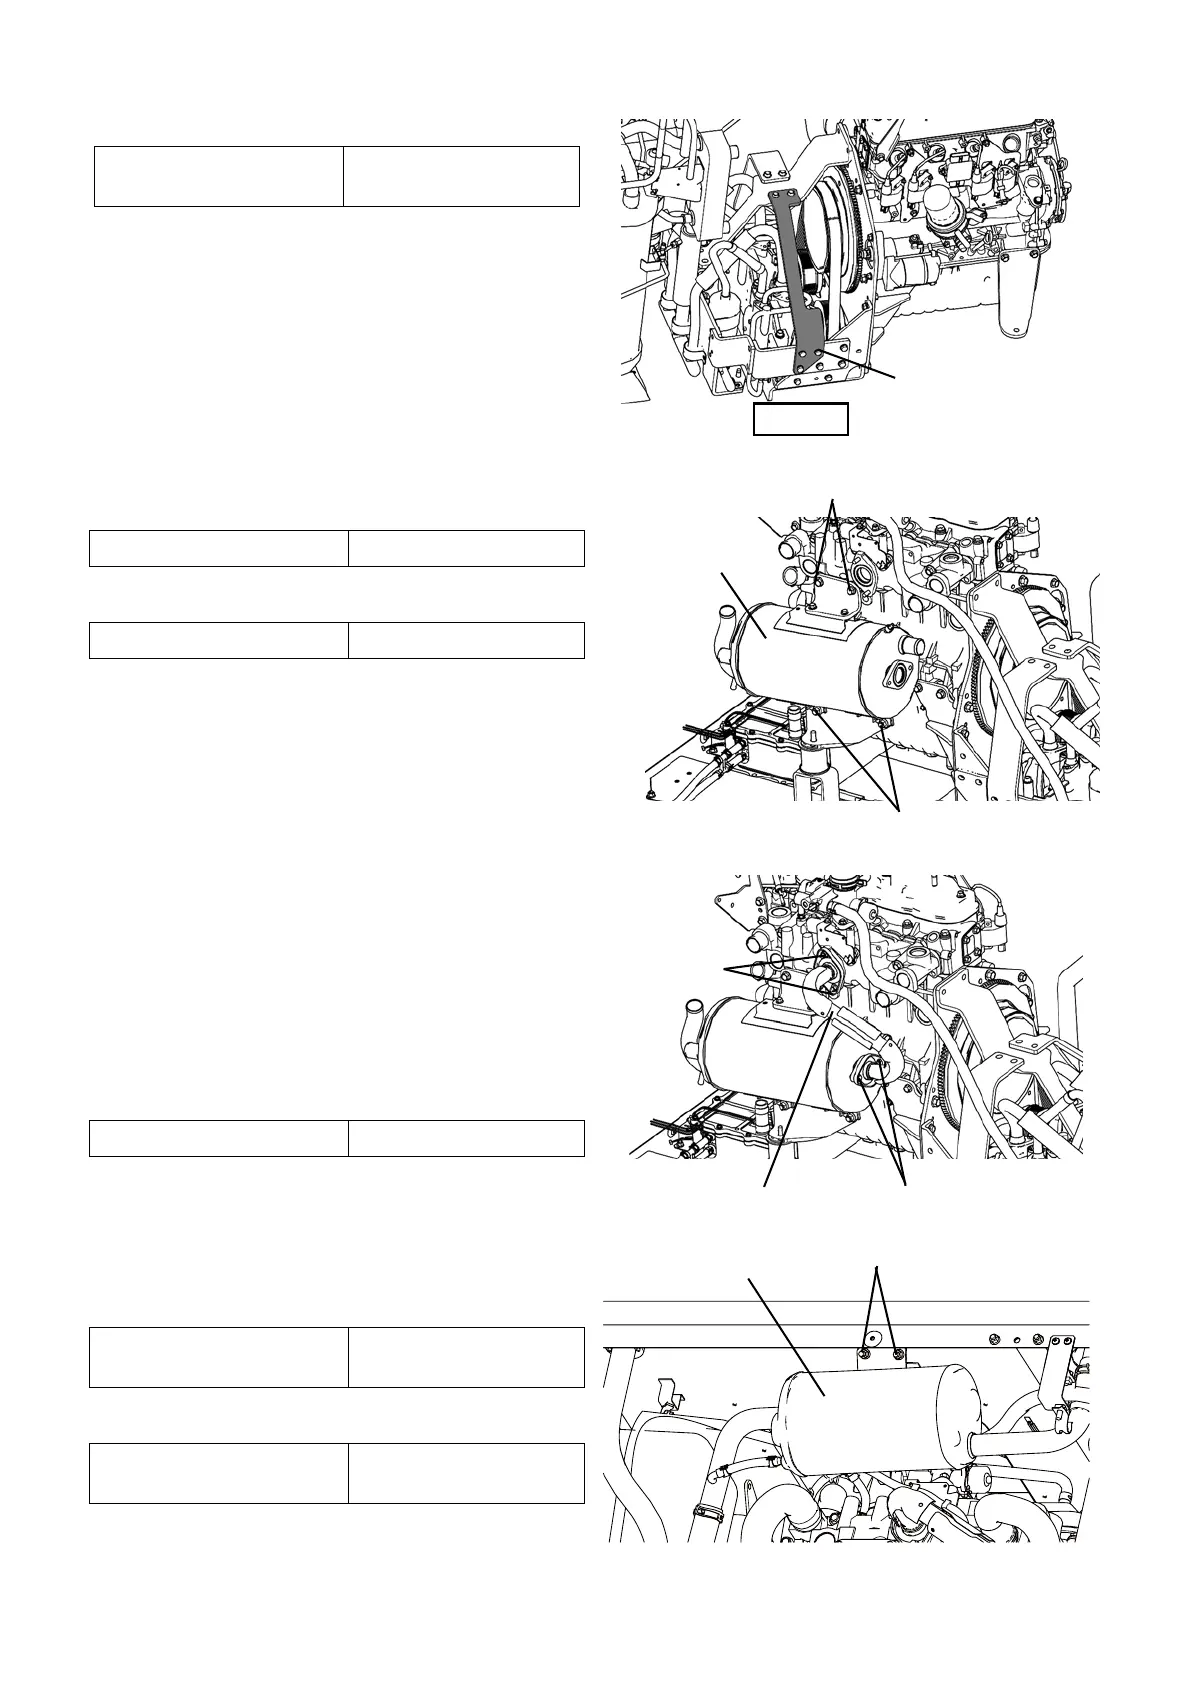
6. Mount the front side stay and tighten 5 bolts.
7. Reassemble the exhaust air heat exchanger.
1) Mount the bracket and tighten 2 nuts.
2) Mount the stay and tighten 2 bolts.
3) Mount the exhaust pipe. Tighten it with 2 nuts and
2 bolts.
NOTE)
Replace the gasket before mounting the exhaust
pipe.
The outdoor unit has the deodorizing catalyst
instead of the exhaust pipe if the deodorant kit is
installed.
8. Mount the muffler.
1) Mount the muffler to the stay and tighten 2 nuts
lightly.
2) Tighten 2 nuts firmly.
NOTE) Be sure to tighten 2 nuts lightly and firmly.
Bolts (5 pieces)
Front side
Tightening torque
31.0 ± 6.2 lb·ft
(42.0 ± 8.4 N·m)
Bolts
Nuts
Exhaust air heat
exchanger
Tightening torque 31.0 lb·ft (42.0 N·m)
Tightening torque 31.0 lb·ft (42.0 N·m)
Nuts
Bolts
Exhaust pipe
Tightening torque 14.8 lb·ft (20.0 N·m)
Muffler
Nuts
Tightening torque
8.9 ± 2.7 lb·ft
(12.0 ± 3.6 N·m)
Tightening torque
8.9 ± 2.7 lb·ft
(12.0 ± 3.6 N·m)
 Loading...