English
42
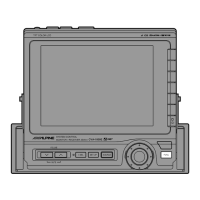
Audio Processor
Operation
Factory (Maker's) Equali-
zation Preset Selection
If an optional Alpine Audio Processor is
connected to the CVA-1000E, the Audio
Processor can be controlled from the
CVA-1000E.
"Audio Processor Operation" section is
described assuming that Alpine ERA-G320
(sold separately) is connected to the CVA-
1000E. If other products are connected, the
functions and displays may vary. For details,
consult your Alpine dealer.
Six equalization curves are preset at the
factory.
Press the SET UP button to display the Set Up
screen.
Note: The Parking Brake must be ON to
access the SET UP screen. Trying to
access this screen while driving will
display the warning – CAN'T OPERATE
WHILE DRIVING.
Turn the rotary switch and select the EQ cont.
menu. Then press the rotary switch.
The display changes to the EQ cont. (Equalizer
Control) screen.
Note: Unless you want to modify one of the
curves, the Factory Presets can be
selected before pressing the rotary
switch.
2
SET UP
SET UP
BEEP OFF
SPE-ANA OFF
CLK DISP. OFF
EQUALIZER Pops
SURROUND Stadium
B B E Custom
L P S Front–L
TIME CORR. Custom
ONSUB WOOFER
vol. 0
LPS T–CR
SubW.
SystemCont.BEE
BBEP
SPE-ANA
CLK DISP.
DEMO
x
SET UP
BEEP ON
SPE-ANA OFF
CLK DISP. OFF
EQUALIZER Pops
SURROUND Stadium
B B E Custom
L P S Front–L
TIME CORR. Custom
ONSUB WOOFER
vol. 0
Systm Visual Audio EQ Cont.
SubW.
FLAT
MALE
FEMALE
POPS
ROCK
NEWS
Select a desired Equalizer characteristic curve
and press the corresponding Function button
(F1 through F6).
You can select your desired equalizer charac-
teristic curve from 6 characteristic curves preset
at the factory.
3
FLAT
MALE
ROCK
NEWS
FEMALE
POPS
When you have selected your desired charac-
teristic curve, press the rotary switch.
The display returns to the Set Up screen.
4