Local Operation
3-6 TM-F1OP-C1XN-01
Setting Output Voltage and Current Limit
Install the power supply and connect the load as described in
“Installation”. Ensure that the power supply is set up for local control as
described in
“Shipped Configuration” on page 3–5.
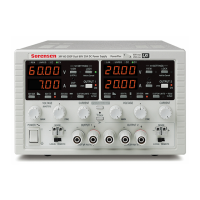
To set the output voltage and current limit at the front panel:
1. Turn both the voltage and current controls fully counter-clockwise.
2. Turn the AC power ON.
3. Press the STANDBY switch to its IN position to disable the power
supply output. The red Shutdown (S/D) LED turns on.
4. Press and hold the V/I CHECK button to display the voltage and
current control settings on the voltmeter and ammeter displays.
5. Adjust the voltage control to the desired voltage (the compliance
voltage for applications using current mode operation).
6. Adjust the current control to the desired current limit setting.
7. Release the V/I CHECK button.
8. Press the STANDBY switch to its OUT position to apply power to the
load. The S/D LED turns off.
Important:
The control circuits have been designed to allow you to set output
voltage and current up to 5% over the model-rated maximum values. The power
supply will operate within these extended ranges, but we cannot guarantee full
performance to specification.
TM-F1OP-C1XN-01.book Page 6 Thursday, October 25, 2007 9:04 PM
 Loading...