TD 92477EN
8 April 2016 / Ver. M
User Manual
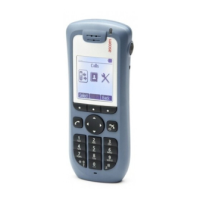
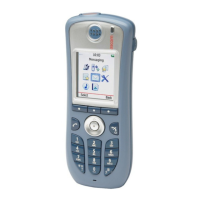
Ascom d62 DECT Handset
86
LED Indications during Easy Replacement
The following table shows the LED indica
tions that are used for the d62 and the charger
during the easy replacement procedure.
LED indication Description
Orange, flashing (1 000 ms on, 1 000
ms off)
File transfer during Easy Replacement.
Orange, flashing (100 ms on, 800 ms
of
f)
“Change phone” indication during Easy
Replacement.
Red, flashing (100 ms on, 800 ms off) Error indication during Easy Replacement. Put back
old han
dset in charger.
Red, flashing (900 ms on, 100 ms off) Error during Easy Replacement. Service
needed for
both handsets.
See also Figure 15. Update Completed while in Charger on
page 77.
4, 5 When the text "Please insert old phone in charger" is displayed, replace
the new
handset with the old handset. The handset can either be switched on or off.
Note: If the CR3 Rack Charger is used, the left ch
arging slot has to be used for both
handsets.
The handset is restarted and after a few seconds, the text "Savin
g settings. Do not
remove phone from charger" appears. The charger LED changes to slow orange
flashing. It may take several minutes.
IMPORTANT: If the old handset cannot communicate with the charger, put the new
handset in the charger to restore its settings (that is, the handset’s IPDI). If this step
is not performed, the new handset must be sent for service. The old handset’s
settings might be transferred to the new handset by usi
ng PDM. See the handset’s
Configuration Manual.
6, 7 When the text "Please insert new phone in charger" is displayed, re
place the old
handset with the new handset. The text "Restoring settings" is displayed.
IMPORTANT: Do not remove the handset while the text "R
estoring settings" is
displayed.
8 When the text "Phone successfully replaced. Plea
se remove phone to restart."
appears in the display, remove the handset from the charger. The handset is
automatically restarted.